
This integration plugin is designed to support membership sites that use Keap as their CRM to manage customers and leads.
Keap is a CRM that helps you organize, track, and nurture your leads and customers. You can use Keap to manage leads, send emails, and track your sales processes.
How the Keap Integration Works
This Add On creates or updates contacts inside your Keap account as new users complete registration, checkout, cancel membership, and more. The integration tags the contact based on the tags assigned to their membership level or, if they do not have membership, with the All Users tag.
- This integration does not remove contacts from Keap when they are deleted from WordPress. You may want to set up an internal process to manually delete contacts from Keap when you manually delete a WordPress user.
- Tags that are added outside of Paid Memberships Pro won’t be removed when a member cancels their membership level. Only the associated tags will be removed from Keap.
Installation
You must have the Paid Memberships Pro plugin installed and activated to use this Add On.
- Navigate to Memberships > Add Ons in the WordPress admin.
- Locate the Add On and click “Install Now“.
- Or, to install this plugin manually, download the .zip file above.
- Upload the compressed directory (.zip) via the Plugins > Add New > Upload Plugin screen in the WordPress admin.
- Activate the plugin through the Plugins screen in the WordPress admin.
Setting Up the Keap Integration Add On
Setting up the Keap Integration requires different steps within your Keap Account and your WordPress site. These steps assume that you have an existing Keap account.
1. Create a Keap App
This integration requires you to create a Keap App that allows your WordPress site to connect to your Keap Account via the Keap API.
- Navigate to https://keys.developer.keap.com/ and sign in with your live or sandbox Keap account credentials.
- Select your user name on the top right and choose Apps.
- Click the + New App button at the top right.
- Use a unique App Name and description, for example “My Membership Site App”. This App Name is private and will only be used internally.
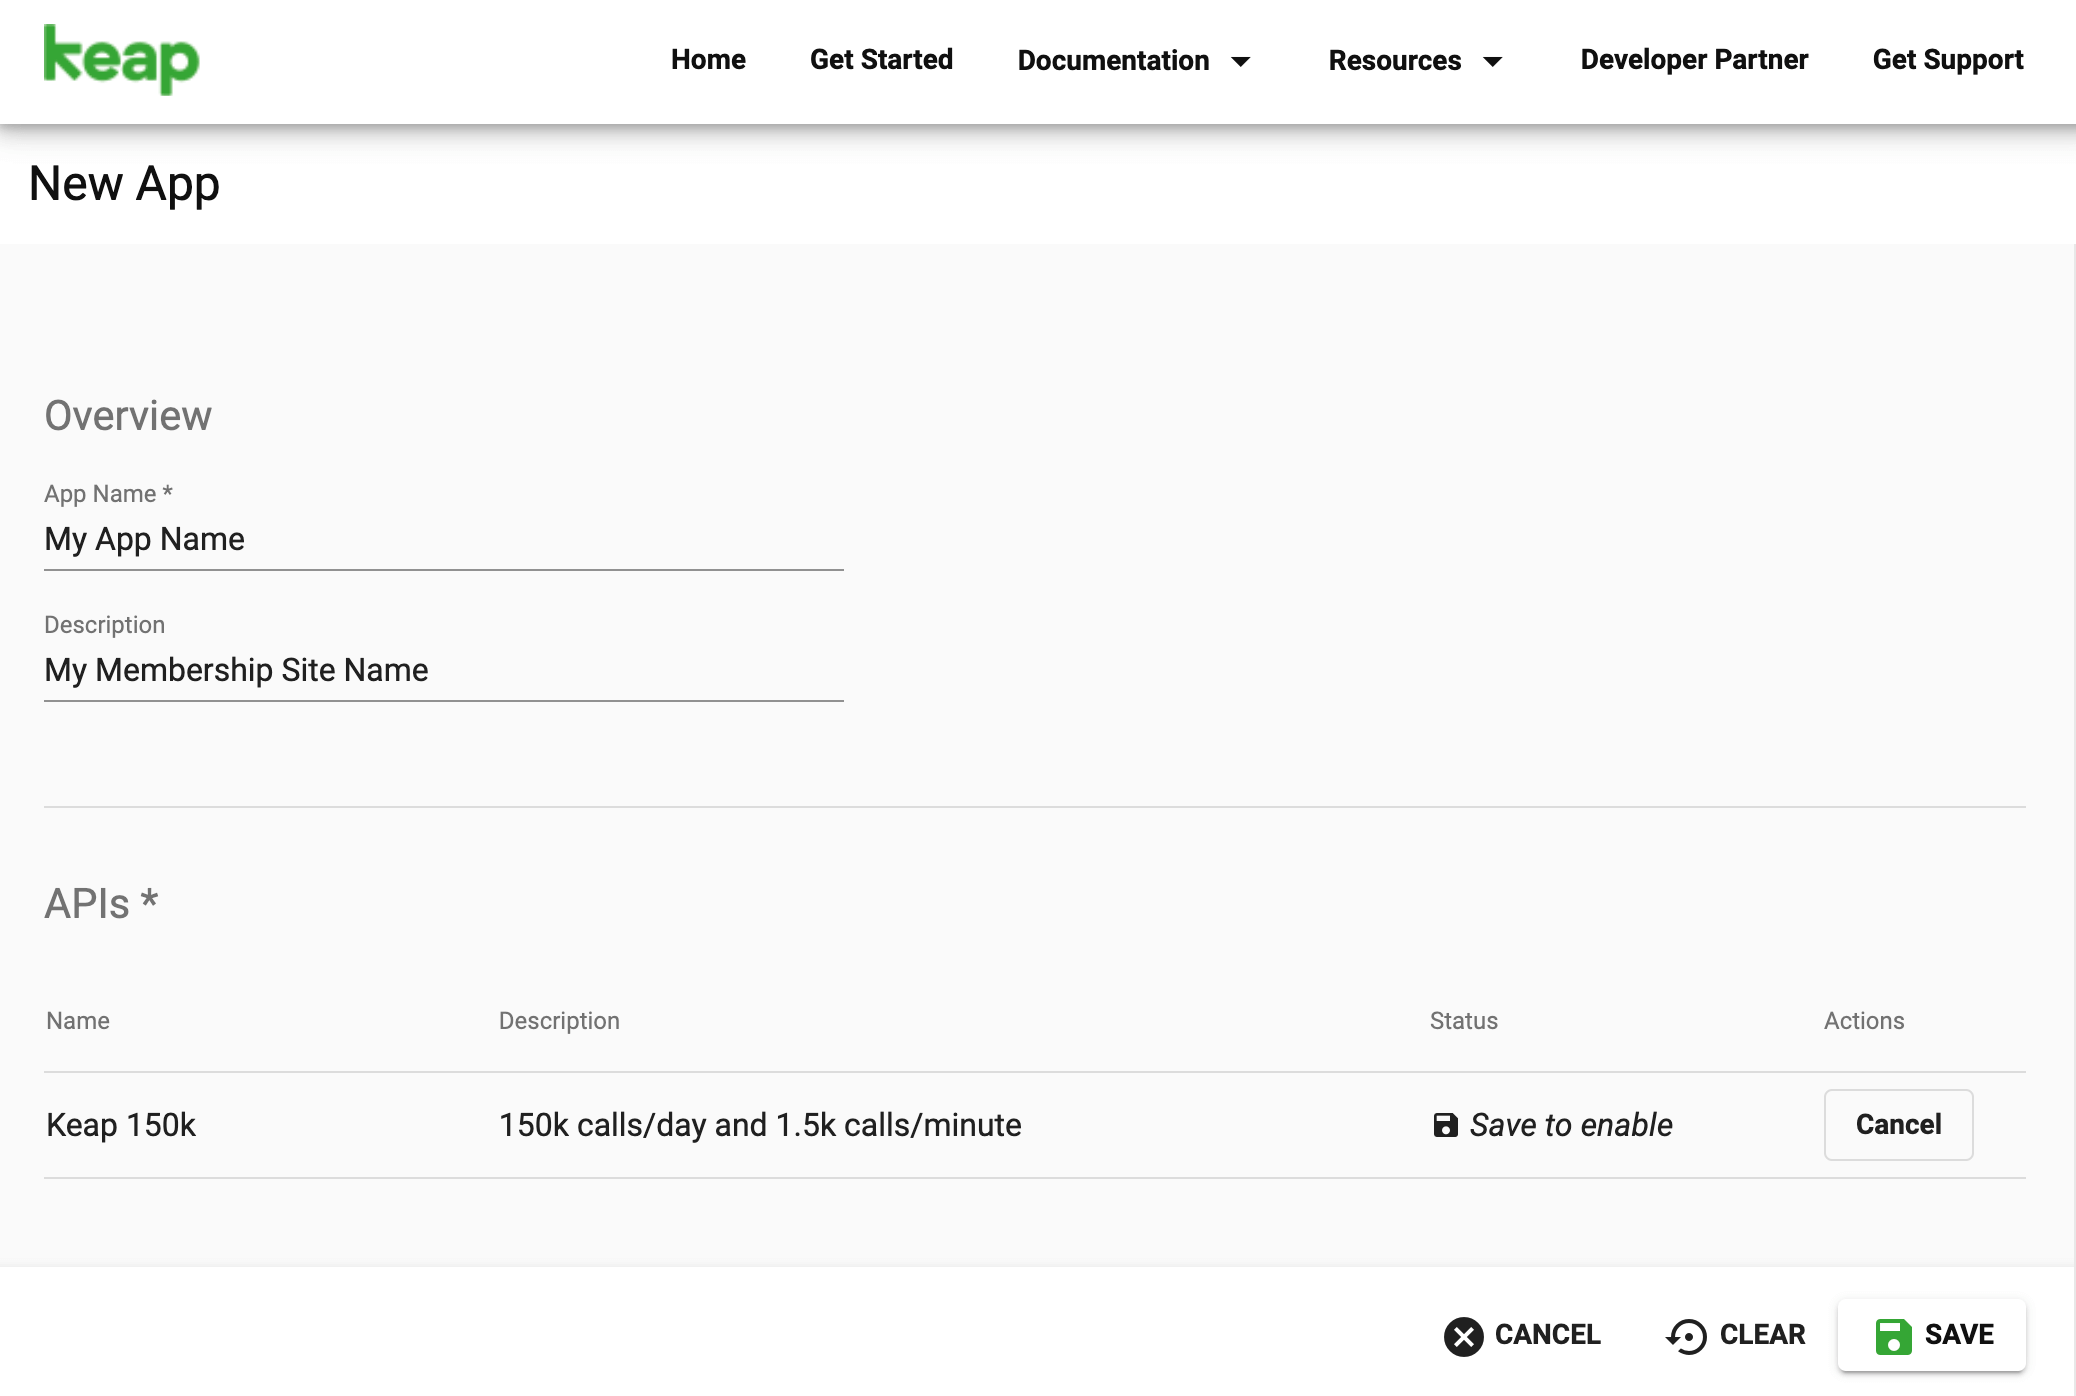
- Under the APIs section, choose Keap 150k.
- Save your App.
Once the App is created, you will get a new Keap API Key and Keap Secret Key. These values will be used in step 2 below.
2. Connect Your PMPro-Powered Membership Site to Keap
- Log in to your site’s WordPress admin.
- Navigate to Memberships > Keap.
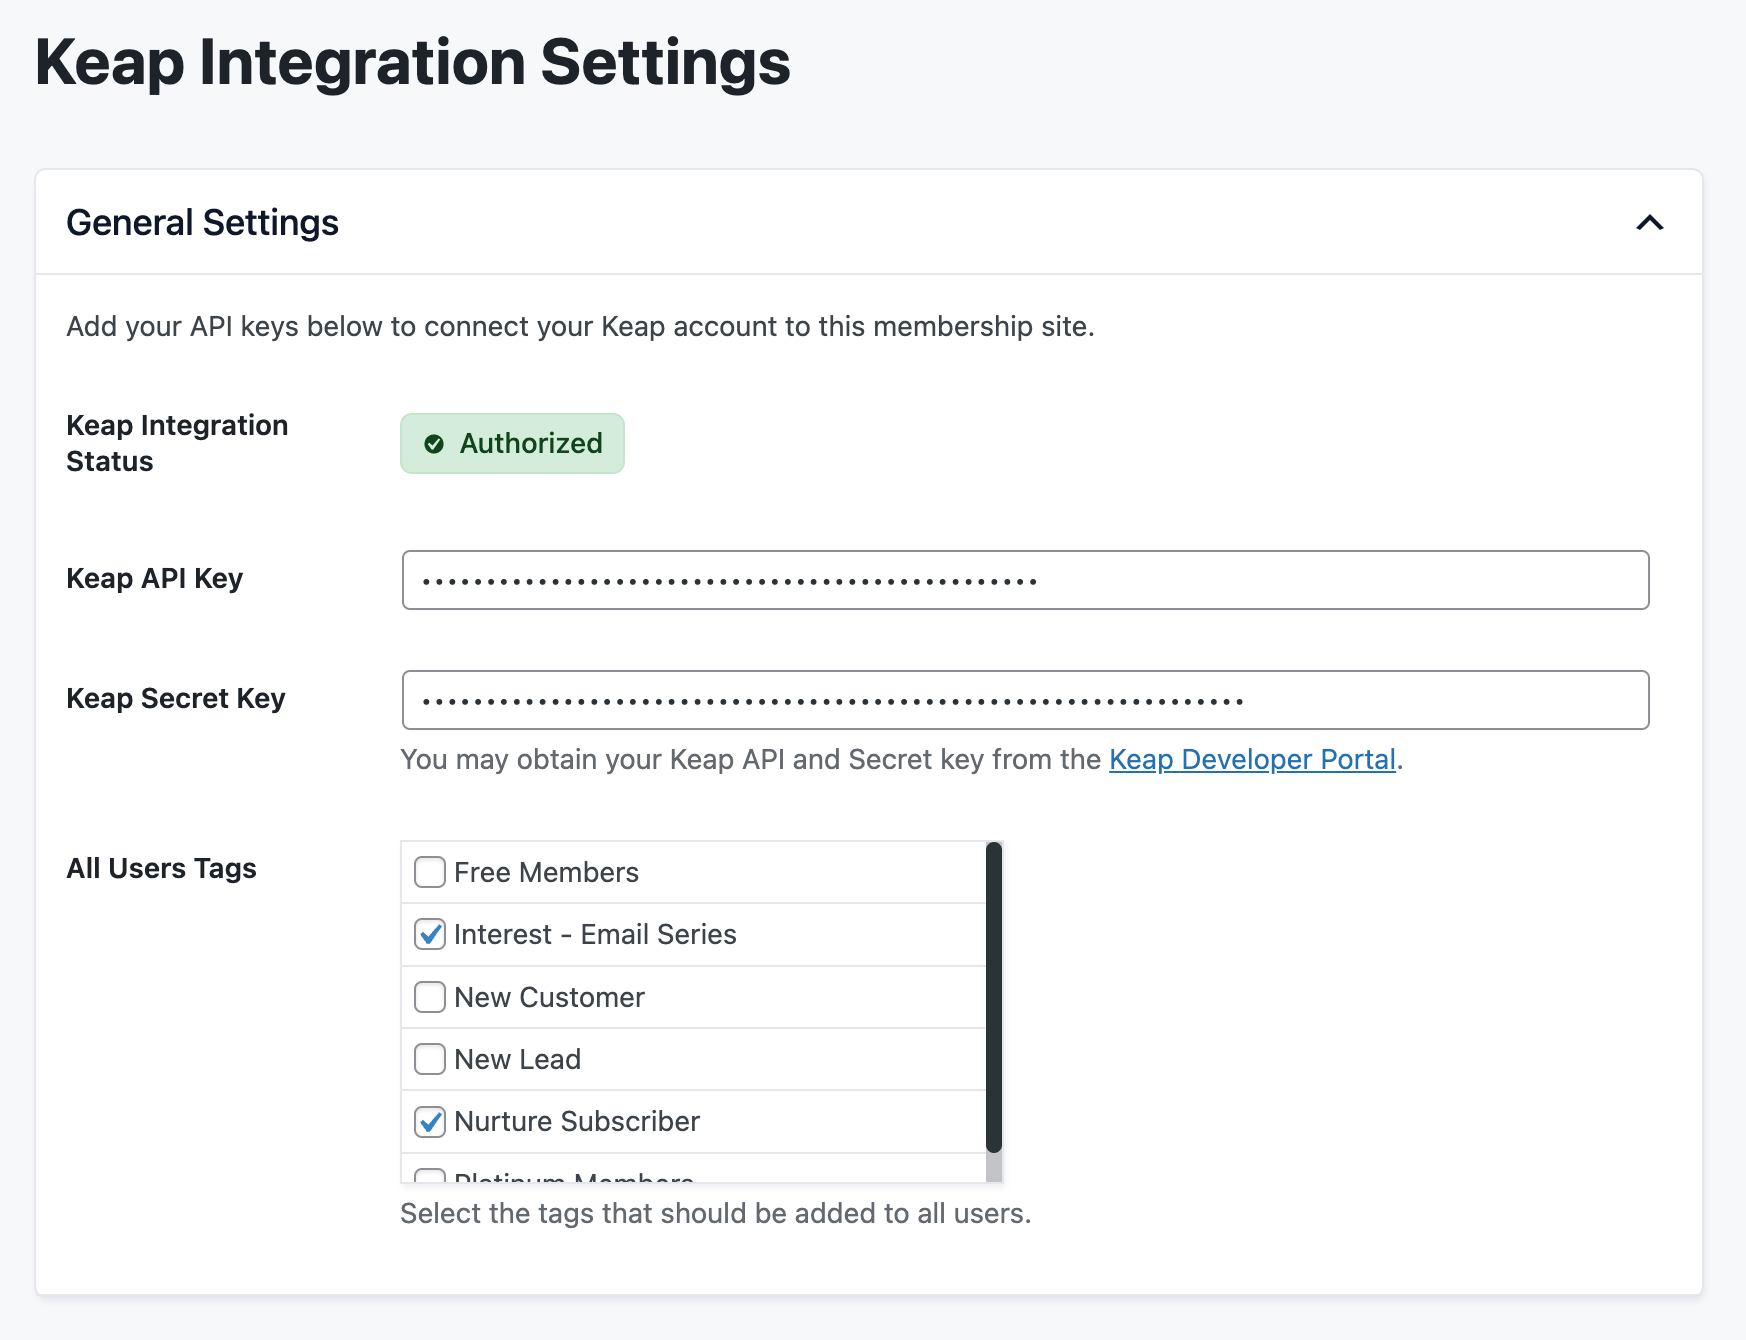
- Enter your Keap API Key and Keap Secret Key
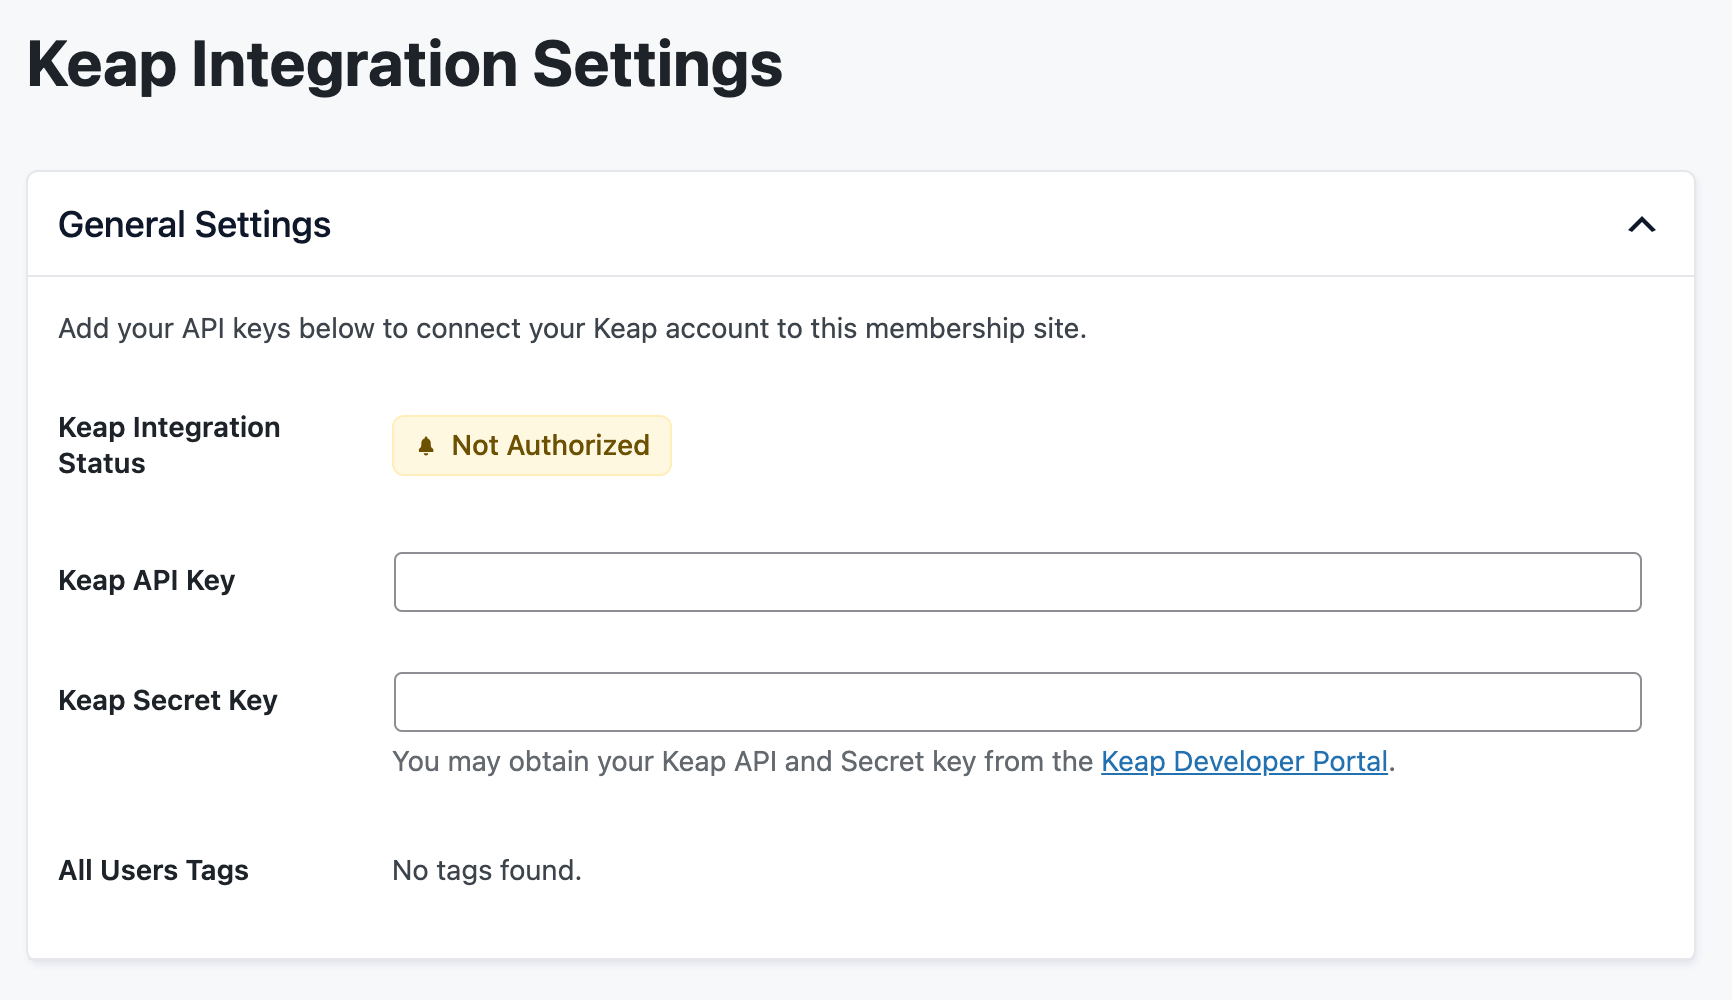
- Save Settings.
After you save your settings, click the Authorize button.
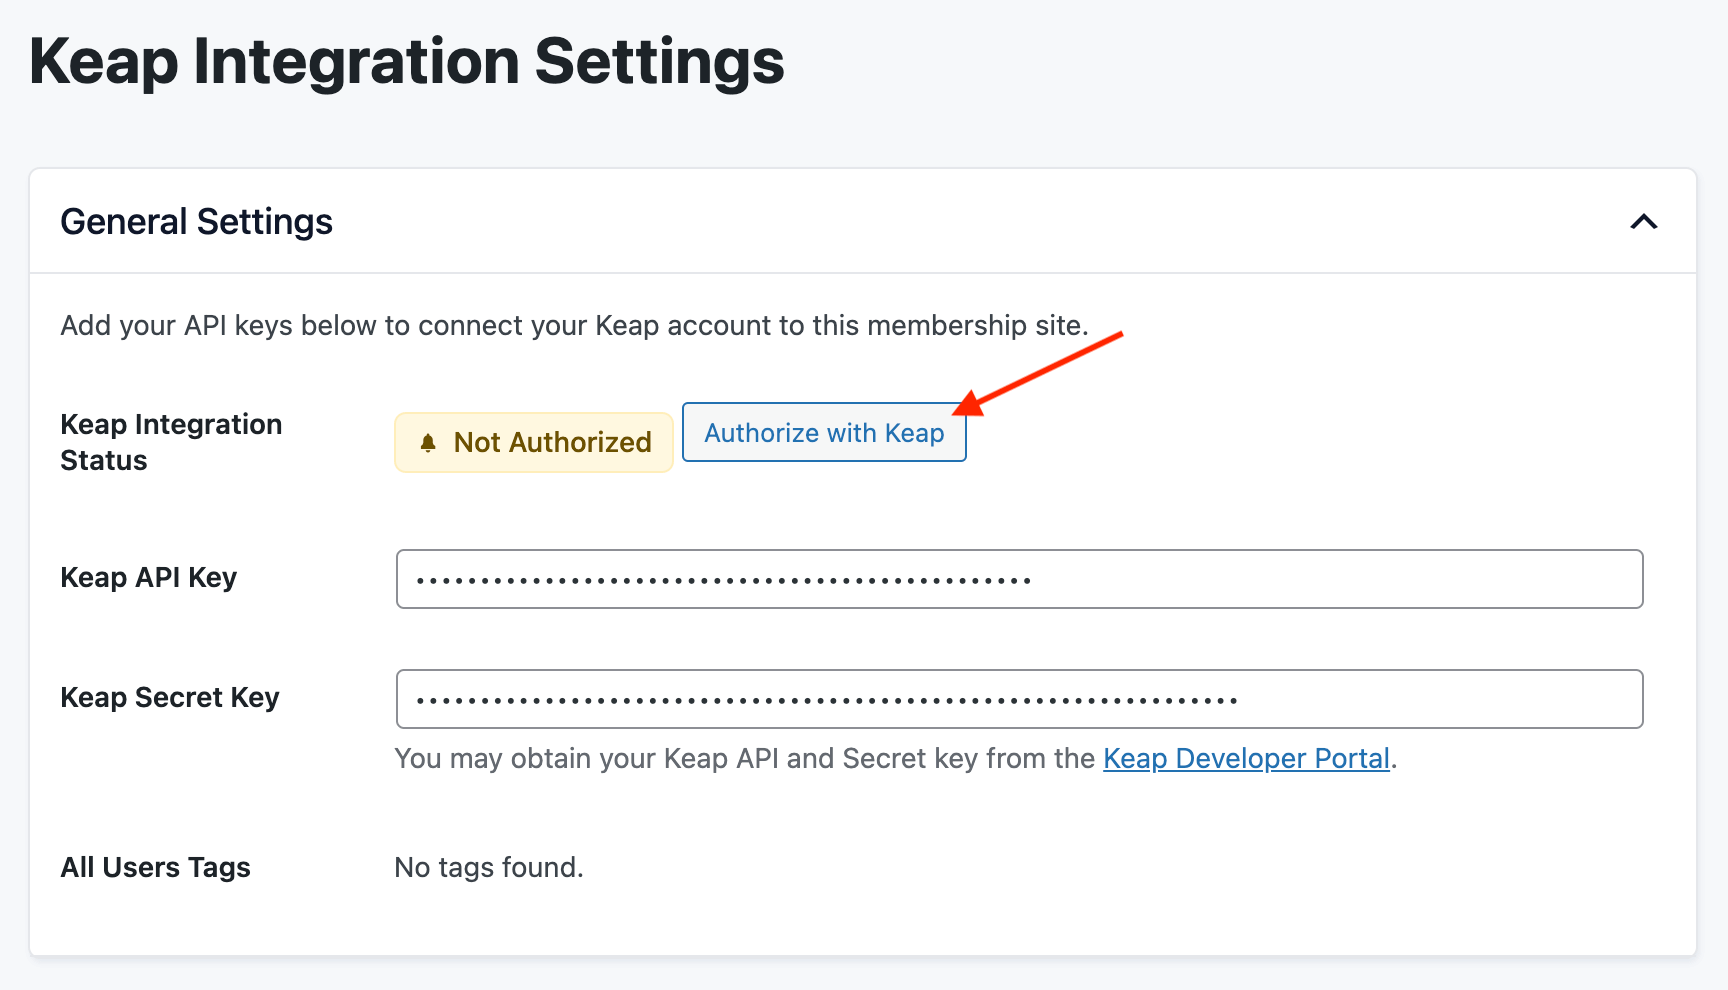
This process will authenticate your application with your Keap account. Follow the prompts on this screen to complete this authentication.
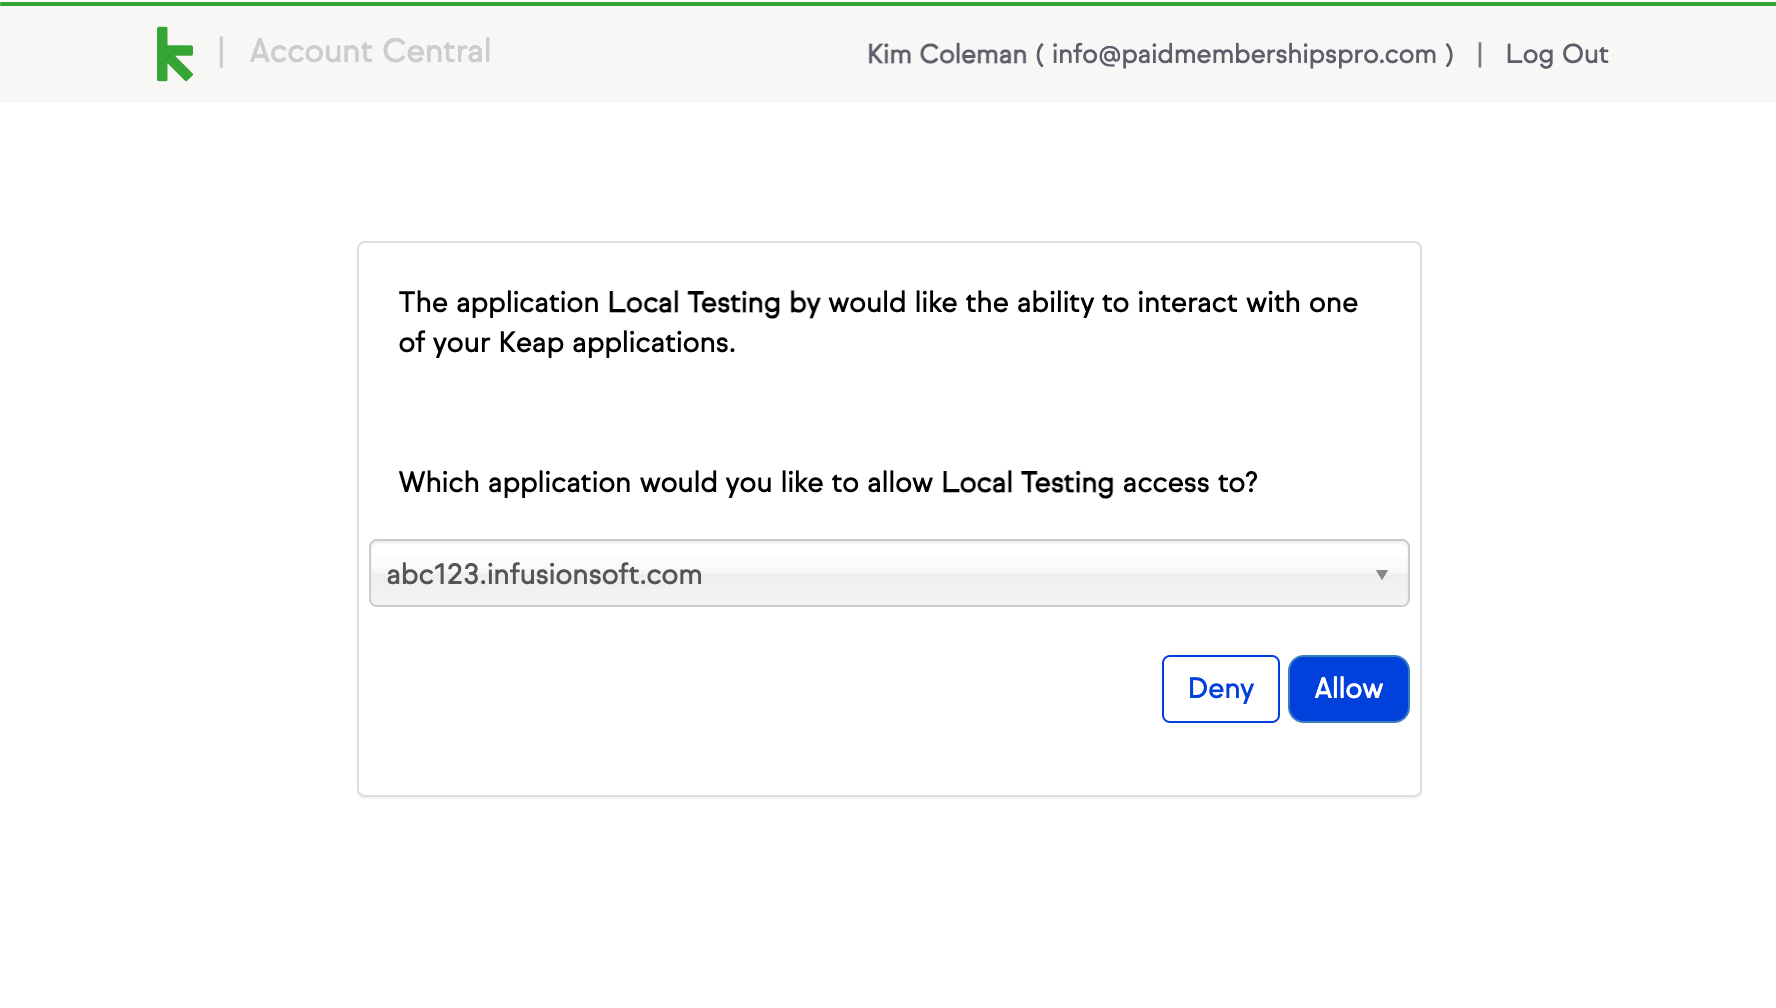
Once the App is successfully authorized, you should be returned to your WordPress site admin and see your Keap tags within the settings.
How to Assign a Tag For WordPress Users
This integration is designed to tag users by membership level after they complete checkout. Some users may exist in your WordPress site that do not have a membership level. This includes users that have cancelled their membership (users with “No Level”) and also users that begin the checkout process but do not complete checkout (users with a Token order).
You can assign a default “All Users” tag for these contacts.
- Navigate to Memberships > Keap in the WordPress admin.
- Assign a tag in the All User Tags field. This is the default tag that is always assigned to WordPress users. This tag is never removed by PMPro if the member cancels their membership level or registers to your site without a membership level.
- Click Save Settings.
How to Assign a Tag to a Membership Level
After successfully authenticating your Keap App, you will have an option to assign unique tags to each membership level in your site. You can create new tags within your Keap Account and they will appear in the dropdown lists within your WordPress site.
- Navigate to Memberships > Keap in the WordPress admin.
- For each membership level, select a tag from the dropdown list.
- Click Save Settings.
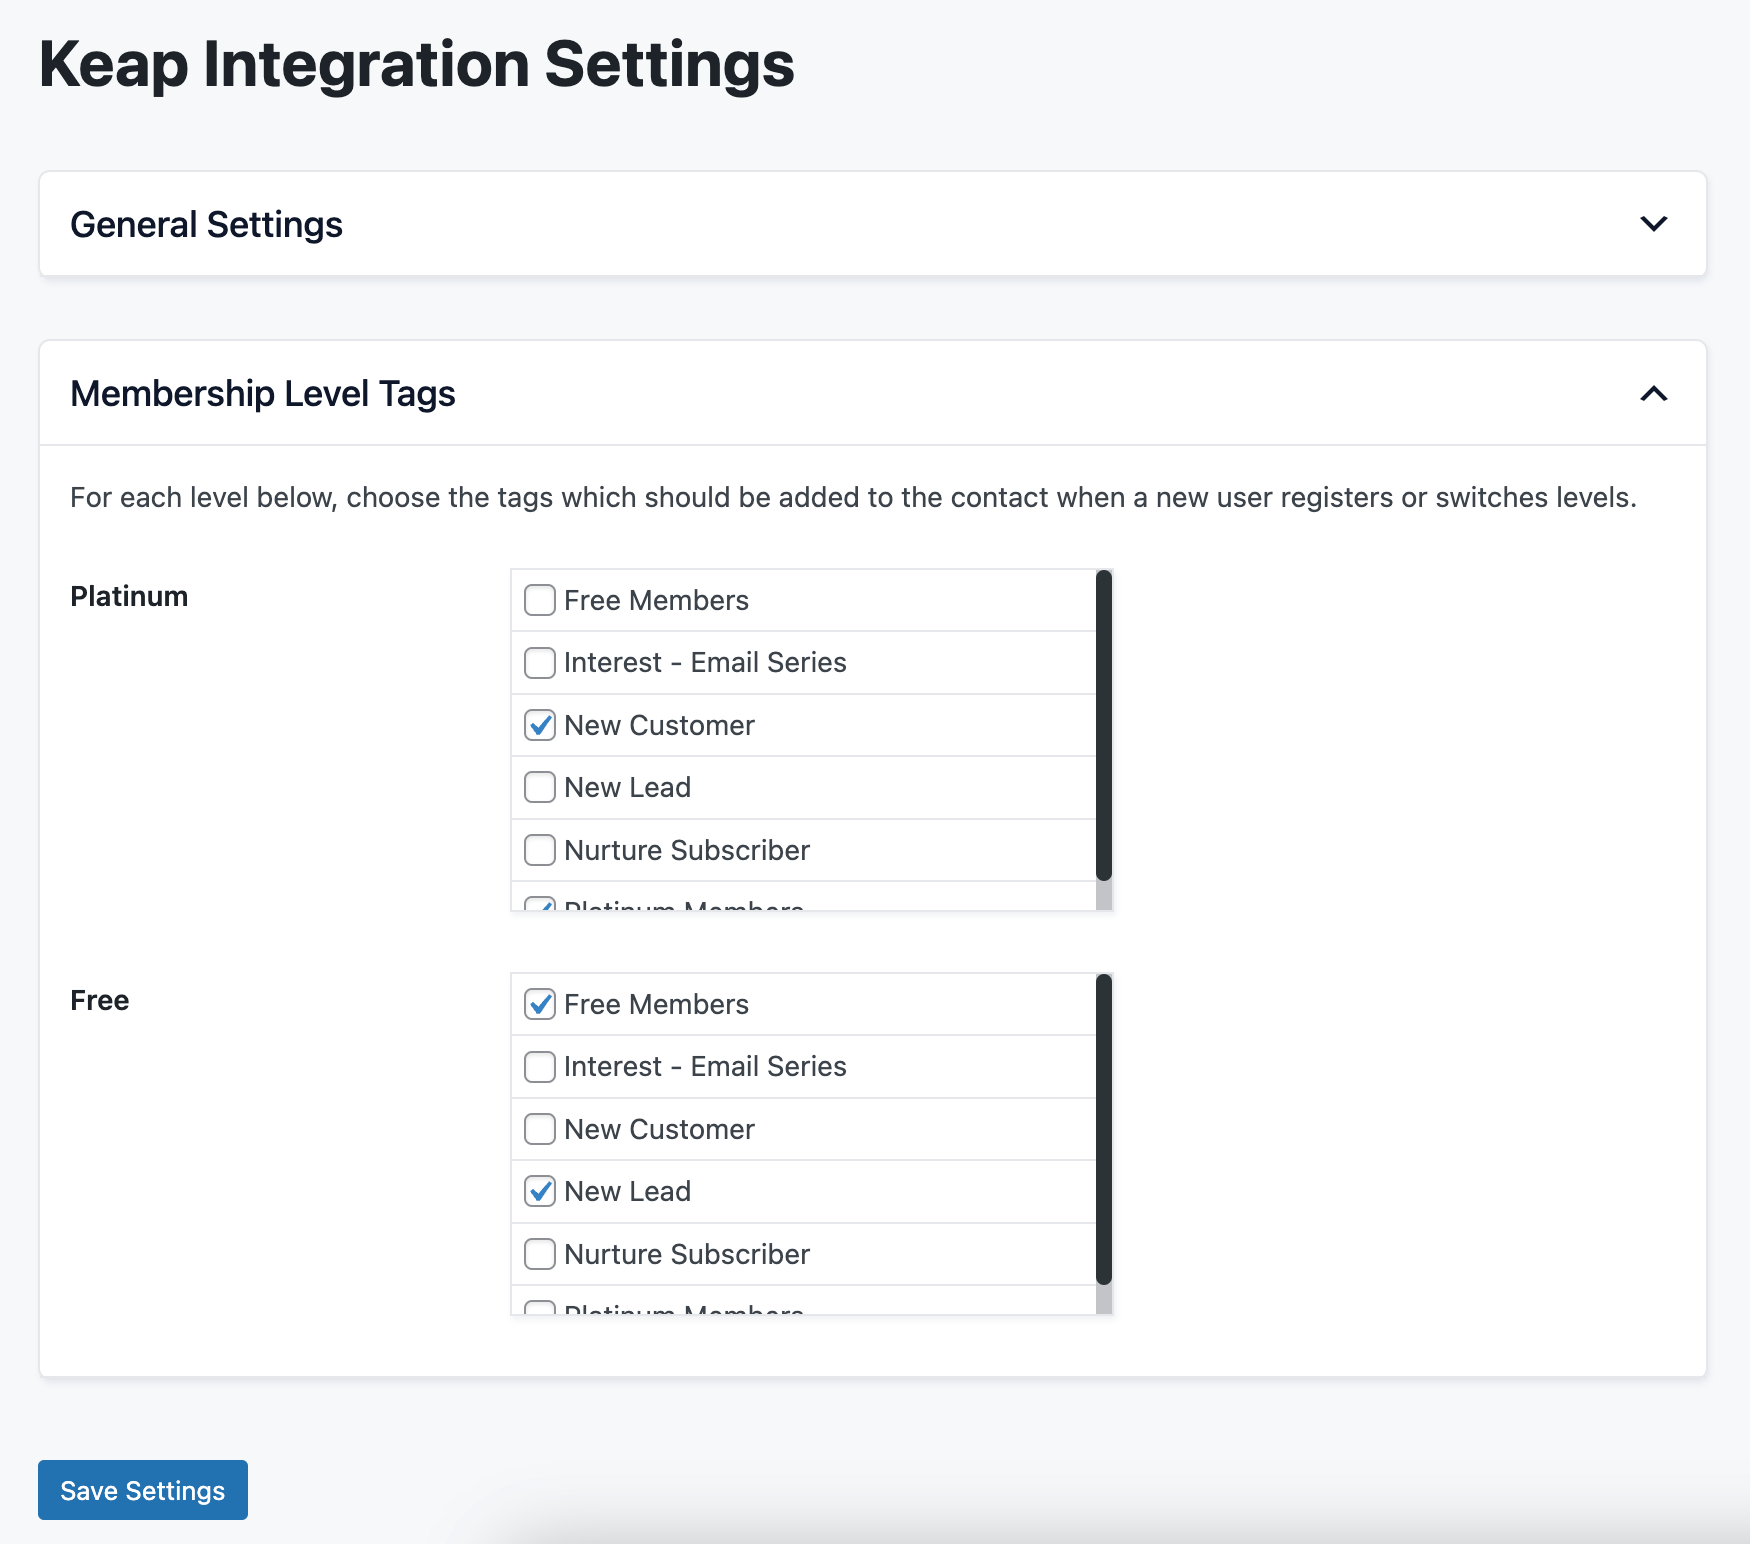
As new members join your site, the tag will be assigned to that customer record in your Keap account.
Testing Your Keap Integration in Sandbox Mode
You can create a Sandbox Keap Account that will only operate in testing/sandbox mode. This is a useful step if you are just testing out the integration or want to set up the integration on a staging or development site before connecting to your real Keap Account.
How to Create a Keap Sandbox Account
Your Keap Sandbox account is used for testing the integration.
- Visit https://sandbox.keap.com/ complete the signup form
- You may select any version of Keap: Pro, Max or Ultimate.
To connect your Keap Sandbox account to your WordPress site, repeat steps 1 and 2 above to create a Sandbox App and connect your site. You can only have your site connected to one App at a time.
Screenshots
Action and Filter Hooks
apply_filters( 'pmpro_keap_format_contact_request', $data, $user );
Filter the contact request data before sending it to Keap.
This is a Free Add On.
Create a free account or log in to gain access to downloads and documentation.

