Add value to your membership, foster community, and build connections through member directories and listings. This Add On allows you to create a customizable Member Directory and individual Member Profile pages.
- Member Directory Page: Dynamically lists members, presents essential profile information, avatars, and direct links to the individual Member Profile pages.
- Member Profile Page: Highlights a specific member’s information. Customize the profile display with no-code User Fields to create a useful resource for each member that encourages exploration, interaction, and even generates business opportunities.
- Customization Options: Build your Member Directory to fit your unique vision and set up specific visibility and access rules. Use the built-in WordPress blocks or shortcodes to arrange and display the directory, member profiles, and included user profile data based on membership level.
Table of contents
Installation
You must have the Paid Memberships Pro plugin installed and activated with a valid license type to use this Add On.
- Navigate to Memberships > Add Ons in the WordPress admin.
- Locate the Add On and click Install Now.
- To install this plugin manually, download the .zip file above, then upload the compressed directory via the Plugins > Add New > Upload Plugin screen in the WordPress admin.
- Activate the plugin through the Plugins screen in the WordPress admin.
Try a Demo: View the PMPro demo site or launch a free private demo now.
Initial Directory and Profile Page Setup
- Navigate to Memberships > Settings > Pages in the WordPress admin.
- Locate the Additional Page Settings section.
- Click the Generate Page button to create a new page for your Member Directory and Member Profile.
- Note that these pages can also be created manually and then assigned to these Page Settings after they are published.
- Save Settings.
Video Demo: Member Directory and Profile
Edit Your Member Directory
A directory can be inserted in any page or post via the Members Directory Block or Shortcode [pmpro_member_directory]
.
- Navigate to Memberships > Settings > Pages in the WordPress admin.
- Locate the Additional Page Settings section.
- In the Member Directory page setting row, click Edit to edit your directory.
- The generated Member Directory page should have automatically inserted the following shortcode:
[pmpro_member_directory]
- You can swap this shortcode for a more user-friendly block option with visual settings. To do this, use the Block inserter to locate the Members Directory block.
- Remove the shortcode if you choose to use the block option.
Block Settings and Attributes
The Members Directory Block options appear in Settings side panel when you select the block.
- avatar_size: The square pixel dimensions of the avatar to display. Requires the “show_avatar” attribute to be set to ‘true’. default: ‘128’ (accepts any numerical value).
- fields: Display additional user meta fields. default: none (accepts a list of label names and field IDs, i.e.
fields="Company,company;Website,user_url"
). You can also display user fields captured at checkout, such as the member’s billing information. See a list of payment fields stored in usermeta here. - layout: The format of the directory. default: div (accepts ‘table’, ‘div’, ‘2col’, ‘3col’, and ‘4col’).
- levels: The level ID or a comma-separated list of level IDs to include in the directory. default: all levels (accepts a single level ID or a comma-separated list of IDs).
- limit: the number of members to display per page
- link: Optionally link the member directory item to the single member profile page. default: true (accepts ‘true’ or ‘false’).
- order: Sort the results based on the order_by attribute in ascending or descending order. default: ASC (accepts ‘DESC’ or ‘ASC’).
- order_by: The sort order for the results. default: ‘u.display_name’ (accepts ‘u.user_email’, ‘u.display_name’, ‘u.user_login’, ‘u.user_registered’, ‘mu.membership_id’, ‘mu.startdate’, ‘joindate’)
- show_avatar: Display the user’s avatar generated via Gravatar or user-submitted using a plugin like Basic User Avatars; default: true (accepts ‘true’ or ‘false’).
- show_email: Display the user’s email address; default: true (accepts ‘true’ or ‘false’).
- show_level: Display the user’s membership level; default: true (accepts ‘true’ or ‘false’).
- show_search: Display a search form (searches on member display name or email address); default: true (accepts ‘true’ or ‘false’).
- show_startdate: Display the user’s membership start date for their current level; default: true (accepts ‘true’ or ‘false’).
We have a list of shortcode examples at the bottom of this documentation page if you are using the shortcode method instead of the block.
Edit Your Individual Member Profile
A profile can be inserted in any page or post via the Member Profile Block or Shortcode [pmpro_member_profile]
.
- Navigate to Memberships > Settings > Pages in the WordPress admin.
- Locate the Additional Page Settings section.
- In the Member Profile page setting row, click Edit to edit the individual profile.
- The generated Member Profile page should have automatically inserted the following shortcode:
[pmpro_member_profile]
- You can swap this shortcode for a more user-friendly block option with visual settings. To do this, use the Block inserter to locate the Member Profile block.
- Remove the shortcode if you choose to use the block option.
Block Settings and Attributes
The Member Profile Block options appear in Settings side panel when you select the block.
- avatar_size: The square pixel dimensions of the avatar to display. Requires the “show_avatar” attribute to be set to ‘true’. default: ‘128’ (accepts any numerical value).
- fields: Display additional user meta fields. default: none (accepts a list of label names and field IDs, i.e.
fields="Company,company;Website,user_url"
). You can also display user fields captured at checkout, such as the member’s billing information. See a list of payment fields stored in usermeta here. - levels: The level ID or a comma-separated list of level IDs that allow profiles. default: all levels (accepts a single level ID or a comma-separated list of IDs).
- show_avatar: Display the user’s avatar generated via Gravatar or user-submitted using a plugin like Basic User Avatars; default: true (accepts ‘true’ or ‘false’).
- show_bio: Display the user’s bio (if available); default: true (accepts ‘true’ or ‘false’).
- show_billing: Display the user’s billing address (if available); default: true (accepts ‘true’ or ‘false’).
- show_email: Display the user’s email address; default: true (accepts ‘true’ or ‘false’).
- show_name: Display the user’s display name; default: true (accepts ‘true’ or ‘false’). Use our Force First Last plugin to batch update display names.
- show_level: Display the user’s membership level; default: true (accepts ‘true’ or ‘false’).
- show_phone: Display the user’s billing phone (if available); default: true (accepts ‘true’ or ‘false’).
- show_search: Display a search form (searches on member display name or email address); default: true (accepts ‘true’ or ‘false’).
- show_startdate: Display the user’s membership start date for their current level; default: true (accepts ‘true’ or ‘false’).
- user_id: Show a specific member’s profile; default: none (accepts any numeric uesr id, i.e. user_id=”125″).
Members can opt out of the member directory by checking the “Hide from Directory?” field on the “Edit Profile” page.
We have a list of shortcode examples at the bottom of this documentation page if you are using this method.
Video Demo: Member Directories and Profile Pages
Allow Members to Control Profile Visibility
The Member Directory and Profile Page Add On includes functionality to allow members to remove their profile from display. This field is added by default as a field on the user’s WordPress Profile.
This tutorial will help you create a User Field that will add an “Exclude my profile from the member directory” field at membership checkout.
- From the administrative dashboard navigate to Memberships > Settings > User Fields.
- Click the “+ Add Field Group” button.
- Enter your preferred title for the group in the “Group Name” field, e.g. “Hide from Directory?”.
- Select “Yes” for the “Show fields at checkout?” option.
- Select “No” for the “Show fields on user profile?” option.
- Click the “+ Add Field” button.
- Enter your preferred title for the field in the “Label” field, e.g. “Exclude my profile from the member directory”.
- Enter
pmpromd_hide_directory
in the field’s “Name” field. - Select “Checkbox” from the field “Type” dropdown.
- Click on the “Save All Changes” button to create and save the new field group and field.
Customizations, Theme Compatibility, and Styling
File-Type Profile Fields
If you are displaying a field that is a file type (audio, video, image, document), the shortcode will attempt to embed or display the file based on the mime type (about WordPress filetypes).
- Audio files will embed using the WordPress [audio] shortcode
- Document files will display the appropriate wp_mime_type_icon and a link to view or download the file
- Image files will display as a standard image on the page at full size
- Video files will embed using the WordPress [video] shortcode
Third-Party Embeddable Links
If your members have a profile field that links to a third-party embeddable platform like YouTube, Vimeo, and others, the field will also display as an embed. See a list of supported oembed sites here.
Custom Directory and Profile Template Files For Your Theme
The screenshots in these docs use the Memberlite Theme, which provides full integration and additional styling for the Member Directory and Profile Pages Add On.
Theme authors and developers can create a custom template for the Directory and Profile via two methods: a template in the active theme folder or a template loaded via a customization plugin.
Theme authors should use the theme method as outlined in this document. The files directory.php
and profile.php
should copied out of the Add On plugin files and placed in a new /paid-memberships-pro/pmpro-member-directory/
folder in your theme.
If you are not a theme author looking to build support for this Add On, we recommend using a customizations plugin and creating a new shortcode (rename the directory or profile shortcode in the Add On to something unique for your site) and require that template file in your customizations plugin main file.
Member Directory and Profile Search
By default, the search fields in this Add On will search the following profile values: user_login
, user_email
, display_name
, and all usermeta
fields.
Some servers may not allow the large queries needed to execute a directory and profiles search. You will know this is the case if you are using the search form and no results are returned when you know results should be returned.
The recipe below can be used to allow your hosting environment to process the large JOIN operations needed for this Add On.
Shortcode Examples
Display only level IDs 1 and 4, hide avatars and email address:
[pmpro_member_directory levels="1,4" show_avatar="false" show_email="false"]
Show all level IDs, hide level name and start date:
[pmpro_member_directory show_level="false" show_startdate="false"]
Display custom user meta fields using the “fields” attribute in the format Label,key;Label,key:
[pmpro_member_directory fields="Company,company;Website,user_url"]
Show a unique member directory by level. Level 1 Members can only see other Level 1 Members:
[membership level="1"]
[pmpro_member_directory levels="1"]
[/membership]
[membership level="2"]
[pmpro_member_directory levels="2"]
[/membership]
[membership level="3"]
[pmpro_member_directory levels="3"]
[/membership]
Show unique member profiles based on level – hide user phone number and email address.
[membership level="1"]
[pmpro_member_profile show_email="false" show_phone="false"]
[/membership]
[membership level="2"]
[pmpro_member_profile show_email="true" show_phone="true"]
[/membership]
Action and Filter Hooks
The following actions and filters are available in this Add On:
do_action( 'pmpro_member_directory_before', $sqlQuery, $shortcode_atts );
Allows content to be inserted before the member directory table.
apply_filters( 'pmpro_member_profile_fields', array $fields_array, user $pu );
Change which fields are displayed on a user’s profile.
apply_filters( 'pmpro_member_directory_sql_parts', array $sql_parts, string $levels, string $s, int $pn, int $limit, int $start, int $end, string $order_by, string $order );
The $levels
parameter is a single level ID or a comma-separate list of IDs (not an array of level IDs).
The $sql_parts
parameter is an array of each section of the SQL query for building your list of members to include in the directory. The sections of the array you can modify include:
$sql_parts['SELECT']
$sql_parts['JOIN']
$sql_parts['WHERE']
$sql_parts['GROUP']
$sql_parts['ORDER']
$sql_parts['LIMIT']
apply_filters( 'pmpromd_format_profile_field', $value, $original_value, $field_name );
Format the profile field
Screenshots
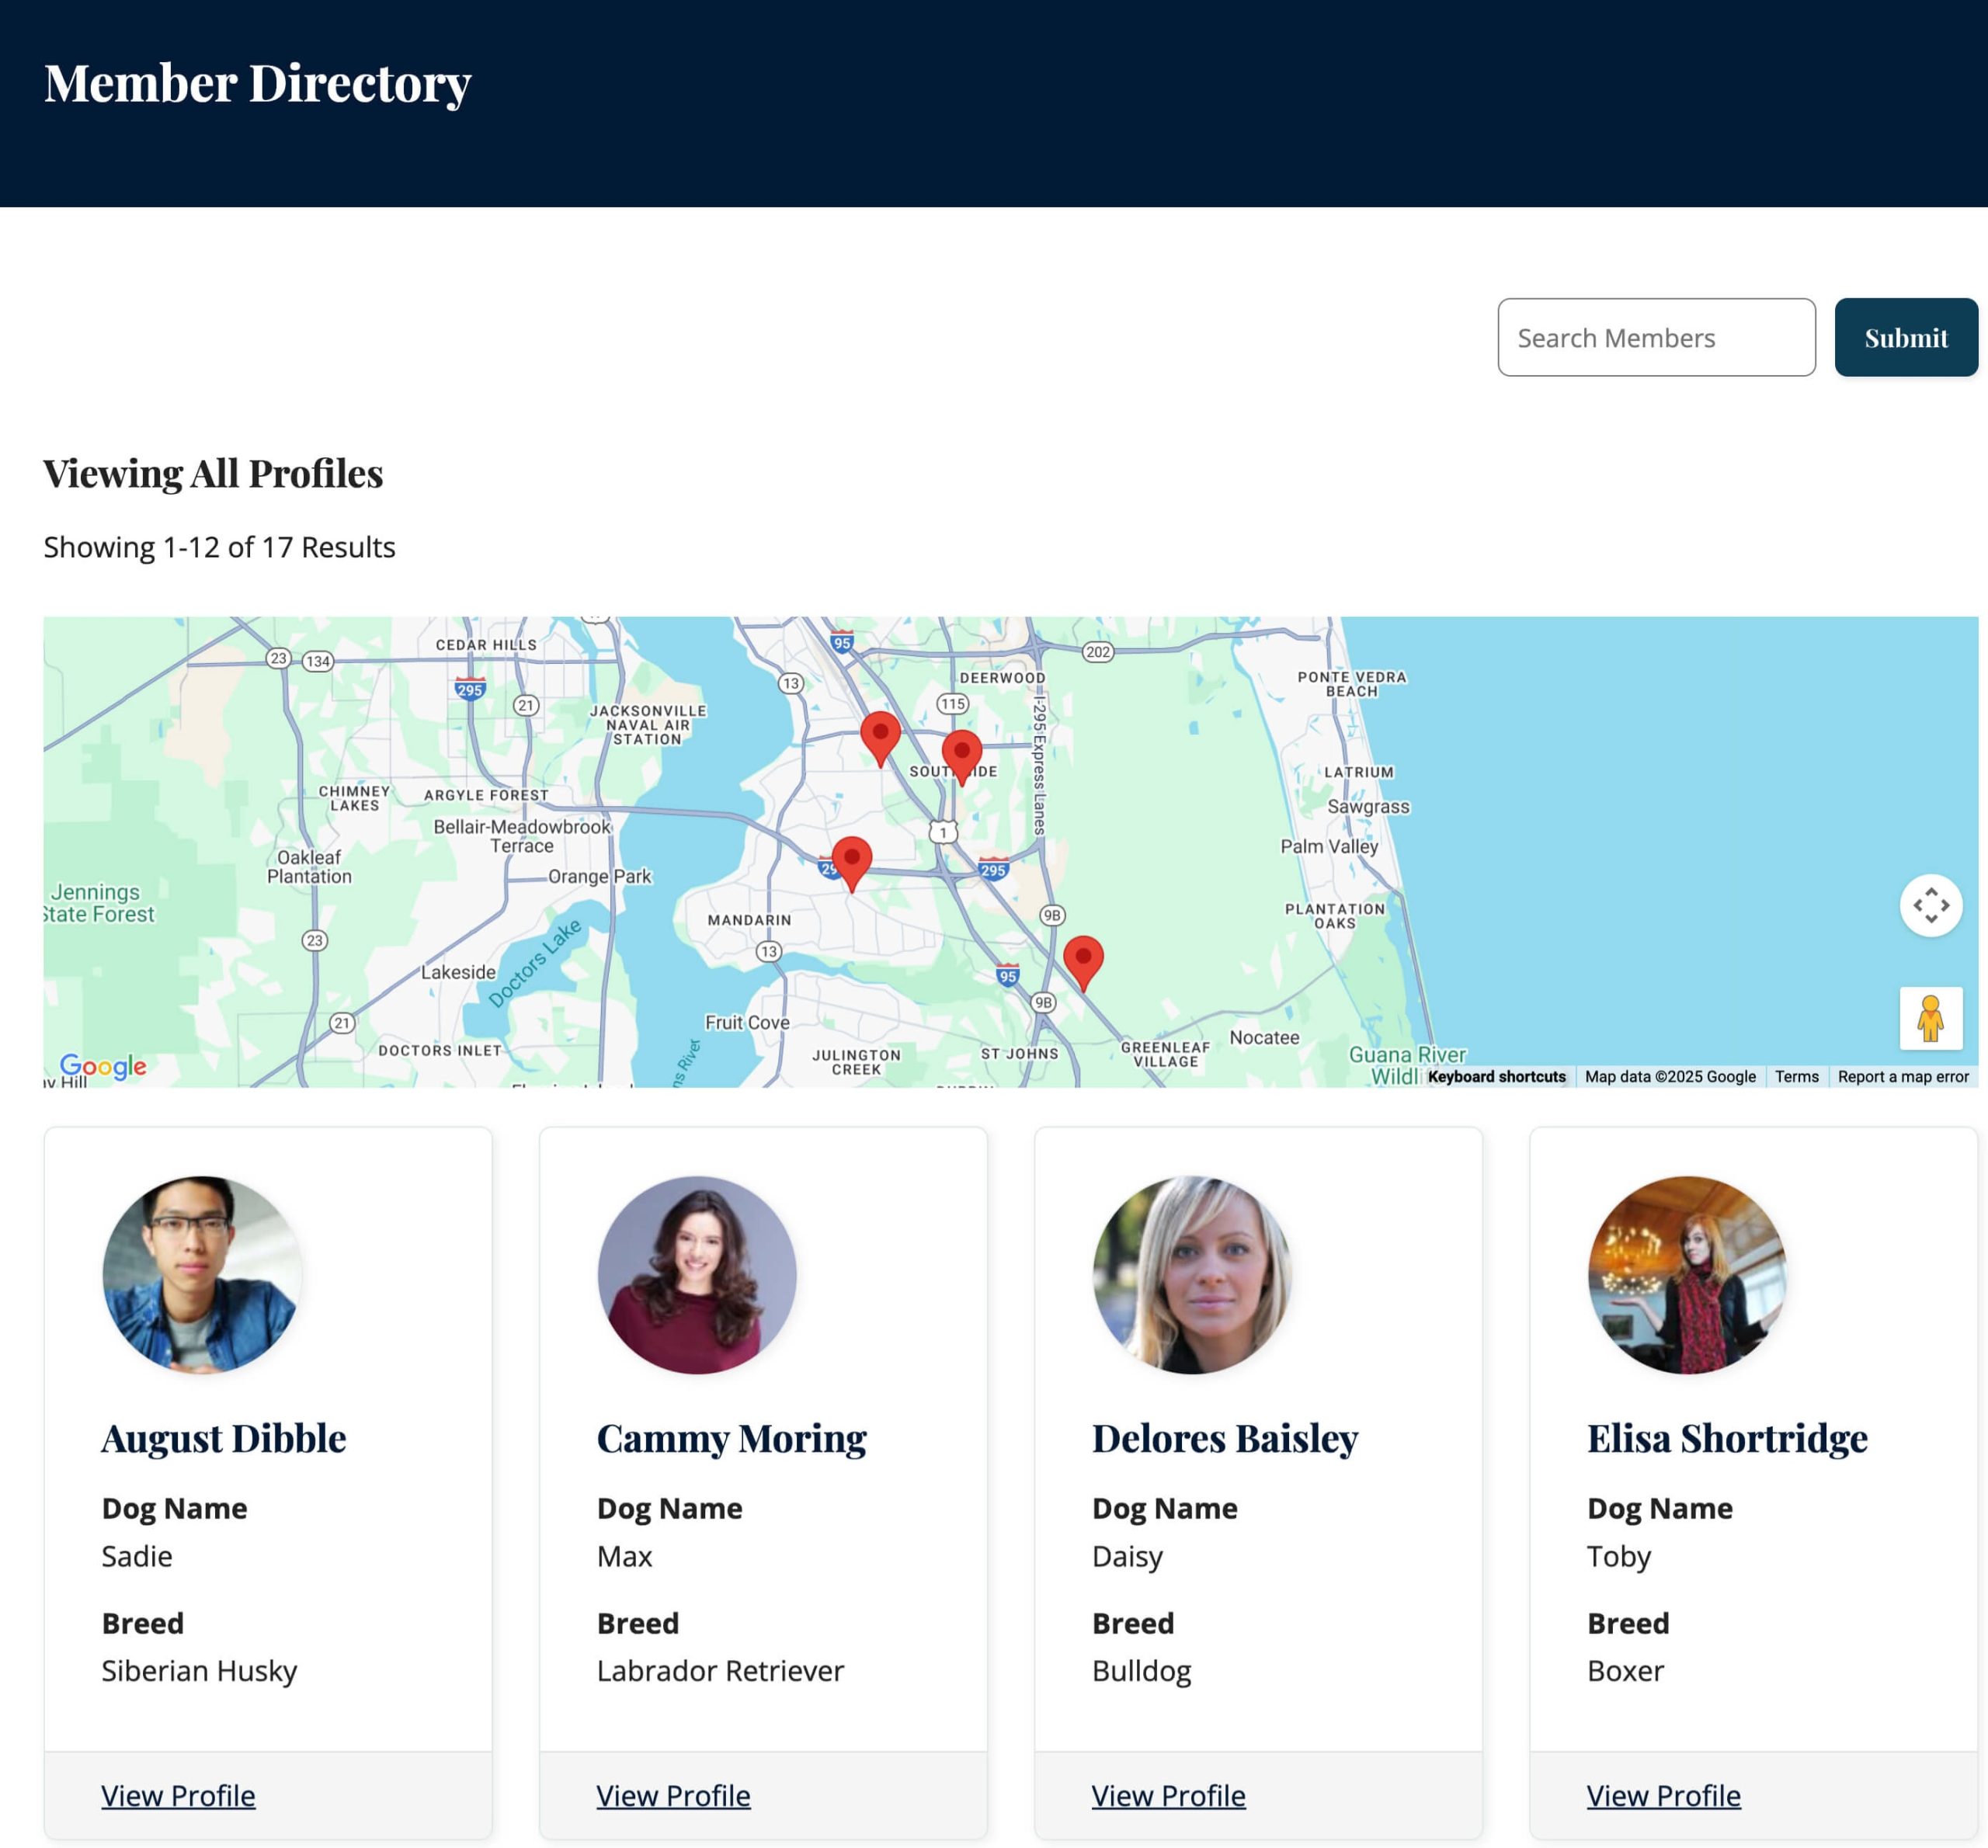
4 Column Layout
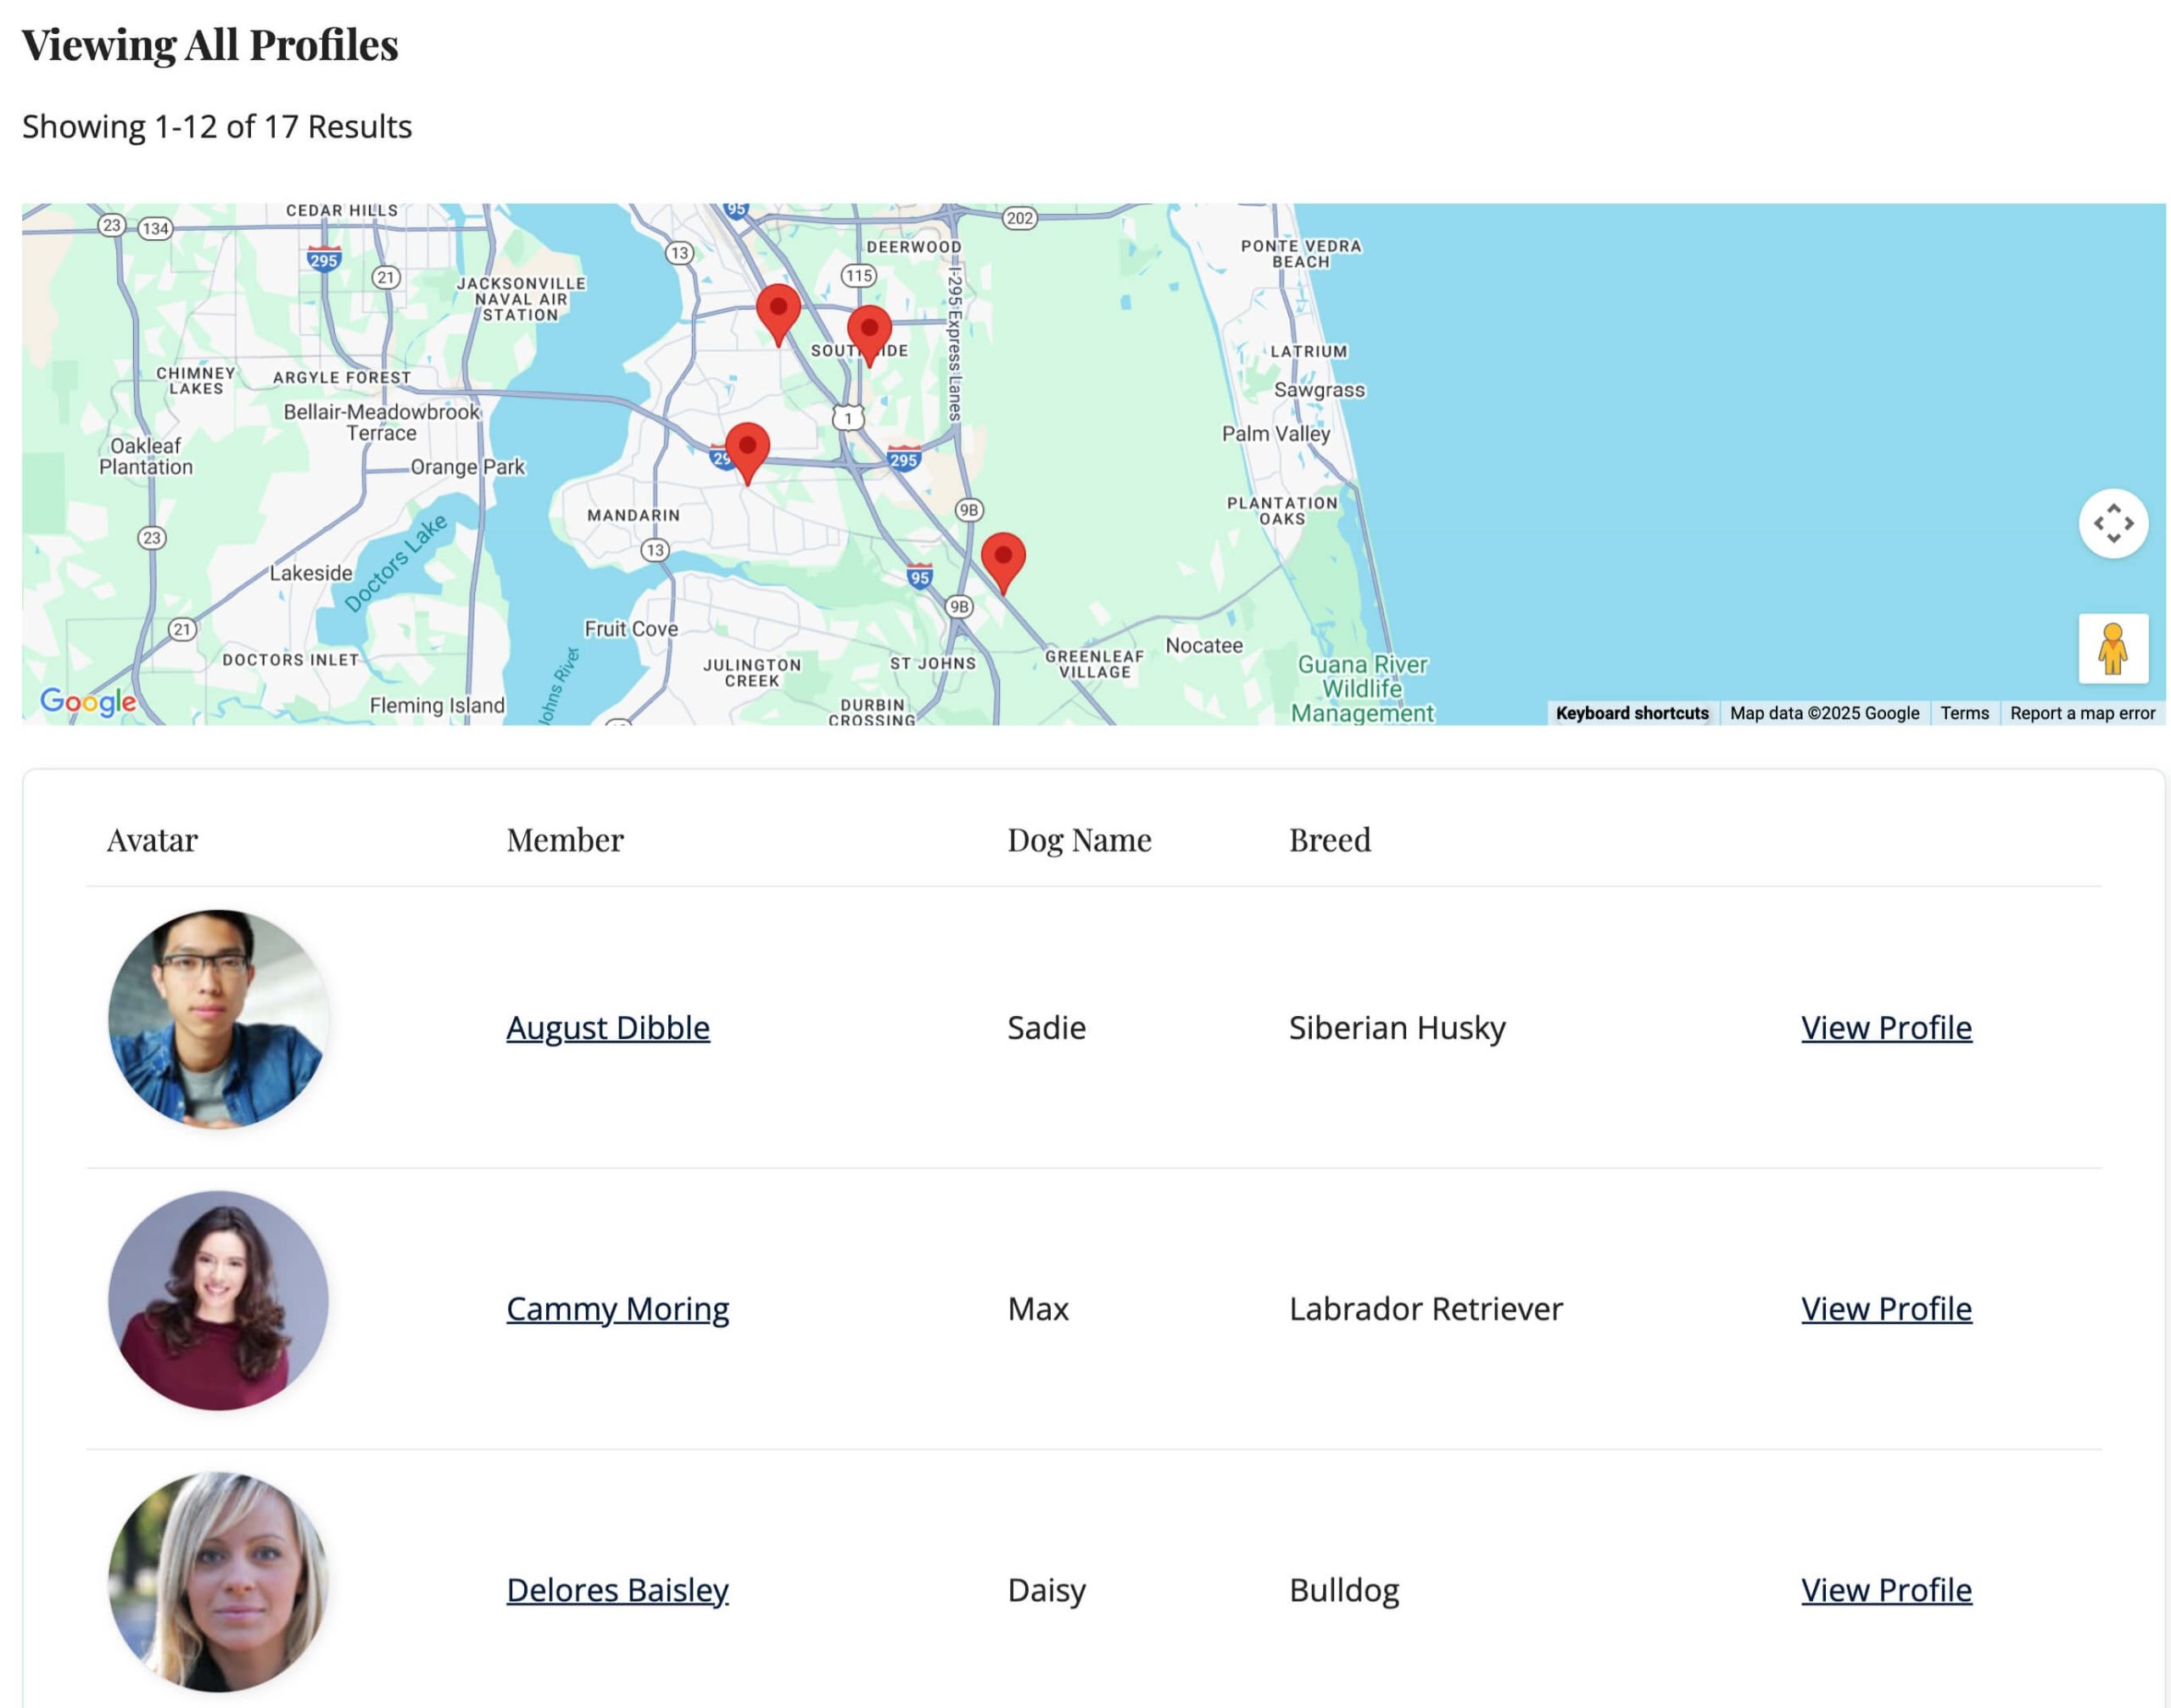
Table Layout
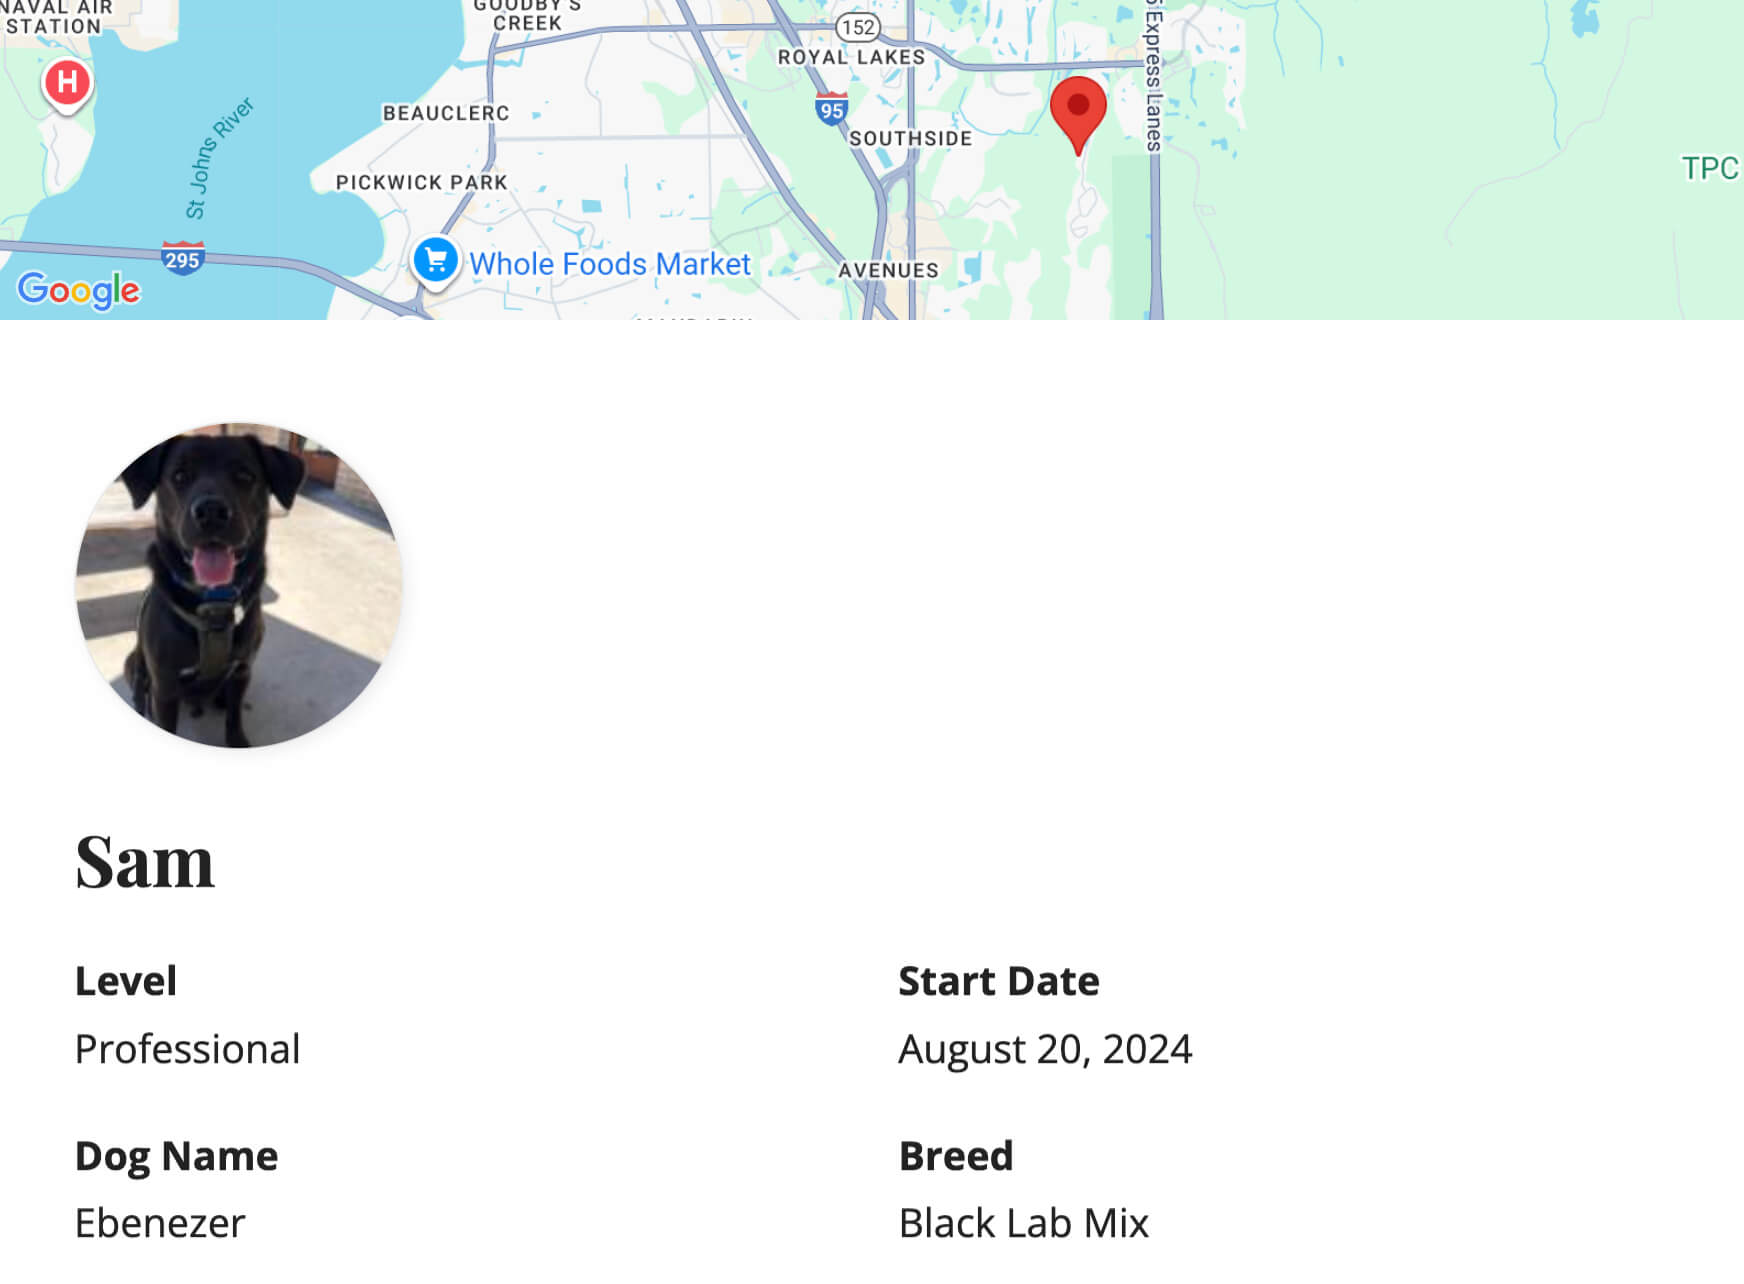
Member Profile
This is a Plus Add On.
Plus Add Ons are included in all Plus or higher premium membership plans.