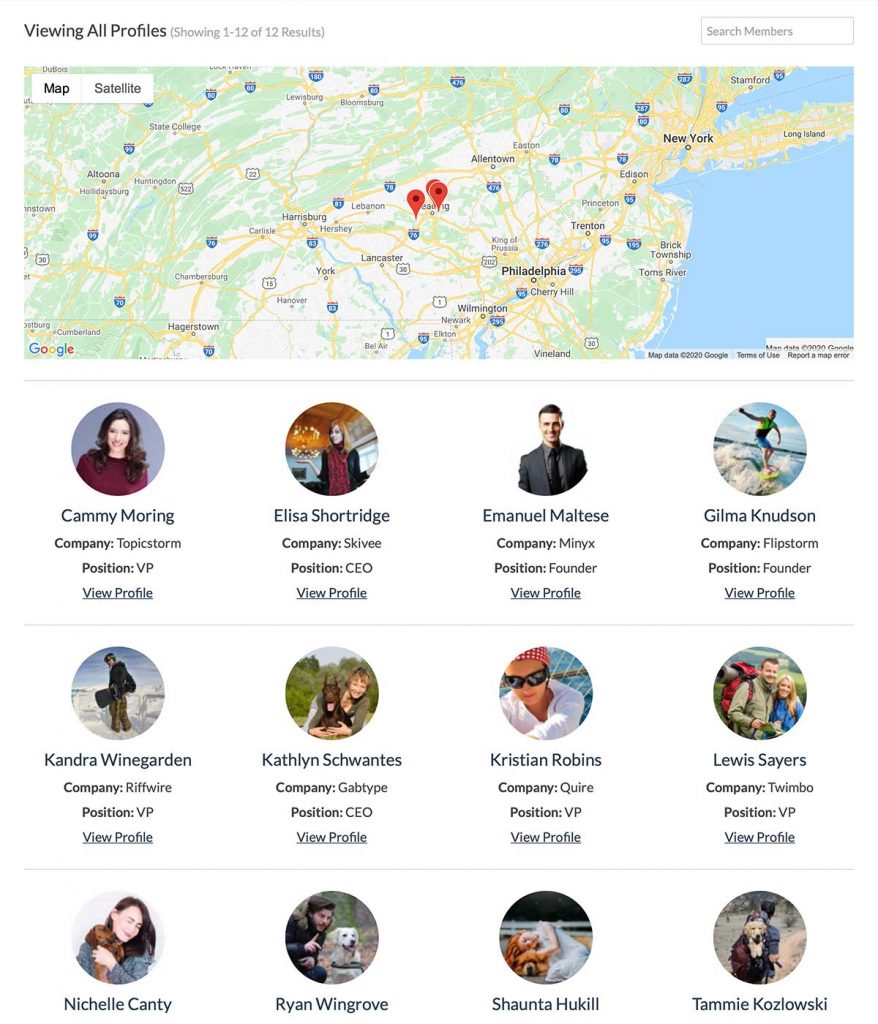
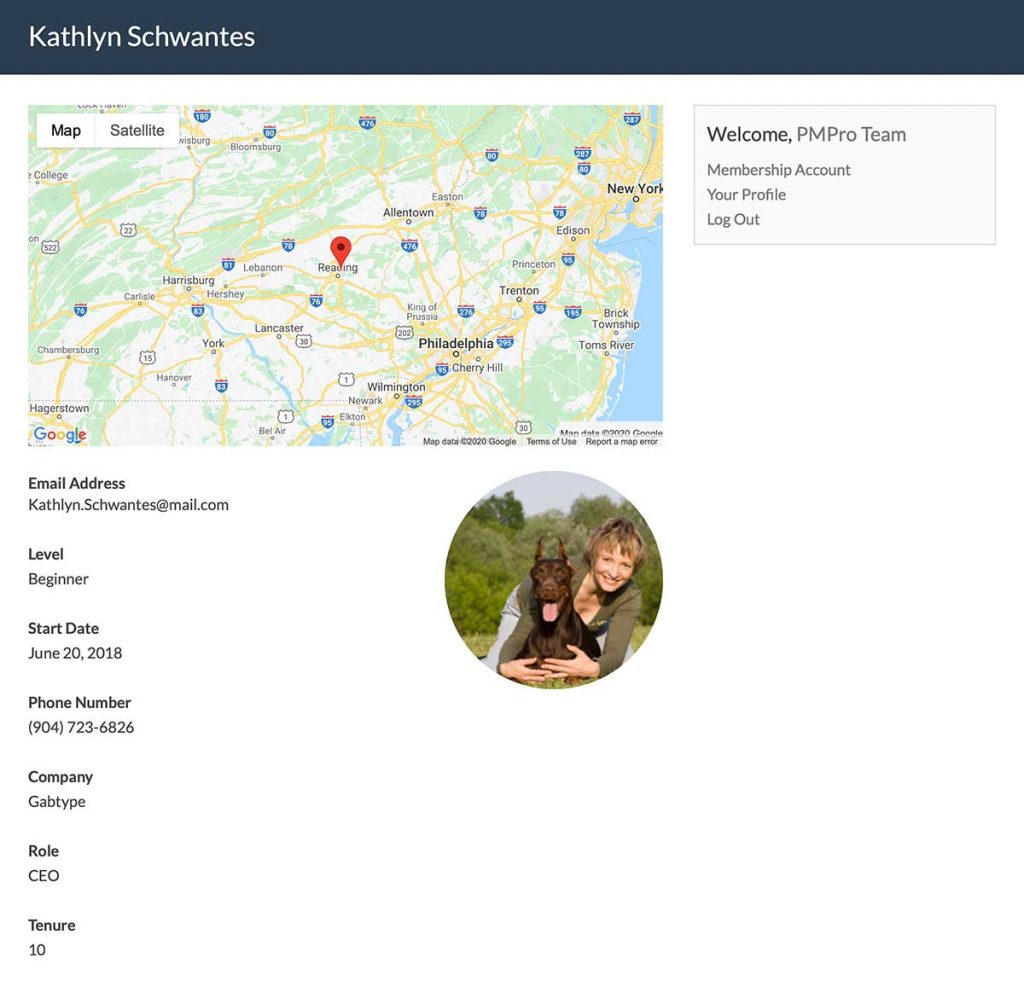
This plugin creates a shortcode [pmpro_membership_maps] you can place on any page of your WordPress site. Membership Maps will also display automatically on the Member Directory and Profiles Add On frontend pages.
Installation
You must have the Paid Memberships Pro plugin installed and activated with a valid license type to use this Add On.
- Navigate to Memberships > Add Ons in the WordPress admin.
- Locate the Add On and click Install Now.
- To install this plugin manually, download the .zip file above, then upload the compressed directory via the Plugins > Add New > Upload Plugin screen in the WordPress admin.
- Activate the plugin through the Plugins screen in the WordPress admin.
Settings
- This plugin requires Paid Memberships Pro to be installed and activated.
- By default, the map will geocode the member’s “Billing Address”. Navigate to Memberships > Settings > Payment Gateway & SSL in the WordPress admin. Confirm the “Show Billing Address Fields” setting is set to “Yes“. If you need to use a different member address for the map, please refer to this guide.
- Next, enter your Google Maps API Key on the Memberships > Settings > Advanced Settings page in the WordPress admin. Click here for help obtaining up your Google Maps API Key.
Shortcode Attributes
| Attribute | Default | Type | Description |
| height | 400 | int | Height of the map. The height is restricted to a pixel value. |
| width | 100 | int | Width of the map. The width of the map makes use of a percentage value to maintain responsiveness. |
| zoom | 8 | int | Default zoom level of your map. The higher the value, the closer the view. |
| max_zoom | NULL | int | Limits how far a viewer can zoom in on the map. The higher the value, the closer the view. |
| map_id | 1 | mixed | Specify a unique identifier for your map to use as a CSS selector and in code recipes. This attribute is required if you want to show more than one map on a single page. |
| infowindow_width | 300 | int | The maximum width of an info window in pixels. |
| levels | false | mixed | Specify level ID’s here to only show markers on the map of specific membership levels. More than one ID can be comma separated. |
| link* | true | boolean | This determines if the contents of the info window can be turned into links to the member’s profile page. |
| avatar_size* | 64 | int | The size of the avatar displayed in the info window. |
| show_avatar* | true | boolean | Determines if a member’s avatar should be displayed or not. |
| show_email* | true | boolean | Determines if a member’s email address should be displayed or not. |
| show_level* | true | boolean | Determines if a member’s level should be displayed or not. |
| show_startdate* | true | boolean | Determines if a member’s start date should be displayed or not. |
| avatar_align* | NULL | string | Specify the position of the member’s avatar. Choose between none, left, center, right. |
| fields* | NULL | string | Display additional user meta fields. This attribute accepts a list of label names and field IDs, i.e. fields="Company,company;Site,user_url" |
* These fields integrate directly with the Member Directory and Profiles Add On. The Membership Maps Add On will automatically use the values of these fields when setting up your Membership Directory.
Member Directory and Profile Pages Add On Integration
Your map will automatically display on the Member Directory and Profile pages, inheriting the shortcode attributes of that Add On for rendering the map. You can add additional shortcode attributes from the Membership Maps directly to the shortcodes used by the directory or profile page. See the example below, which adds the infowindow_width attribute to the Directory shortcode:
[pmpro_member_directory levels="1,2,3" infowindow_width="350"]
If you do not want to display a map automatically on these pages, you must unhook the actions in the Membership Maps Add On using a recipe like the one below:
Obtaining Your Google Maps API Key
This plugin requires you to create a Google Maps API Key enabled for the Google Maps Javascript API & Geocoding API. You must use an active G Suite or Gmail Account in order to leverage this API.
- Navigate to https://console.cloud.google.com/.
- Click ‘Select Project‘ to get a view of all current projects for your profile.
- Click ‘New Project‘.
- Name your project and (optionally) assign your project to an organization.
- Click ‘Create‘.
Once you have created a new project, you will see a notification window. Click “View” to see an overview of your project.
- Hover over ‘APIs & Services‘ and click ‘Credentials‘ in the left navigation pane.
- Click ‘Create Credentials‘.
- Select ‘API Key‘ to generate your API Key.
- In your WordPress admin, navigate to Memberships > Settings > Advanced Settings. Enter in your API key under the “Google Maps API Key” field.
Now that your API Key is created, you must enable the Google Maps Javascript API for your API Key.
- Click ‘Library‘.
- Search for
Google Maps Javascript API. Select the first option that comes up. - Click to Enable this service.
- You’ll then be redirected to an overview of your Google Maps API key. Click ‘APIs‘ in the left navigation pane.
- Click on ‘Geocoding API‘.
- Click to Enable this service.
After completing these steps your API Key will be properly configured with the services needed to display membership maps on your WordPress site.
Action and Filter Hooks
apply_filters( 'pmpromm_marker_attributes', $marker_attributes );
apply_filters( 'pmpromm_default_map_notice', $notice );
apply_filters( 'pmpromm_google_maps_libraries', $libraries );
apply_filters( 'pmpromm_default_map_start', array $default_start, $ID );
apply_filters( 'pmpromm_default_zoom_level', '8' );
apply_filters( 'pmpromm_override_first_marker', bool $override_first_marker_location, $ID );
apply_filters( 'pmpro_membership_maps_sql_parts', $sql_parts, $levels, $s, $pn, $limit, $start, $end );
apply_filters( 'pmpro_membership_maps_sql', $sqlQuery, $levels, $s, $pn, $limit, $start, $end, $order_by, $order );
apply_filters( 'pmpromm_return_markers_array', array $marker_array );
apply_filters( 'pmpromm_profile_url', string $profile_url );
apply_filters( 'pmpromm_view_profile_text', string __( 'View Profile', 'pmpro-membership-maps' ) );
apply_filters( 'pmpromm_marker_content_order', array $marker_content_order );
apply_filters( 'pmpromm_member_address_after_checkout', string $member_address, int $user_id, MemberOrder object $morder );
apply_filters( 'pmpromm_single_map_address_geocode', string $member_address, WP_User object $pu );
do_action( 'pmpromm_geocode_response', $request_body, MemberOrder object $morder );
apply_filters( 'pmpromm_geocode_return_array', array( 'lat' => $lat, 'lng' => $lng ), $request_body, $addr_array, $morder );
apply_filters( 'pmpromm_geocoding_api_key', pmpro_getOption( 'pmpromm_api_key' ) );
apply_filters( 'pmpromm_enable_geocode_error_email', bool $mail_error );
apply_filters( 'pmpromm_load_markers_start', 0, $levels, $marker_attributes );
apply_filters( 'pmpromm_load_markers_limit', 100, $levels, $marker_attributes );
apply_filters( 'pmpromm_map_styles', '', $map_id );
Debugging for Geocoding
There are two ways to enable debugging for geocoding:
Option 1: Enable WP_DEBUG. This will email the admin_email with the error code if there are any.
Option 2: Set PMPROMM_DEBUG to true in your wp-config.php file, or assign an email address to PMPROMM_DEBUG to email the errors to the desired email address.
Screenshots


This is a Plus Add On.
Plus Add Ons are included in all Plus or higher premium membership plans.

