The Admin Checkout Email notifies you immediately when a new member signs up. This is particularly exciting for new membership site owners as they watch their community grow. For sites with high-priced memberships, this email is also essential for quickly reaching out to new members.
PMPro automatically includes any custom user fields collected during checkout in the Admin Checkout Email. This ensures you have all the important details you need about each new member without any extra configuration.
In this guide, we explain the core PMPro functionality and explain how to manually insert user fields to admin emails. Finally, this guide includes a code recipe if you do not want to include these fields by default.
How to Include User Fields in Admin Checkout Emails
When you add custom user fields to your membership checkout process, PMPro automatically includes the collected data in the Admin Checkout Email.
Steps to Add User Fields:
- Create custom fields via Memberships > Settings > User Fields in your WordPress dashboard.
- Follow our User Fields Documentation for step-by-step guidance.
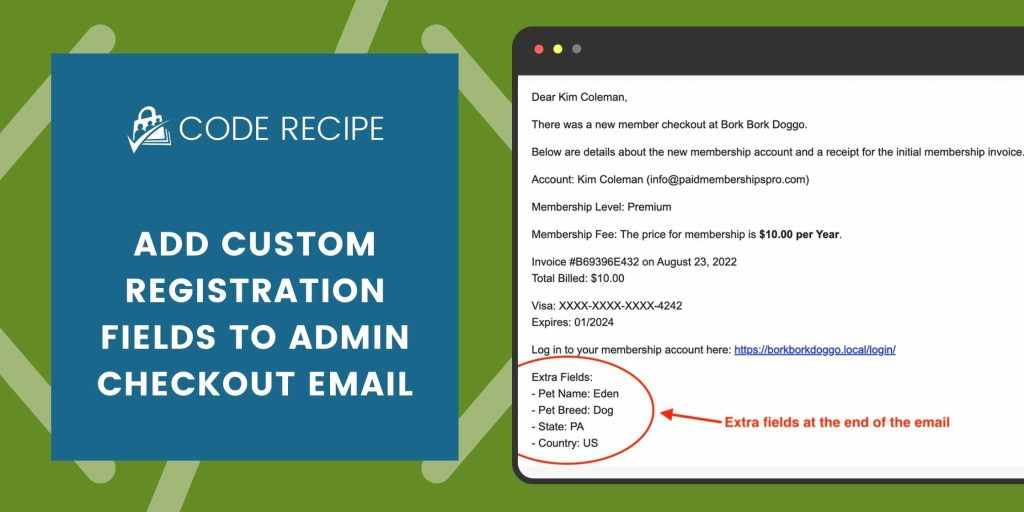
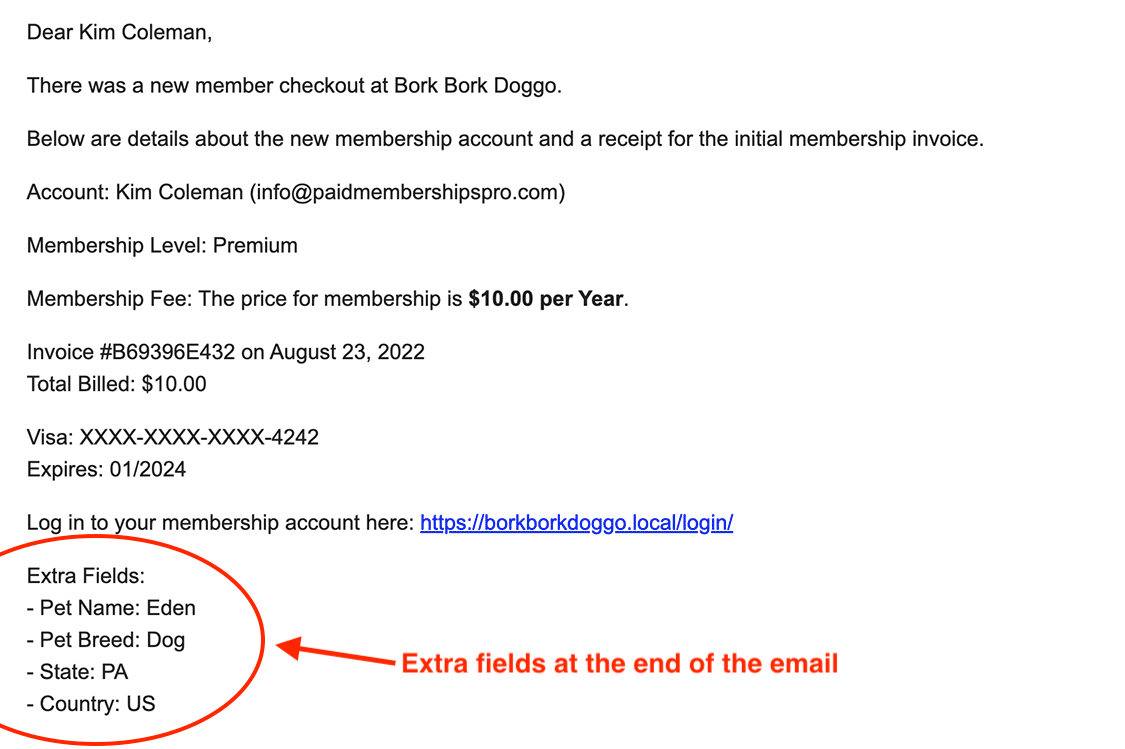
After a member completes checkout and fills out the custom fields, these fields are automatically appended to the bottom of the Admin Checkout Email. No coding or manual updates to the email template are required.
Manually Adding Specific User Fields to Emails
If you want to include a specific user field elsewhere in your email content, PMPro makes this easy using field tags. Use the following format for any named user field in your site:
!!field_name_here!!Example: If you have a custom field named company_name, include the tag !!company_name!! in your email template. This will display the member’s company name wherever the tag is placed.
To find the “name” value for your custom field, navigate to Memberships > Settings > User Fields and use the “name” column in the list of fields.
Removing Automatically Included Fields
By default, all user fields are included at the bottom of the Admin Checkout Email. If you prefer to exclude certain fields, you can use the following code recipe:
Adding the Recipe to Your Website
You can add this recipe to your site by creating a custom plugin or using the Code Snippets plugin available for free in the WordPress repository. Read this companion article for step-by-step directions on either method.
More Ways to Customize Emails
There are many ways to customize the emails that you send to both your admin and your members. The best place to start is reviewing our documentation on customizing email templates.
If you want to add more custom data to your emails, check out this tutorial on adding a new email template variable.
With PMPro’s core functionality and a few optional tweaks, you can ensure your admin emails include exactly the information you need, exactly where you want it.
Free Course: Membership Site Development—The Basics
Develop a deeper understanding of membership site development in this beginner-level course. Learn how to make your site work better, save yourself time and money, and improve your site's performance.