Members can remove their profile from being included in the Directory and decide if their location is shown on the map. The Add On automatically adds this setting to the Member Profile Edit page.
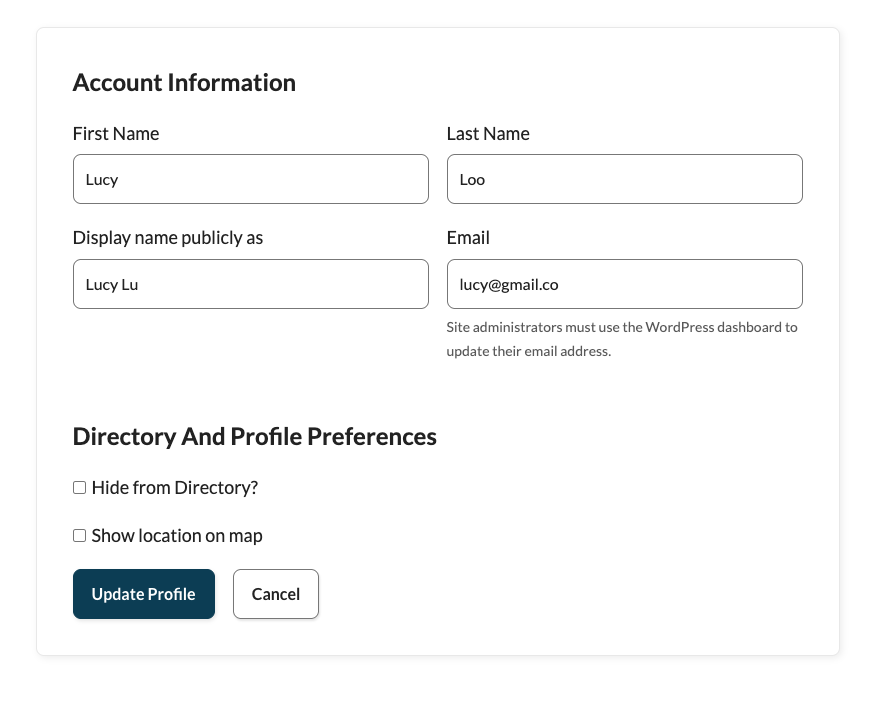
Directory and Profile Preferences
Admins also have the ability to remove a member from the directory and show the members location on the map.
In your WordPress admin, navigate to Memberships > Members > Edit Member > Directory and Profile Preferences.
- “Hide from Directory?”: Check this box to hide the specific member you are editing from the Member Directory. The label uses the title of your Directory page, so it may read “Hide from Member Directory?” on your site.
- “Show location on map”: Check this box to show the member’s location on the map. This field and the address fields only appear after you add a Google Maps API Key.

Who Can See a Profile
A member’s profile is only shown to other visitors when the member has an active membership and isn’t hidden from the directory. If you use the Approval Process for Membership Add On, members who are still pending approval are hidden too. On your assigned Profile page, visitors who try to open one of these profiles are sent to your Directory page. If the profile block or shortcode is on another page, it shows the message “This profile is not available.” instead.
Members with an active membership can always view their own profile, even when they are hidden from the directory or pending approval.
Add Opt-Out at Checkout
You can also let members opt out of the directory as part of membership checkout. Follow these steps to create a User Field that adds an “Exclude my profile from the member directory” field at membership checkout:
- Navigate to Memberships > Settings > User Fields in the WordPress admin.
- Click the “+ Add Field Group” button.
- Enter your preferred title for the group in the “Group Name” field, e.g., “Hide from Directory?”.
- Select “Yes” for the “Show fields at checkout?” option.
- Select “No” for the “Show fields on user profile?” option.
- Click the “+ Add Field” button.
- Enter your preferred title for the field in the “Label” field, e.g., “Exclude my profile from the member directory”.
- Enter
pmpromd_hide_directoryin the field’s “Name” field. - Select “Checkbox” from the field “Type” dropdown.
- Click on the “Save All Changes” button to create and save the new field group and field.

Get Support From Our Team of Experts
Have a question about how to use this feature? Our Support Page outlines three ways to get support.
Our Max plans include hands-on help customizing your membership site and implementing new features. Upgrade to PMPro Max now »
Last updated on November 12, 2026