Our Mailchimp Add On for Paid Memberships Pro now creates PMPLEVEL and PMPLEVELID merge fields for each subscriber added to an Audience. This post covers how to use these merge fields to “segment” audiences in order to send a campaign to a specific membership level.

Why is This Better Than Using Separate Audiences?
Now that the Add On synchronizes a member’s level information, there is no need to use separate audiences. This is important because your Mailchimp monthly fee is based on the number of subscribers in each audience. Put another way, a subscriber who is in 2 “Audiences” is counted twice, but a subscriber in 2 or more “segments” is only counted once. This method only puts the subscriber on a single audience.
There may be other reasons for you to keep your members subscribed to different audiences, but if all you are worried about is your monthly Mailchimp fee, you’ll want to use one audience with members segmented by PMPLEVEL or PMPLEVELID.
First, Make Sure that the PMPLEVEL and PMPLEVELID Fields are Set For All of Your Subscribers
After upgrading to v2.0 of the Mailchimp Add On, only new members and members who change level or update their profiles will be updated with the appropriate PMPLEVEL and PMPLEVELID merge fields in Mailchimp. All existing members will not have these fields populated.
To populate these fields for new members follow the steps here to export your members to a specific CSV format and import them into MailChimp.
Now, Go Forth and Segment (Or Group?)
Now that you have all this excellent new data available, let’s learn a bit about MailChimp Groups and Segments.
Both Groups and Segments allow you to easily kick off a new campaign to a subset of members on your audience. Segments are managed by the admin only – a member cannot opt-in or opt-out of a segment. Segments can be auto-updated based on added criteria. For our Mailchimp management, we have an auto-update segment for each membership level. Most email campaigns (such as our newsletter) are sent to the full audience, while others are sent to a specific segment.
Groups, alternately, are not auto-generated. You need to create a group then add members to it directly via import or by sending a segment to the group. Groups are useful if you have a series of email “flavors”, such as a clothing company that allows members to select interest based on Men’s, Women’s or Children’s fashion. For this case, you can set up an automated response email when a member joins your audience. They can manage their Mailchimp profile and opt in or out of your public group options.
Here’s a useful primer on Groups and Segments via Mailchimp »
Create a Segment for Each Membership Level
Whether or not you plan to use Mailchimp Groups, you should set up the segments for each membership level so they are readily available to your next targeted campaign.
- Log into Mailchimp.
- Click on “Audiences” in the main menu.
- Choose the Audience you would like to segment.
- In your selected Audience, click “Manage Subscribers” -> Segments.
- Click “Create Segment”.
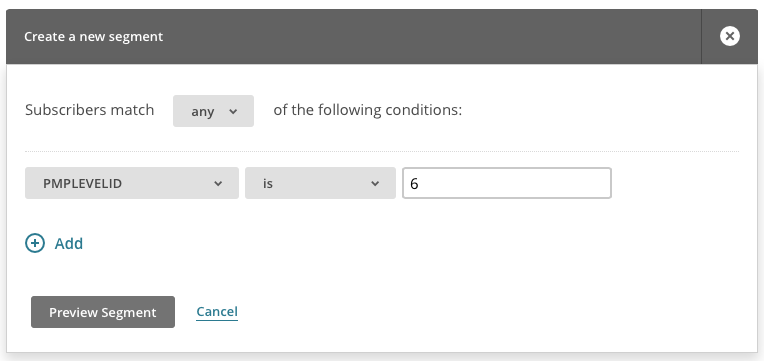
- Set “subscribers match” to “any”.
- Add a rule “PMPLEVELID” “IS” [ your level ID ].

 Click “Preview Segment”. Then, click “Save as segment” in the dark grey toolbar.
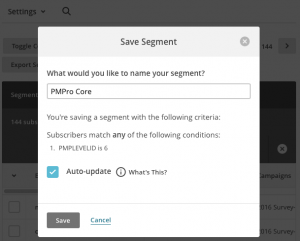
- Name your segment the Membership Level name. Check the box for “Auto-update”. Click Save.
- Repeat this process for each of your Membership Levels.
Here’s a guide on Setting Up a Segment via Mailchimp »
You can also segment on the PMPLEVEL field which would be set to the name of the membership level. Be careful when doing this though, since changing the membership level name in WordPress will change the value sent and synchronized with Mailchimp. The membership level ID (PMPLEVELID in MailChimp) is less likely to change, which is why we recommend using it here.
You can also segment multiple levels into the same segment. Just be sure “subscribers match” is set to “any” and add a new rule for each membership level ID.


