The Memberships > Settings > Level page in the WordPress admin allows you to create and edit the Membership Levels for your membership site.
Video Demo
Getting Started
- From the WordPress dashboard, navigate to Memberships > Settings > Levels.
- If this is your first time creating a membership level, click the “Create a Membership Level” button.
- To add a new level, click the “Add New Level” button.

Each level in the table has several row actions, which allow you to edit, copy, or delete the level. We do not recommend deleting a level if there are active members that hold the specific level. If you want to archive a level and no longer allow public signups, you should edit the level and adjust the “Disable New Signups” setting.
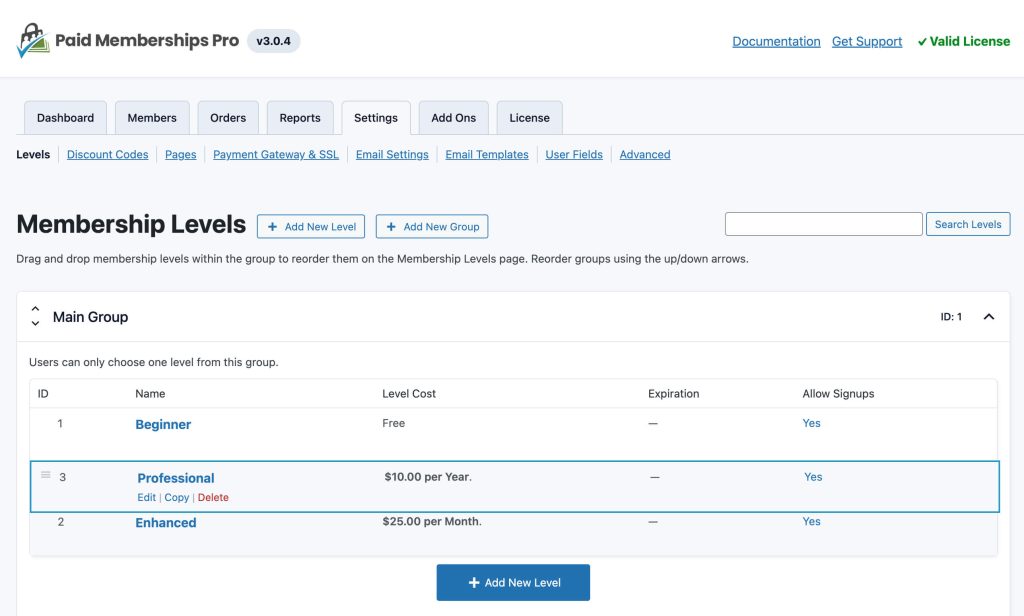
How To Reorder Membership Levels
If you’re using the default pmpro_levels shortcode, you can update the display from the Memberships > Membership Levels admin page. This sorting also adjusts the order in which your levels are displayed in the protected content messages and in your admin area checkbox lists.
- Hold down your mouse on the level you want to move.
- Drag the level to the desired placement in the list.
- That’s it – this will automatically update the levels order.
- Navigate to the page assigned as the “Membership Levels” page to see the updated output.
Select a Membership Level Template
Paid Memberships Pro has level settings for almost any type of level you can imagine. The plugin includes level templates for the most common types of levels our user research revealed including:
- free: no payment, never expires
- one-time: one initial payment at checkout with expiration
- monthly or annual: recurring subscription that charges the same amount at checkout and per period until the user cancels
- lifetime: one initial payment at checkout with no expiration
- trial: a free period of membership that begins charging the recurring membership after one period
- advanced: the complete Add Membership Level screen with all options expanded
When creating a new level, select a template from the list that best fits the type of level you need.
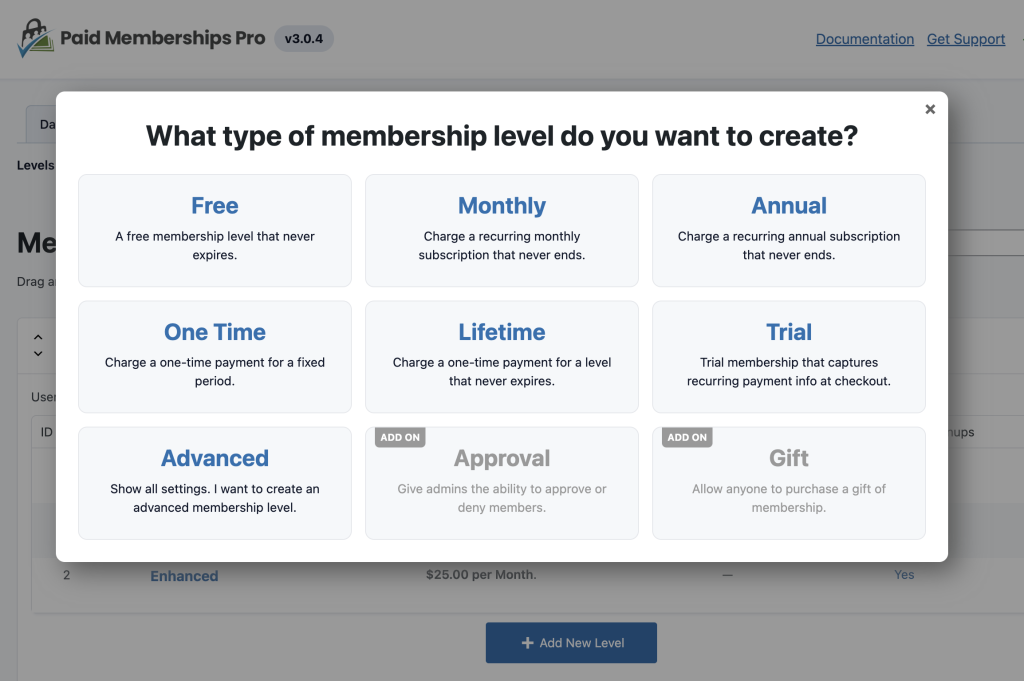
Note that even though you may have chosen a template to set up your level, you can still access every individual level setting if you decide to change your one-time payment level to recurring later.
Add / Edit Membership Level Settings
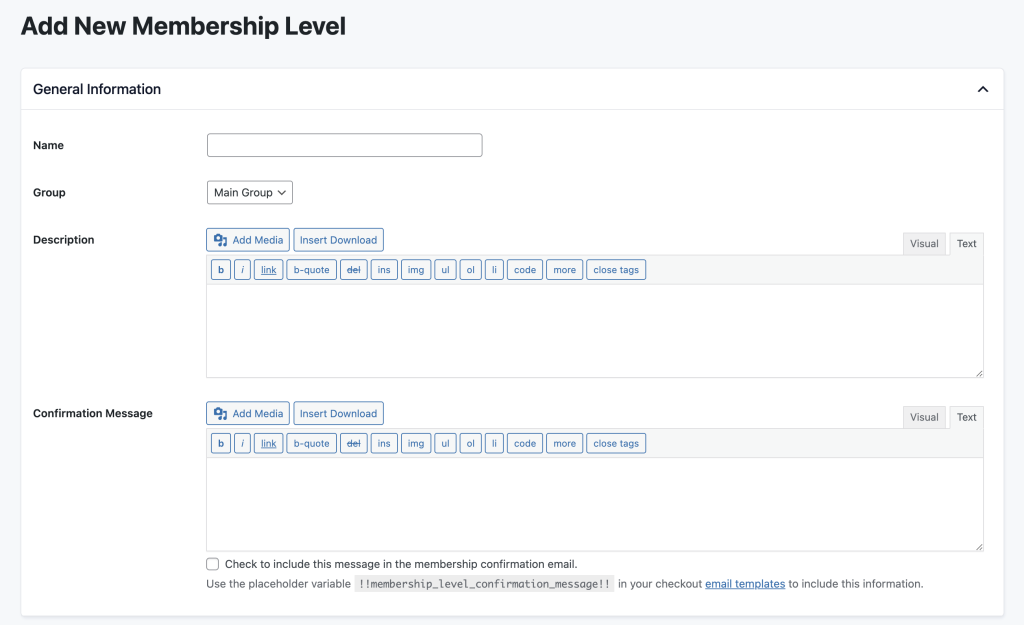
General Information
- Name: The name of your Membership Level (required, public)
- Description: Optional descriptive content shown on the checkout page. You can format content in this field using the toolbar. This content can also be shown on the Membership Levels page using the Advanced Levels Page Shortcode Add On.
- Confirmation Message: Optional content shown on the Membership Confirmation page. You can format content in this field using the toolbar. This message can be added to the member’s confirmation email by selecting the “Check to include this message in the membership confirmation email” checkbox.
Billing Details
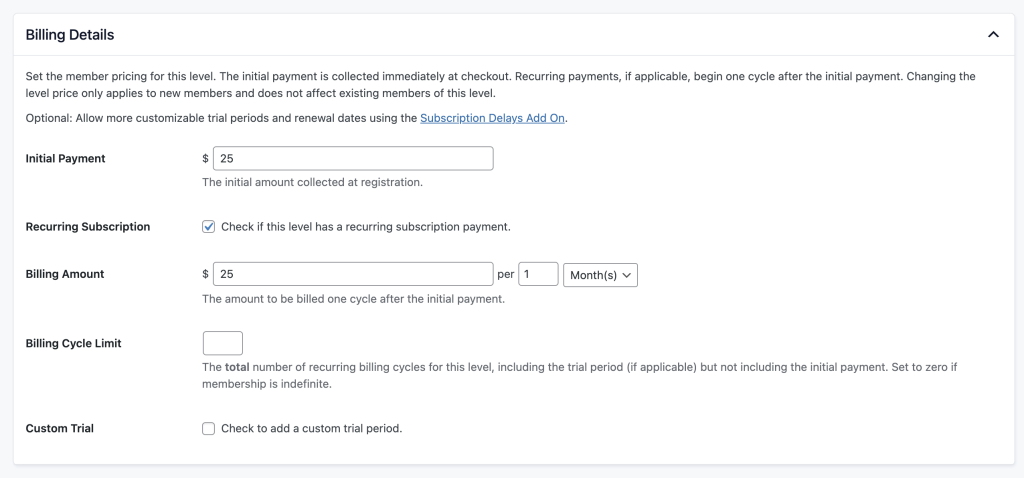
The Billing Details section sets up the payment structure for the Membership Level. You can offer any combination of free, trial, and paid memberships.
- Initial Payment: The initial amount collected at registration. This amount can differ from recurring payments (if applicable). If you want to offer a free membership level, leave this field blank.
- Recurring Subscription: If you would like to offer recurring subscriptions, select the recurring subscription check box. This will open up some further options.
- Billing Amount: Set the recurring billing amount and frequency for the payment. This can be set to a specific number of times per “Day”, “Week”, “Month”, or “Year”. For example,
[$50] per [1] [Month]will charge the member $50 per month.
Advanced Level Billing Settings
These are the less-used settings that you may need to create a more complex level.
- Billing Cycle Limit: The total number of recurring billing cycles for this level, including the trial period (if applicable) but not including the initial payment. Set to zero if membership is indefinite. Cycle limits are not compatible with all gateways so check for an error after saving your Membership Level to confirm.
- Custom Trial: Offer a trial period for your membership. Set the “Trial Billing” amount as well as the number of subscription payments that the trial will be active for. For example,
[$0] for the first [2] subscription payments. If you need more customizable trial periods and renewal dates, please explore using the Subscription Delays Add On.
Expiration Settings
- Membership Expiration: Check this to set when membership access expires.
- Expires In: Set the duration of membership access. Note that the member’s recurring subscription (if any) will be cancelled when the membership expires. You can allow more customizable expiration dates using the Set Expiration Date Add On.

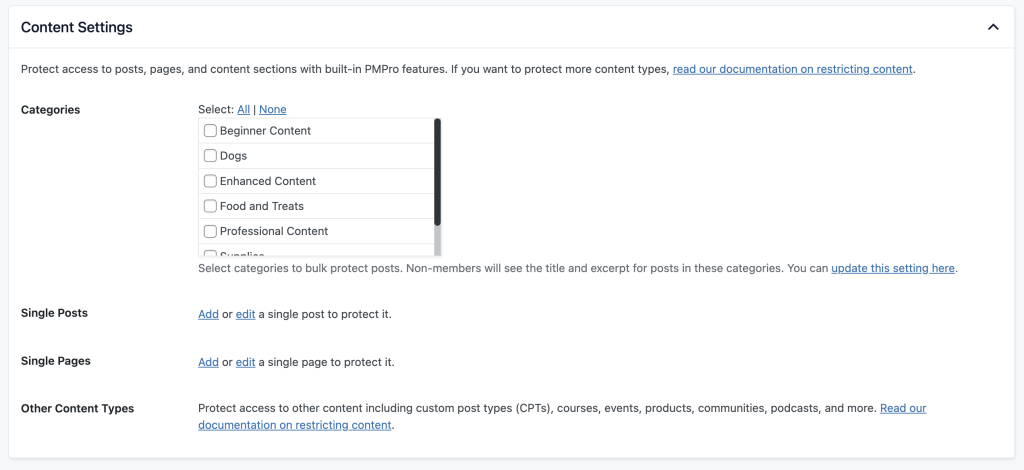
Content Settings
- Categories: Select categories to bulk protect posts. You can control whether non-members see posts in archives or a shown excerpts using this guide. If you have any Categories that should be locked down for members, you can check them off at the bottom of the edit level page.
- Single Posts: Add or edit a single post to protect it.
- Single Pages: Add or edit a single page to protect it.
- Other Content Types: PMPro can protect other content types such as a Custom Post Type, Course, Community, Directory, Podcast, and more.
Other Settings
- Disable New Signups: Disables new signups and hides the level from default “Membership Levels” page
Other settings may also appear in this section if you are using any of our Add Ons or third party integrations.For example, our screenshot below shows Auto-Renewal Settings from the Auto-RenewalCheckbox at Membership Checkout Add On.

Read more documentation on Membership Levels »
Get Support From Our Team of Experts
For more help with this PMPro feature, check out our Support Page with three ways to get support as a free or premium member.
Last updated on August 1, 2025

