If you already run your own blog, you’ve probably got a wealth of content under your belt. But what if your new subscribers never see it?
People who have just started following your blog may be notified whenever you post something new, but you want them to get the most out of your content in general—not just your latest posts.
One of the best ways to do that is to use drip content to create a campaign or email automation that sends existing blog posts to your email list. This post will show you how to do it.
Table of contents
- What is Drip Content?
- What is a Drip Campaign?
- How a Drip Campaign Can Multiply the Value of Your Blog Content
- 4 Ways to Reuse Your Old Blog Content
- How to Create a Drip Campaign or Email Automation from Your Blog Content
- How to Monitor the Performance of Your Drip Campaign
- How to Leverage Drip Campaigns in Your Marketing
- Conclusion
What is Drip Content?
Drip content is information that you strategically release at chosen times instead of giving it to your subscribers all at once. Learn more about drip content in our post The Basics of Running a Drip Content Membership Site.
What is a Drip Campaign?
A drip campaign is essentially a sequence of automated emails that get sent to your subscribers at intervals you choose.
For example, let’s say you want your “beginner” audience segment to receive a series of blog posts that will help them get started. Or, maybe you want to highlight the comprehensive value of your work and bring new subscribers up to speed by sending them an overview of your very best content.
How a Drip Campaign Can Multiply the Value of Your Blog Content
Once published, blog posts can sometimes get lost in the void. Creating a drip campaign can help your content production efforts go a lot farther—and give your subscribers maximum value.
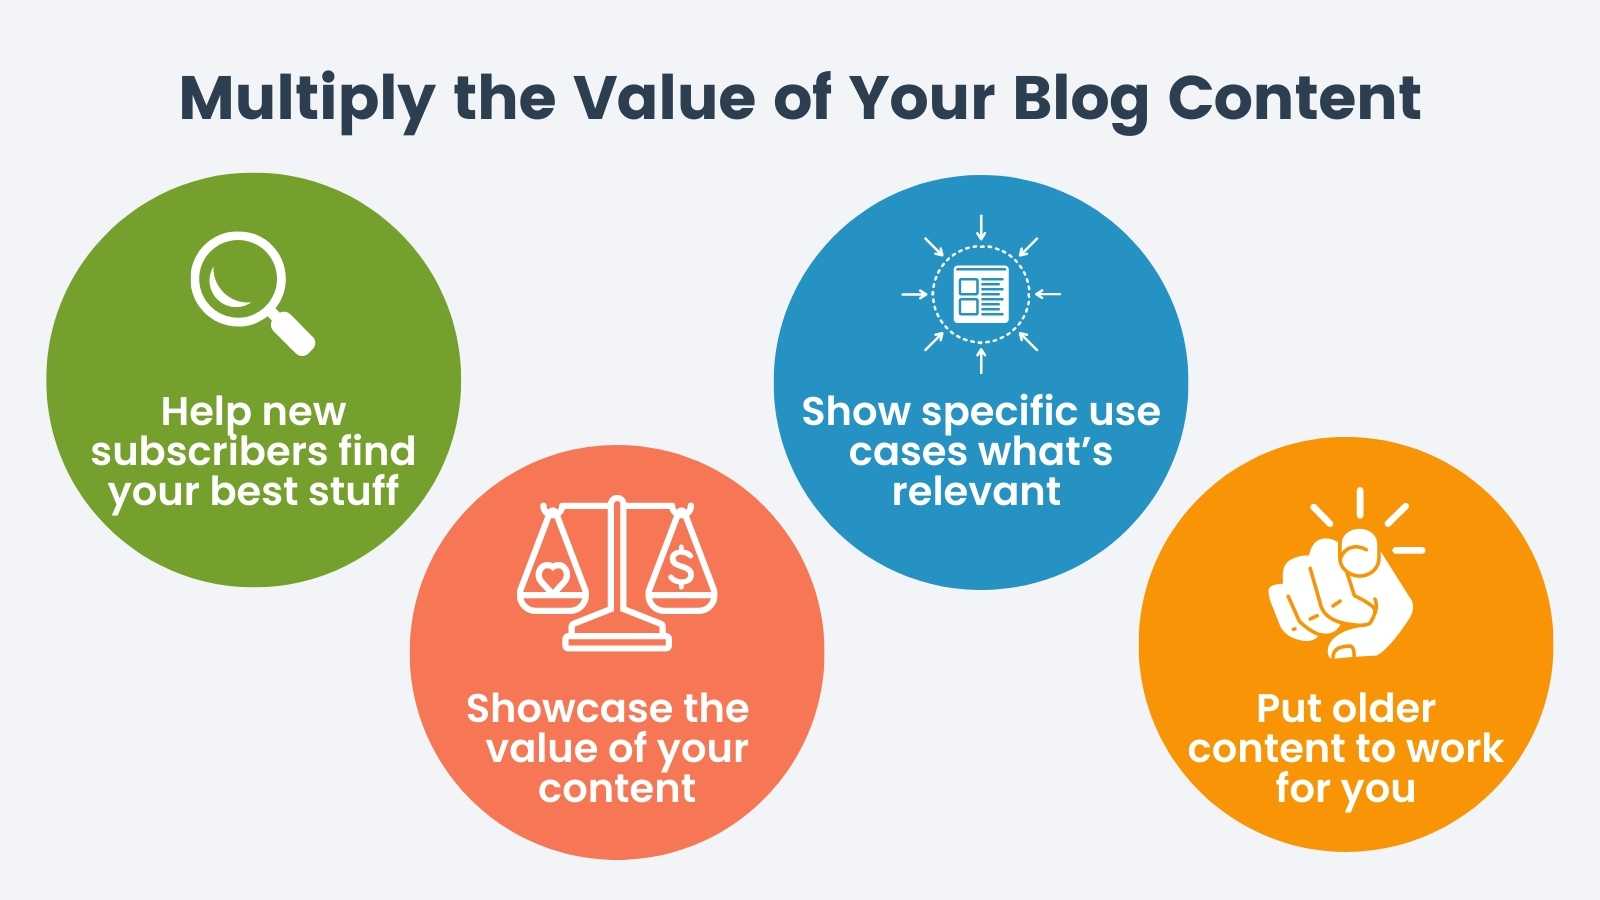
Drip campaigns have this effect because they:
- Help new subscribers find your best stuff. This keeps them coming back and engaging with your content.
- Help specific use cases find what’s relevant to them. You can put things in an order that makes sense in a flow or sequence—and helps people synthesize separate pieces of content.
- Showcase the comprehensive value of your content. Some subscribers might not even realize how much you have to offer them. Bringing this front-and-center makes the value of your content obvious and compelling.
- Make your older content work for you. Using your existing content means you save a lot of time and effort you’d otherwise spend producing new content.
4 Ways to Reuse Your Old Blog Content
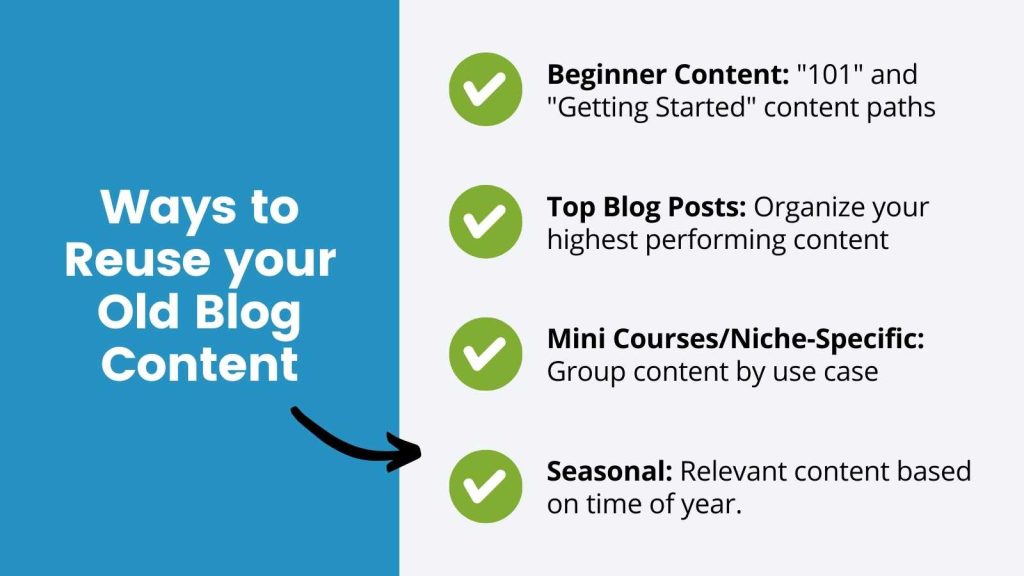
There are limitless possibilities when it comes to creating drip campaigns, but here are four common strategies:
- Beginner content. This is content that applies to beginner-level users, and includes things like “101” and “getting started” guides.
- Top blog posts. This refers to all of your highest-performing blog posts, or other content that gets a lot of attention or engagement.
- Mini courses or niche-specific content. This is content that is geared toward specific use cases or niche topics and goals, such as knowledge and skill-building courses, certification pathways, or industry-specific information.
- Seasonal content. Help subscribers kick off the new year or have a fun-filled summer with content that inspires or enhances these moods.
You know your content best, so take a look at everything you have written and think about how you can connect separate posts in a meaningful way.
Remember: Your subscribers don’t want to receive entire campaigns full of content they can’t access. So, for example, if your drip campaign is going out to all of your free subscribers, make sure to give them at least some of your premium content without requiring them to pay.
Now, let’s talk about how to create a drip campaign or email automation from your blog content—more specifically, a series of your best (highest-performing) posts.

Power Your Publishing with a Platform You Can Control
Paid Memberships Pro is the best tool for online publishers: an open source WordPress plugin that transforms your blog or news site into a revenue-generating platform.
Tailor your site to engage readers, monetize content, and grow a loyal subscriber base. Give your subscribers the premium content they seek and earn a reliable income with a totally independent online business.
How to Create a Drip Campaign or Email Automation from Your Blog Content
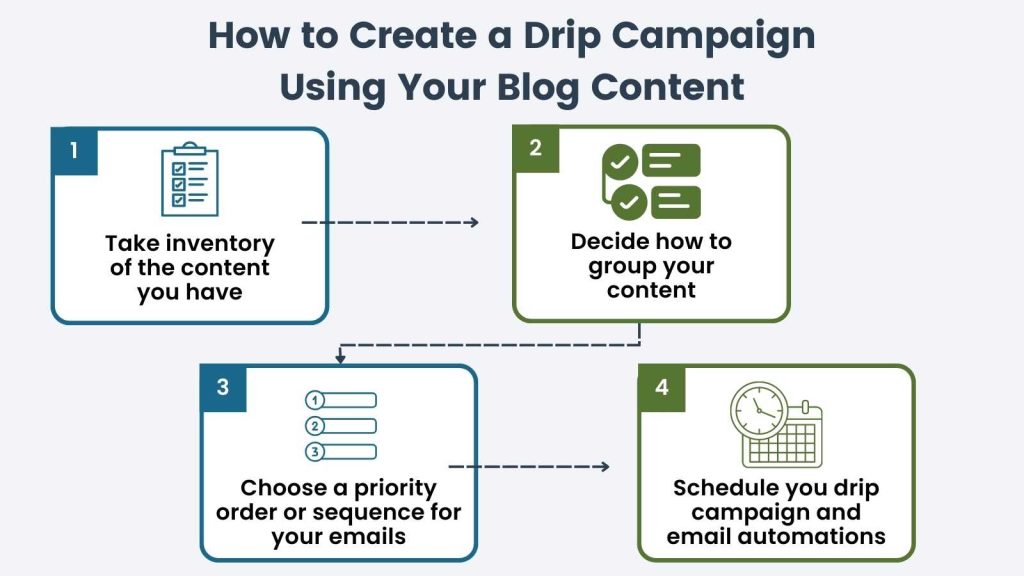
1. Take Inventory of the Content You Have
Whether you’d like to create a top blog post series or send posts on a certain topic to a segment of your audience, start by examining all of your content.
To do this, first export your site content from Google Analytics for the last two years and import the CSV into Google Drive.
- In Google Analytics, navigate to Behavior > Site Content > All Pages.
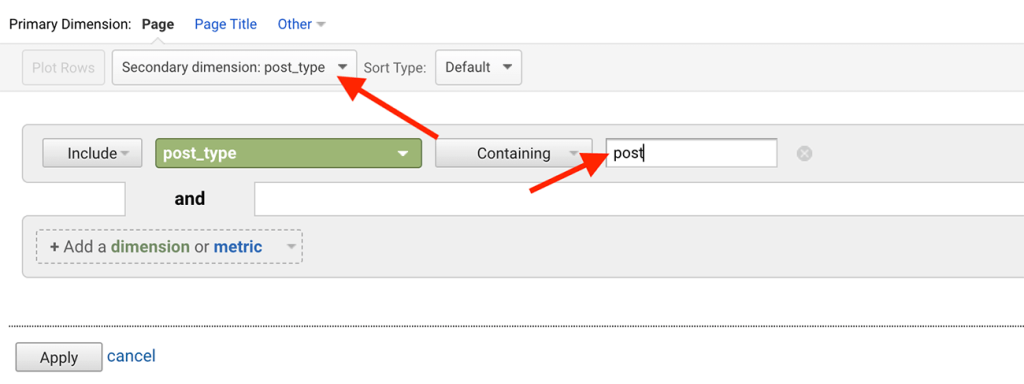
- If you have set up Custom Dimensions to track “post type”—via Google Tag Manager or directly in your Google Analytics tracking script—you can filter this list to only include ‘posts’ (the WordPress post type for your blog or article content).
- If you do not have this dimension set up, you may be able to target posts if you have a URL prefix in your URLs (such as the year, or a term like /blog/).
- If you can’t target posts alone, you can filter them out during the CSV cleanup process (later in this guide).
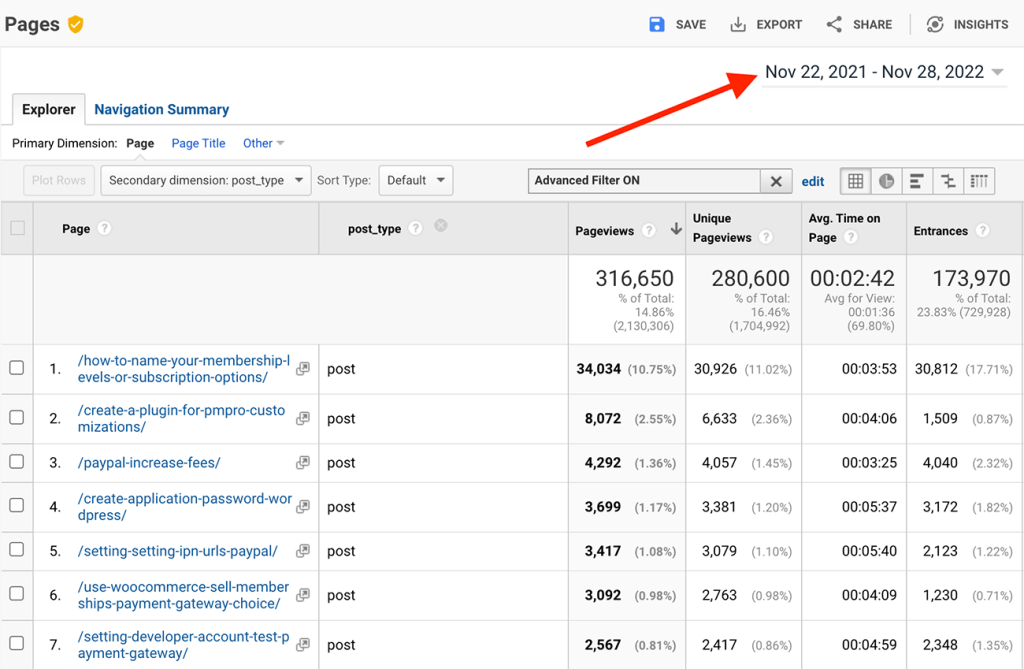
- Adjust the report time period to one that makes sense for you. We suggest going with a wide time frame so that you can capture the highest-performing content (not just what’s most recent).
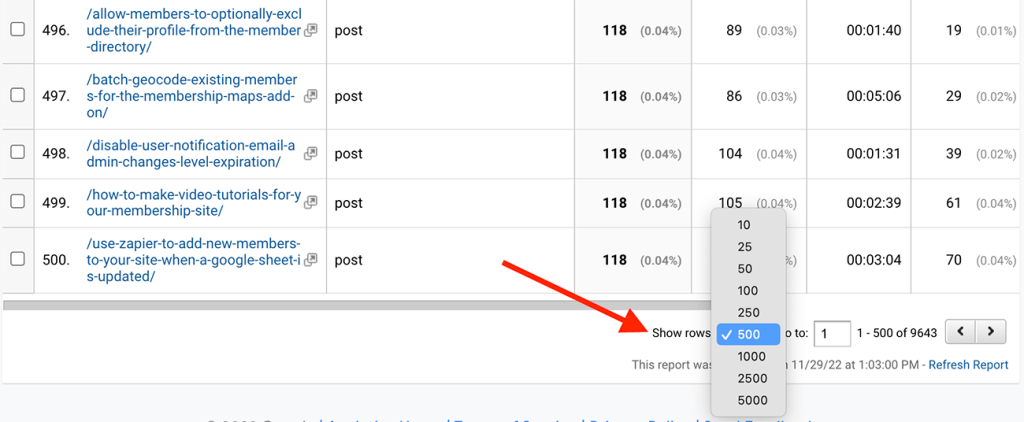
- The export will only include the visible rows on the screen (not the full result), so before you export, adjust the number of shown rows at the bottom of the list in Google Analytics.
- Click Export and select either CSV to download to your computer or select Google Sheets to export right to Google Drive.

2. Decide How to Group Your Content
From here, you can start to identify the content you want to group together for your drip campaign. Depending on the nature of your campaign (and age of your content), you might want to spend a little time making any necessary updates to your posts (in some cases, completely refreshing them) before you start sending emails.
Identify the content that is relevant to new and existing members. Keep these posts in your spreadsheet and delete the rest. If you’re not sure, think about any posts you have that may be useful to someone in a specific audience segment—or someone at a specific point in their journey.
Some of your content may naturally fall into a category of posts that can be grouped in one email, while some of your top content is better sent as one amazing standalone post.
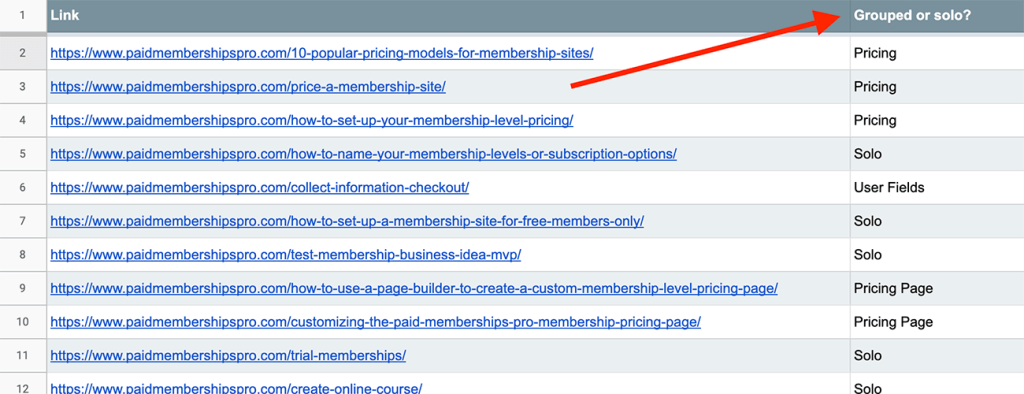
- Add a new column to your spreadsheet for “Grouped or Solo Email”.
- Add the word “solo” to any post that you know should be sent as a single email.
- Add a tag or keyword (to match similar posts) to any post that you want to group with another post.
- Sort the spreadsheet by the “Grouped or Solo Email” column and review.
- Make adjustments to any posts that feel out of place, or should be in their own email or part of another group. If you have too many posts in one group, separate them. The goal is to make your content digestible, not overwhelming.
- Do a final sort by the “Grouped or Solo Email” column.
3. Choose a Priority Order or Sequence for Your Emails
You might find that some of your posts are more introductory, and others are in-depth and better suited for subscribers at a later stage. New list subscribers often want the “new user stuff,” while subscribers who stick around for a few months are ready for the deep dives and late-stage topics.
- Add a new column to your spreadsheet for “order”.
- Order posts by number (by adding numbers in this column).
- If the post is part of a “group”, add the same number for each post in the group to your “order” column.
- Sort the spreadsheet by the “order” column and review.
- Make adjustments to any posts that feel out of place.
- Do a final sort by the “order” column. And that’s it.
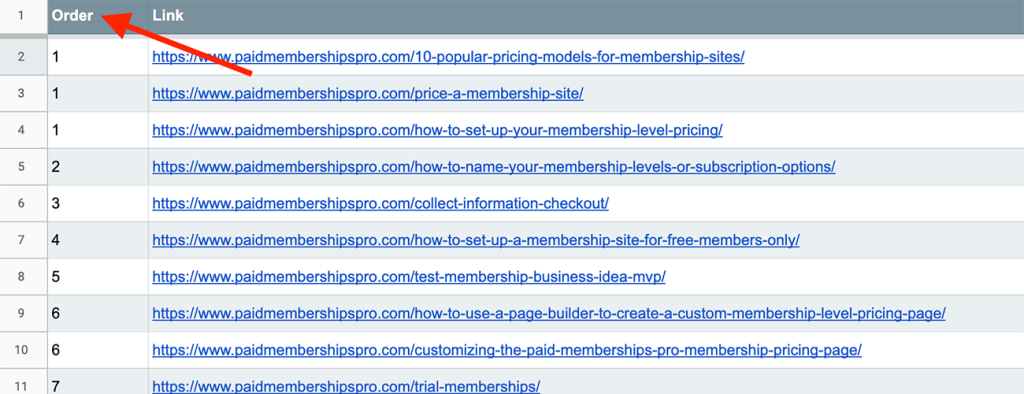
Once you’ve got your priority order set, you have everything you need to create your drip campaign. Now, you can start queueing up your email automations.
4. Schedule Your Drip Campaign and Email Automations
Once you’ve decided how to organize your content and what order you’ll send it in, it’s time to schedule your drip campaign and email automations.
You can do this at specific timed intervals, where content is sent to subscribers according to a schedule you set. For example, at PMPro, we’ve set up a weekly top blog content automation that sends every Wednesday at 10am ET.
You can set up your schedule however you want. You can also base the delivery on specific triggers or actions.
How to Monitor the Performance of Your Drip Campaign
So, you’ve scheduled your drip campaign. Now what?
It’s important to monitor how well your drip campaign is performing, so you know if you need to make any changes. You can do this by watching:
- User engagement metrics. For example, check your open rate to see how many people are opening your emails, and your click-through rate to see how many of those people are actually clicking through to your website. While you can’t perfectly monitor whether your emails are arriving to their main inboxes or a filtered tab, you can check yourself, ask friends, or survey followers of your content to see where it’s going.
Note: If you find out that your content is getting filtered—for example, to the Promotions tab in Gmail—then you should consider adjusting the email subject line or body content. - Unsubscribes (churn). How many people are unsubscribing from your email list? At what point in the drip campaign are they unsubscribing? Is there a specific post that is losing people? Is the sequence timing off? Are you sending emails too often or not often enough?
Be sure to revisit underperforming pieces of content in your drip campaign. You might end up removing a post from the sequence, or adjusting the subject line, email copy or layout, or refreshing the post entirely.
How to Leverage Drip Campaigns in Your Marketing
Drip campaigns can actually provide a lot of marketing value. For example, people often sign up for mailing lists if they know they’re going to receive valuable sequences of content relevant to their needs and interests.
You can use drip campaigns as lead magnets, or free resources that bring traffic to your paid site. If you don’t already have a free level of membership, you could create one with drip content alone.
Remember that giving free members a look inside your content, voice, brand, style, and method is a great way to show them how much more value they will get as a paying member!
A drip campaign also helps you to segment your audience. You can tag users based on their interaction with the campaign, including what they open and what they click on. This helps you identify things like user interests and experience level, for example.
This kind of profiling will help you market the right products and services to your audience. The more you know, the better!
Conclusion
Drip campaigns are particularly valuable tools when it comes to maximizing the impact of your content and marketing your email list. Automating emails and reusing your old content can save you a lot of time and effort, and helps your subscribers get the information they want and need.
Plus, the recurring content delivery increases user engagement and helps you monitor what people are engaging with, what’s causing them to churn, and what needs to be changed.
Monetize Your WordPress Blog with Paid Memberships Pro
Whether you’re adding a premium content subscription to an existing business or creating an entirely new blog or news website, PMPro has all the tools to help you earn a reliable income from your content without breaking the bank.
We know that a WordPress site has tons of moving parts. Choosing the right plugins, themes, hosting, third party services, design assets, and more can feel overwhelming.
Paid Memberships Pro is the most robust membership plugin to create a premium content subscription business on WordPress. Learn exactly what you’ll get — the plugins, the support, and the training — when you sell memberships on your blog or news site with Paid Memberships Pro.
