Payment subscriptions in Stripe can be edited directly from the Stripe Dashboard, giving administrators the ability to make different changes to a subscription.
Admins can change a member’s billing amount, adjust the next payment date, pause subscription collection, and more, all without having to make any changes in Paid Memberships Pro.
This guide explains how to update subscriptions in Stripe, and how to sync those changes to the member’s billing details in your membership site.
Locate the Subscription Transaction ID
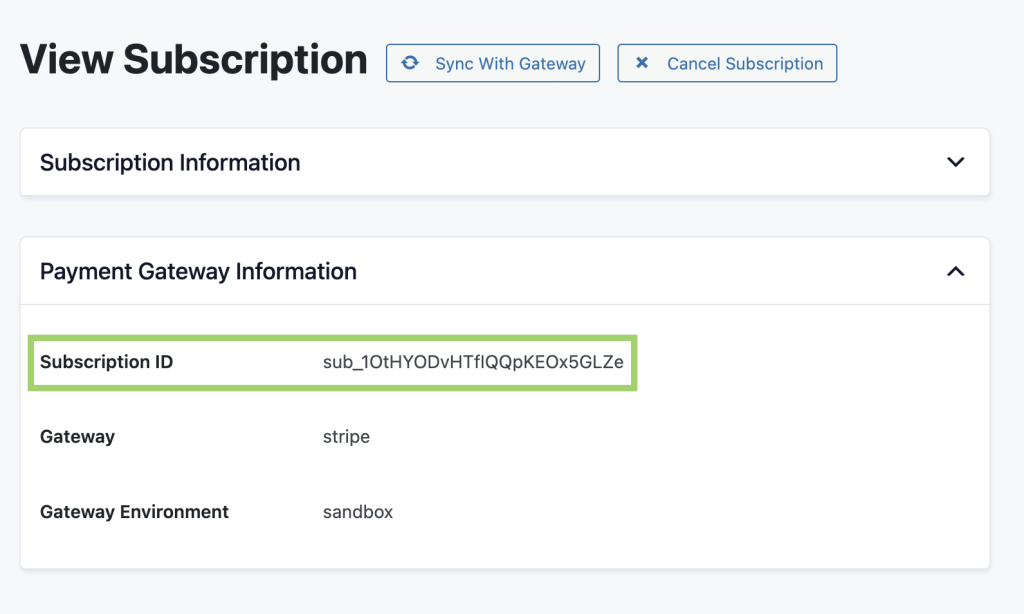
First, you need to find the Subscription Transaction ID for the member that you would like to update. This value begins with the letters sub_.
Follow the steps below to locate the Subscription Transaction ID and update the existing subscription in Stripe.
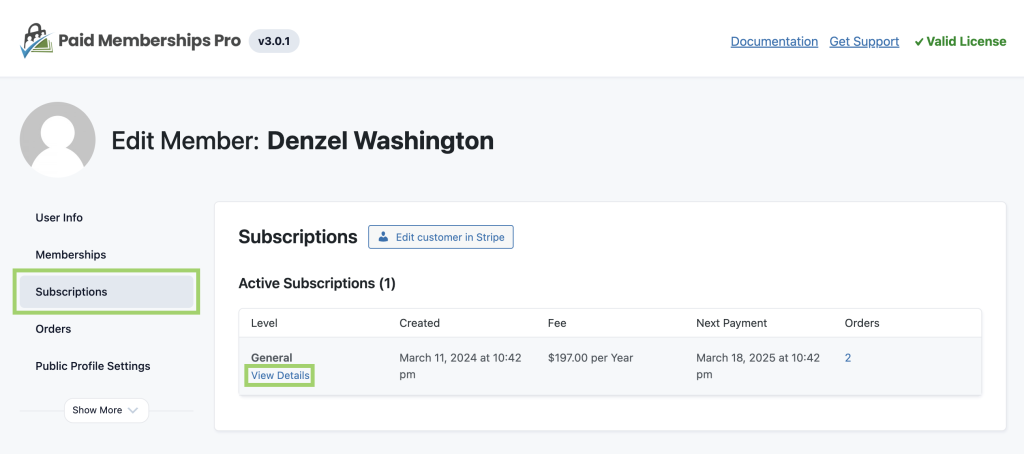
- Navigate to Memberships > Members > Edit Member.
- Select the “Subscriptions” menu item.
- Hover over the subscription you want to update and click “View Details“.

- Copy the Subscription ID found in the “Payment Gateway Information” section.

- Log in to your Stripe Dashboard.
- In the search bar, paste the Subscription Transaction ID that you copied earlier and select the subscription, or select the customers subscription you want to edit.
On this page, you will be able to see information about the chosen subscription such as:
- Billing amount
- Next payment date
- Previous payments
Update Billing Amount or Next Payment Date in Stripe
- Edit the subscription by selecting Actions > Update subscription.
- Click “Add product“
- In the new “Pricing” table row, select a price to begin charging the user.
- If the pricing does not exist, click on add new product and input the details, this could be the same as your level on PMPro or not.
- Next, select “Remove product” from the options dropdown next to the product that was originally associated with the subscription.
- To change the next payment date, click “Add trial“.
- If there is already a trial on the subscription, select “Update trial period” from the options dropdown next to the “Trial” field.
- Depending on whether the subscription is already trialing, either enter the number of days until you would like the next payment to be charged or select the date that you would like the next payment to be charged.
- Disable the “Prorate changes” option
- Then, select “Update subscription” in Stripe.
Optional: Update the Member’s Level
Once the subscription is updated in Stripe, you may need to update the Membership Level in Paid Memberships Pro.
- Navigate to Memberships in the WordPress Admin.
- Search for the member you previously edited in Stripe.
- Navigate to the Edit Member screen.
- Navigate to the Memberships panel and select Change membership.
- In the New Membership Level dropdown menu, select the new desired level.
- Within the Current Subscription dropdown menu, select “Keep subscription active”.
- Select “Change membership” to save the new membership level.
- Navigate to the “Subscriptions” panel and “View details”.
- Select “Change subscription level”.
- From the dropdown menu next to “Membership level”, verify that the desired membership level is displayed, then click “Update subscription level”.
Optional: Sync Subscription Updates with PMPro
The last few steps are optional. You can either wait for the Stripe and PMPro to sync or you can manually force a sync.
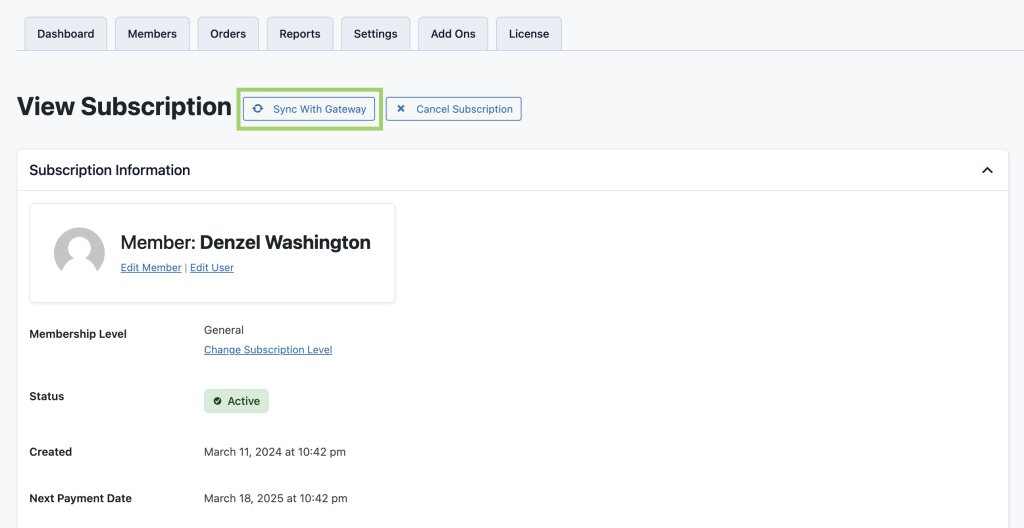
- Navigate back to the “View Details” page from the active subscription in your PMPro site.
- Click the “Sync with Gateway” button.
- This action updates data in PMPro about the subscription, such as the next payment date and billing amount.


