Elevate your analytics game with the Google Analytics Integration for PMPro. This powerful tool bridges your membership site with Google Analytics 4 (GA4), offering insights that drive informed decisions.
Key Features
- Ecommerce Conversion Tracking: From viewing membership options to successful purchases, track every vital user interaction.
- Deep Pageview Data Tracking: Discover more about the content viewers are seeing, whether it’s the post’s author, category, or post type (CPT).
- Analyze Site Activity By User Property: Track usage by membership level and user ID, which is especially valuable to help your understand high-value pages and explore what is most valued by your top members.
- Easy Configuration: A straightforward setup, with options to tailor membership level tracking and exclude admin activity.
- Self-sufficient: Say goodbye to Monster Insights or Google Site Kit. This Add On is your all-in-one solution for Google Analytics integration.
Video: How to Use the Google Analytics Add On for Paid Memberships Pro
Measure Ecommerce Conversion Events
This Add On tracks four conversion events:
view_item: Someone visited the membership levels page.add_to_cart: Someone viewed the single membership level checkout page.begin_checkout: The user interacted with the checkout page form (e.g. entered their user name or email address).purchase: The membership checkout was successful.
Track Custom Definitions
Custom definitions are data points that relate to the user, the event, or the item purchased. These data points enable you to report on information about your users and how they interact with your website.
Think of custom dimensions as a way to send unique data values that aren’t available through the predefined dimensions and metrics in GA4. We track two types of custom definitions in this integration: event parameters and user properties.
Event Parameters To Track
author: The author of the post content.category: The post’s single category or a comma-separated list of categories if it has more than one category term.post_type: The single post’s post type that was viewed, such aspostorpage.
You can add additional event parameters to the tracking code using the pmproga4_custom_dimensions filter. Or, you can remove default parameters using the pmproga4_default_custom_dimension filter.
User Properties To Track
membership_level: The current membership level (user property) for the logged in member. This field will show in GA4 as either the ID of the membership level or the value ‘no_level’ for non-members.
You can add additional user properties to the tracking code using the pmproga4_user_properties filter. For example, you may want to add a non-identifying user field you collect about your members during checkout or on their frontend profile.
Track User ID
This Add On also tracks the current logged in user (if present) by User ID. You can use this field to reference users between GA4 and your membership site, or in other apps that are connected to the same GA4 property.
To ensure your GA4 property is set up to track User-ID, you must enable and/or verify the reporting identity in GA4 property settings. See more information in the Google Analytics Documentation on User-ID here.
Installation
You must have the Paid Memberships Pro plugin installed and activated with a valid license type to use this Add On.
- Navigate to Memberships > Add Ons in the WordPress admin.
- Locate the Add On and click Install Now.
- To install this plugin manually, download the .zip file above, then upload the compressed directory via the Plugins > Add New > Upload Plugin screen in the WordPress admin.
- Activate the plugin through the Plugins screen in the WordPress admin.
Configure Plugin Settings
First, make sure you’ve installed and activated both PMPro (Paid Memberships Pro) and the Google Analytics Integration Add On. Now your can configure basic settings for this integration.
There are two important steps to complete setup:
- Configure plugin settings on the Settings > PMPro Google Analytics screen in your WordPress admin.
- Set up Custom Definitions within your Google Analytics 4 connected Property.
Connect Your Membership Site to Your Google Analytics 4 Property
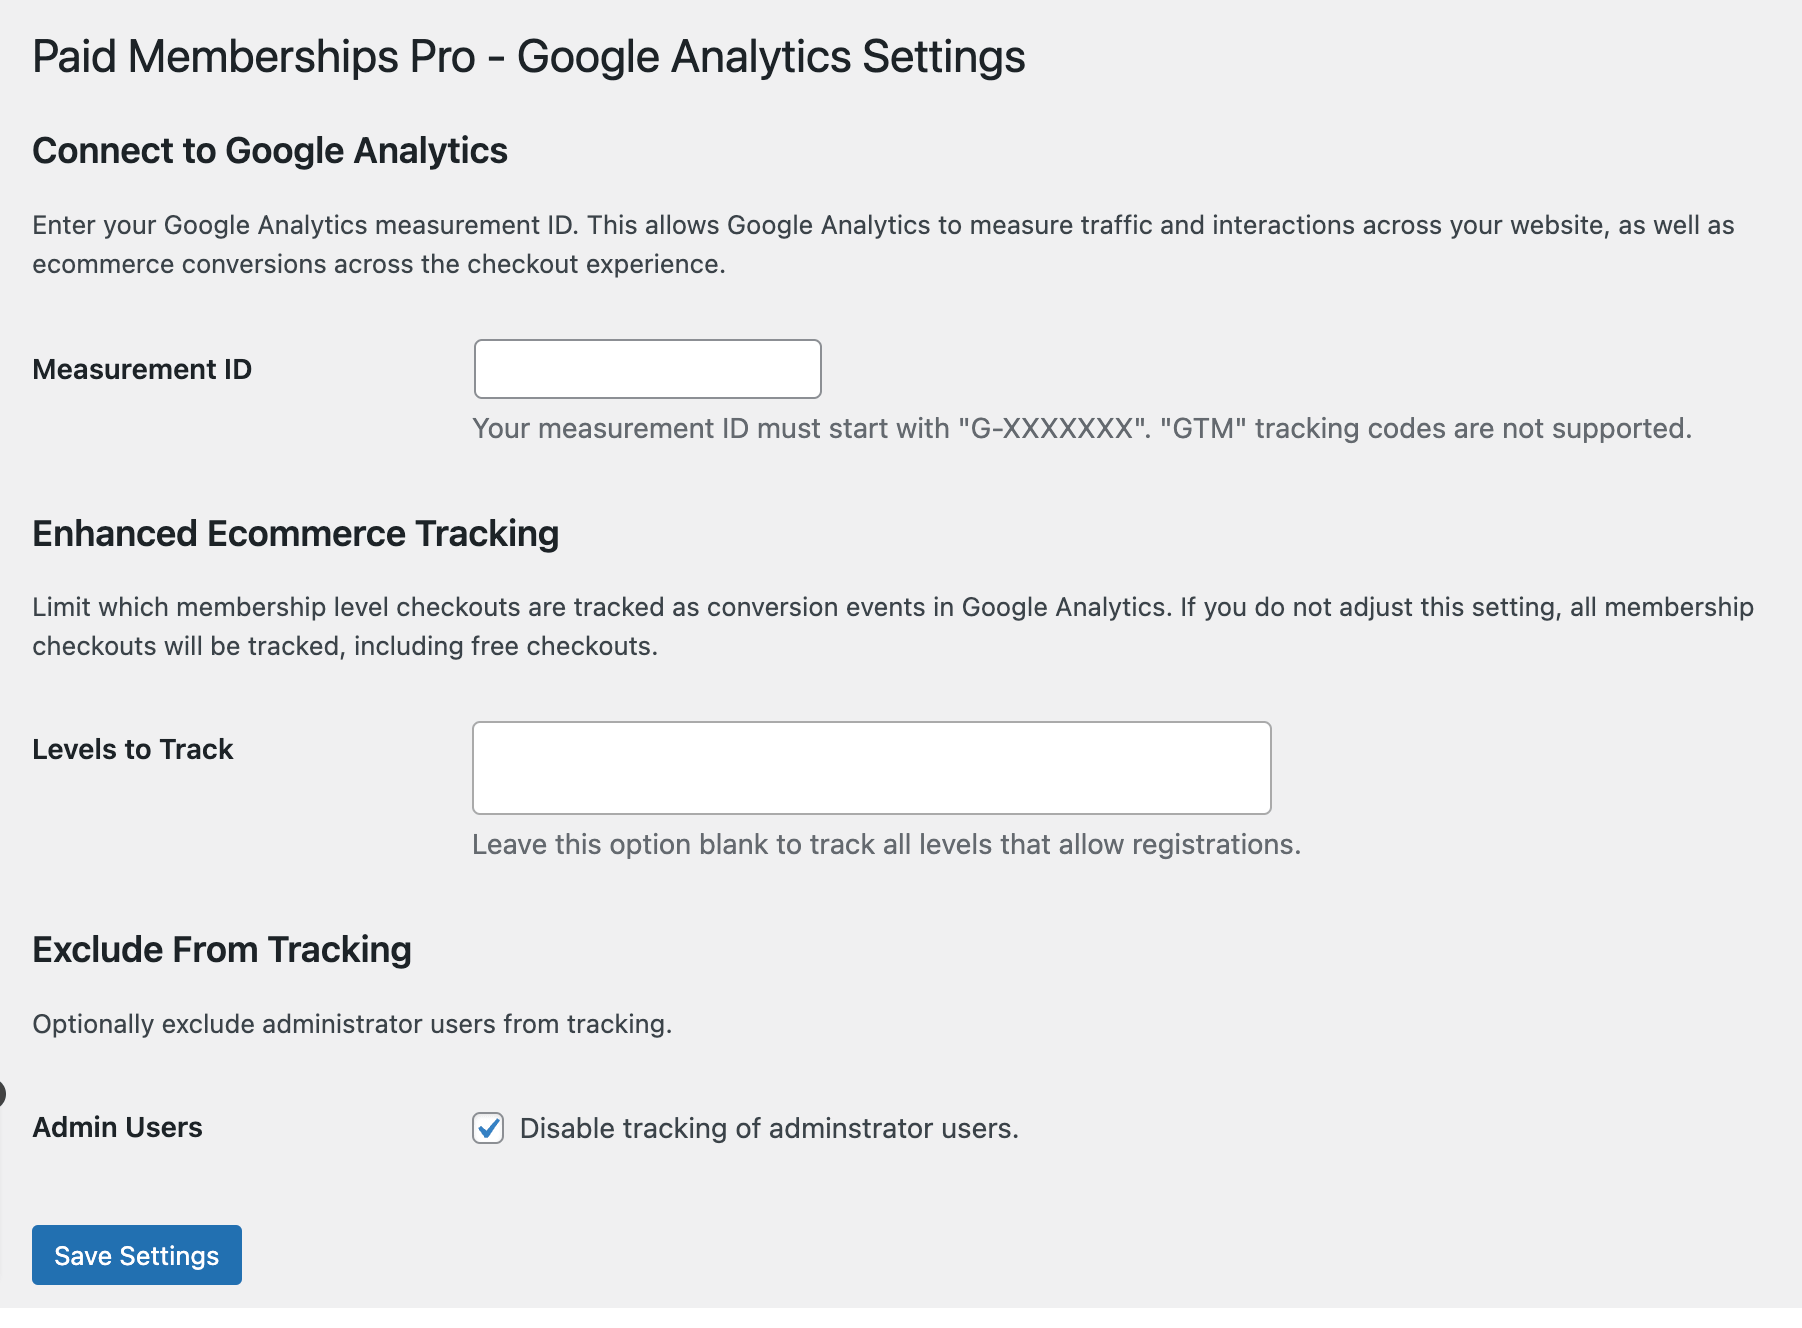
To connect Google Analytics to your PMPro-powered membership site, you’ll need your Measurement ID for the desired property in GA4. A Measurement ID is a unique identifier (e.g., G-12345) for a web data stream. We use this Measurement ID to send data from your membership site to a specific web data stream in your Google Analytics account.
How to Find Your Measurement ID
To find your Google Measurement ID (which must start with G-), do the following:
- Sign in to your Google Analytics account.
- Click Admin in the lower left corner.
- At the top of the Property column, select your property or create a new property from this column.
- In the Property column, click Data streams.
- Select the data stream for this website URL. If you do not have a data stream for your domain, select Add Stream.
- Find the measurement ID in the first row of the stream details.
- Copy and paste this ID into the Measurement ID field in your WordPress site settings.
- Save Settings.
Configure Other Settings
- Enhanced Ecommerce Tracking: Locate the option labeled Levels to Track. Here you will see a list of all your membership levels.
- To specify which membership levels you wish to track, start typing level names in the autocomplete field.
- For example, if you only want to track Premium and Platinum levels, enter only those level names.
- If you want to track all membership levels, including free memberships, leave all options unchecked (recommended).
- Exclude From Tracking: This optional setting allows you to exclude users with the Administrator Role from tracking. We recommend you check this setting to ensure your stats don’t include your admin activity.
- Check the box labeled Disable tracking of Admin-level users if you wish to exclude administrator users from tracking.
- This ensures that activities and checkouts from admins won’t skew your analytics data.
Once you’ve made your selections, scroll down to the bottom of the page and click Save Changes.
That’s it! With these settings configured, your PMPro site is now integrated with Google Analytics, tracking general site activity like sessions, landing pages, referrers, and more. The integration is also tracking the full ecommerce conversion experience for your membership levels.
Set Up Custom Dimensions in GA4
This Add On pushes custom information to the dataLayer, which can be used in GA4 to create custom reports and filter data. In Google Analytics 4, these variables are called Custom Dimensions.
- Log in to your Google Analytics Dashboard.
- Select the property that is using Google Analytics 4 (GA4) you would like to manage.
- Navigate to the Admin management screen.
- Select Custom definitions under the Property column.
- Click Create custom dimensions.
This Add On requires you to set up four custom dimensions:
- category: The category (single name or comma-separated list) of the single post being viewed.
- post_type: The post type of the content being viewed (i.e. ‘post’ or ‘page’)
- author: The display name of the post author.
- membership_level: The membership level ID of the current logged in user (fallback to ‘no_level’ for non-members and site visitors).
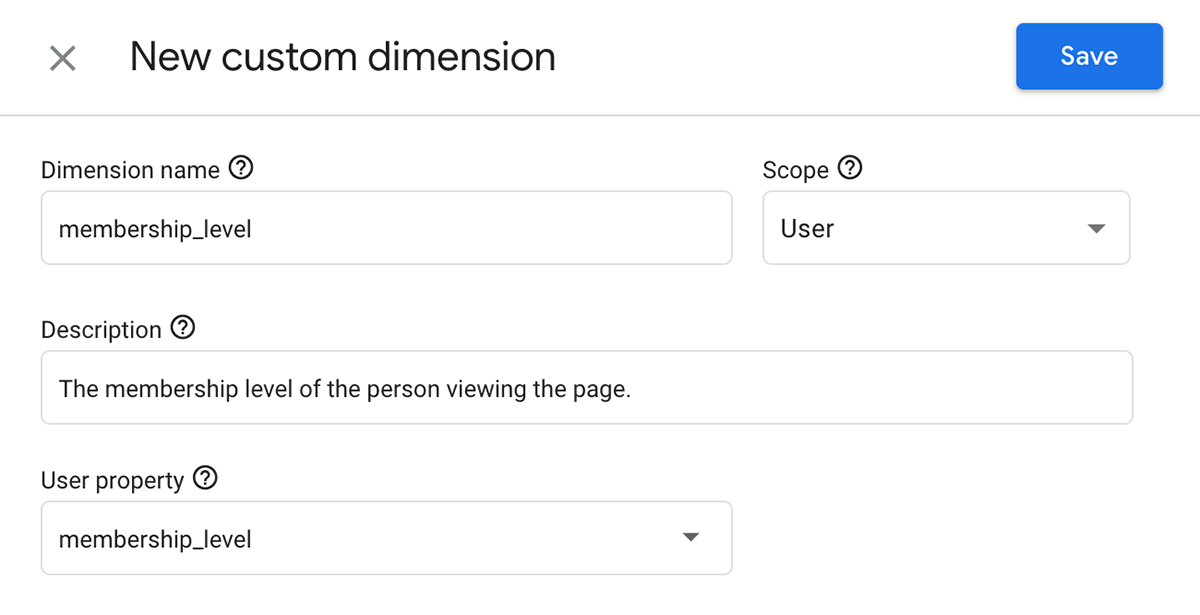
Here’s how to set up the membership_level dimension:
- Enter the Dimension name
membership_level - Set the Scope to User.
- Enter a basic description (for internal use only).
- Set the User property to
membership_level.

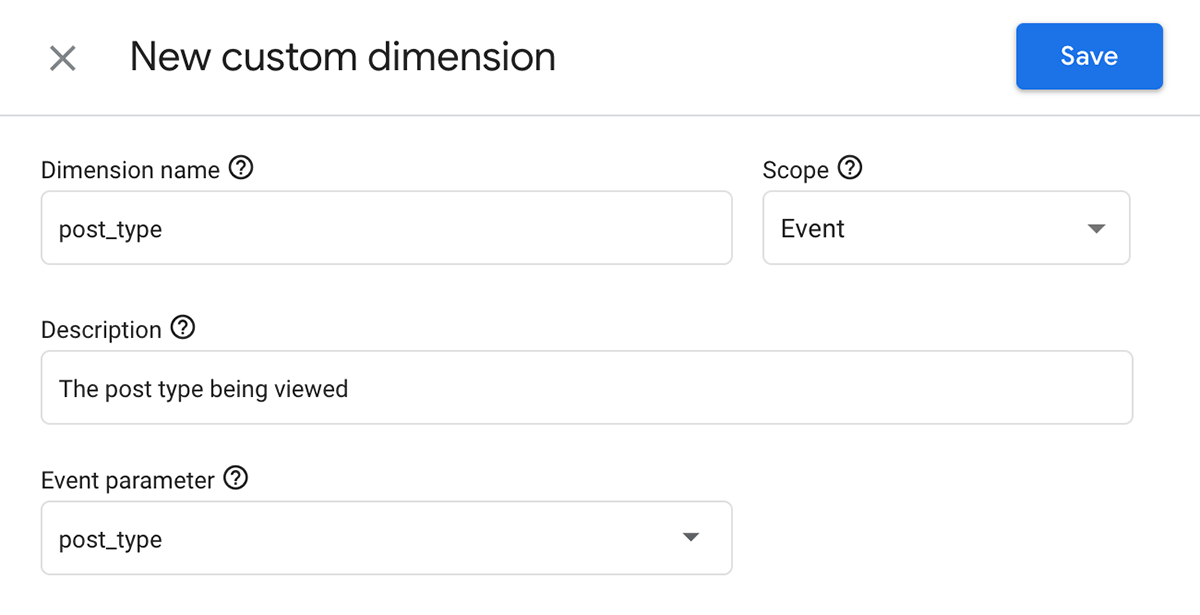
- Repeat these steps to create the other three dimensions in this Add On (
category,post_typeandauthor).- When you create these dimensions, set up the matching name and event parameter, but for the Scope field, select Event.

Testing Your Google Analytics Integration
Google Analytics takes a day to get a full picture of your tracking status. If you want to immediately test that the integration is properly connected, you can do so using the Google Tag Assistant tool here.
When using Tag Assistant, we recommend performing a test transaction (maybe using a free level or a paid level with a discount code) to ensure data is being sent and tracked correctly.
Action and Filter Hooks
apply_filters( 'pmproga4_dont_track', false );
Determines whether to halt tracking based on specific conditions.
apply_filters( 'pmproga4_script_atts', '' );
Filters the attributes applied to the Google Analytics script tag.
apply_filters( 'pmproga4_track_view_item_event', is_page( $pmpro_pages['levels'] ) );
Determines whether to track the ‘view item’ event based on specific conditions.
apply_filters( 'pmproga4_track_level_ids', $track_levels );
Filters the membership levels to be tracked for analytics purposes.
apply_filters( 'pmproga4_default_custom_dimension', array( 'post_type' => '', 'author' => '', 'category' => '' ) );
Sets up the default Custom Dimension data for Google Analytics.
apply_filters( 'pmproga4_custom_dimensions', $gtag_config_custom_dimensions );
Filters the custom dimensions to allow developers to add or remove custom dimensions.
apply_filters( 'pmproga4_default_user_properties', array( 'membership_level' => '' ) );
Sets up the default User Properties data for Google Analytics.
apply_filters( 'pmproga4_user_properties', $gtag_config_user_properties );
Filters the user properties to allow developers to add or remove properties.
Screenshots

This is a Standard Add On.
Standard membership includes all Standard Add Ons, unlimited premium support, automatic updates, and additional benefits.


