User-generated content (UGC) is a powerful way to build community, increase engagement, and add value to your membership site. WS Form and Paid Memberships Pro let members submit content through frontend forms. This workflow reduces your team’s content-creation burden while providing a more diverse content library for your community.
In this tutorial, we take you through each setup step:
- How to create the submission form in WS Form
- Several methods to configure form access permissions and limit submissions
- Plus, various ways to display your members’ contributions.
By the end, you will have a streamlined workflow for capturing, moderating, and showcasing valuable UGC on your site.

Step-by-Step Instructions: Accept Member-Submitted Content Using WS Form
Before starting, ensure you have the following plugins installed and activated on your membership site:
1. Start by Creating a Post Management Form
WS Form’s Post Management Add-On generates a fully configured post submission form with just a few clicks.
- Navigate to WS Form > Add New in the WordPress admin.
- Select the Post Management tab at the top of the page.
- Choose a Post Type template or start Blank.
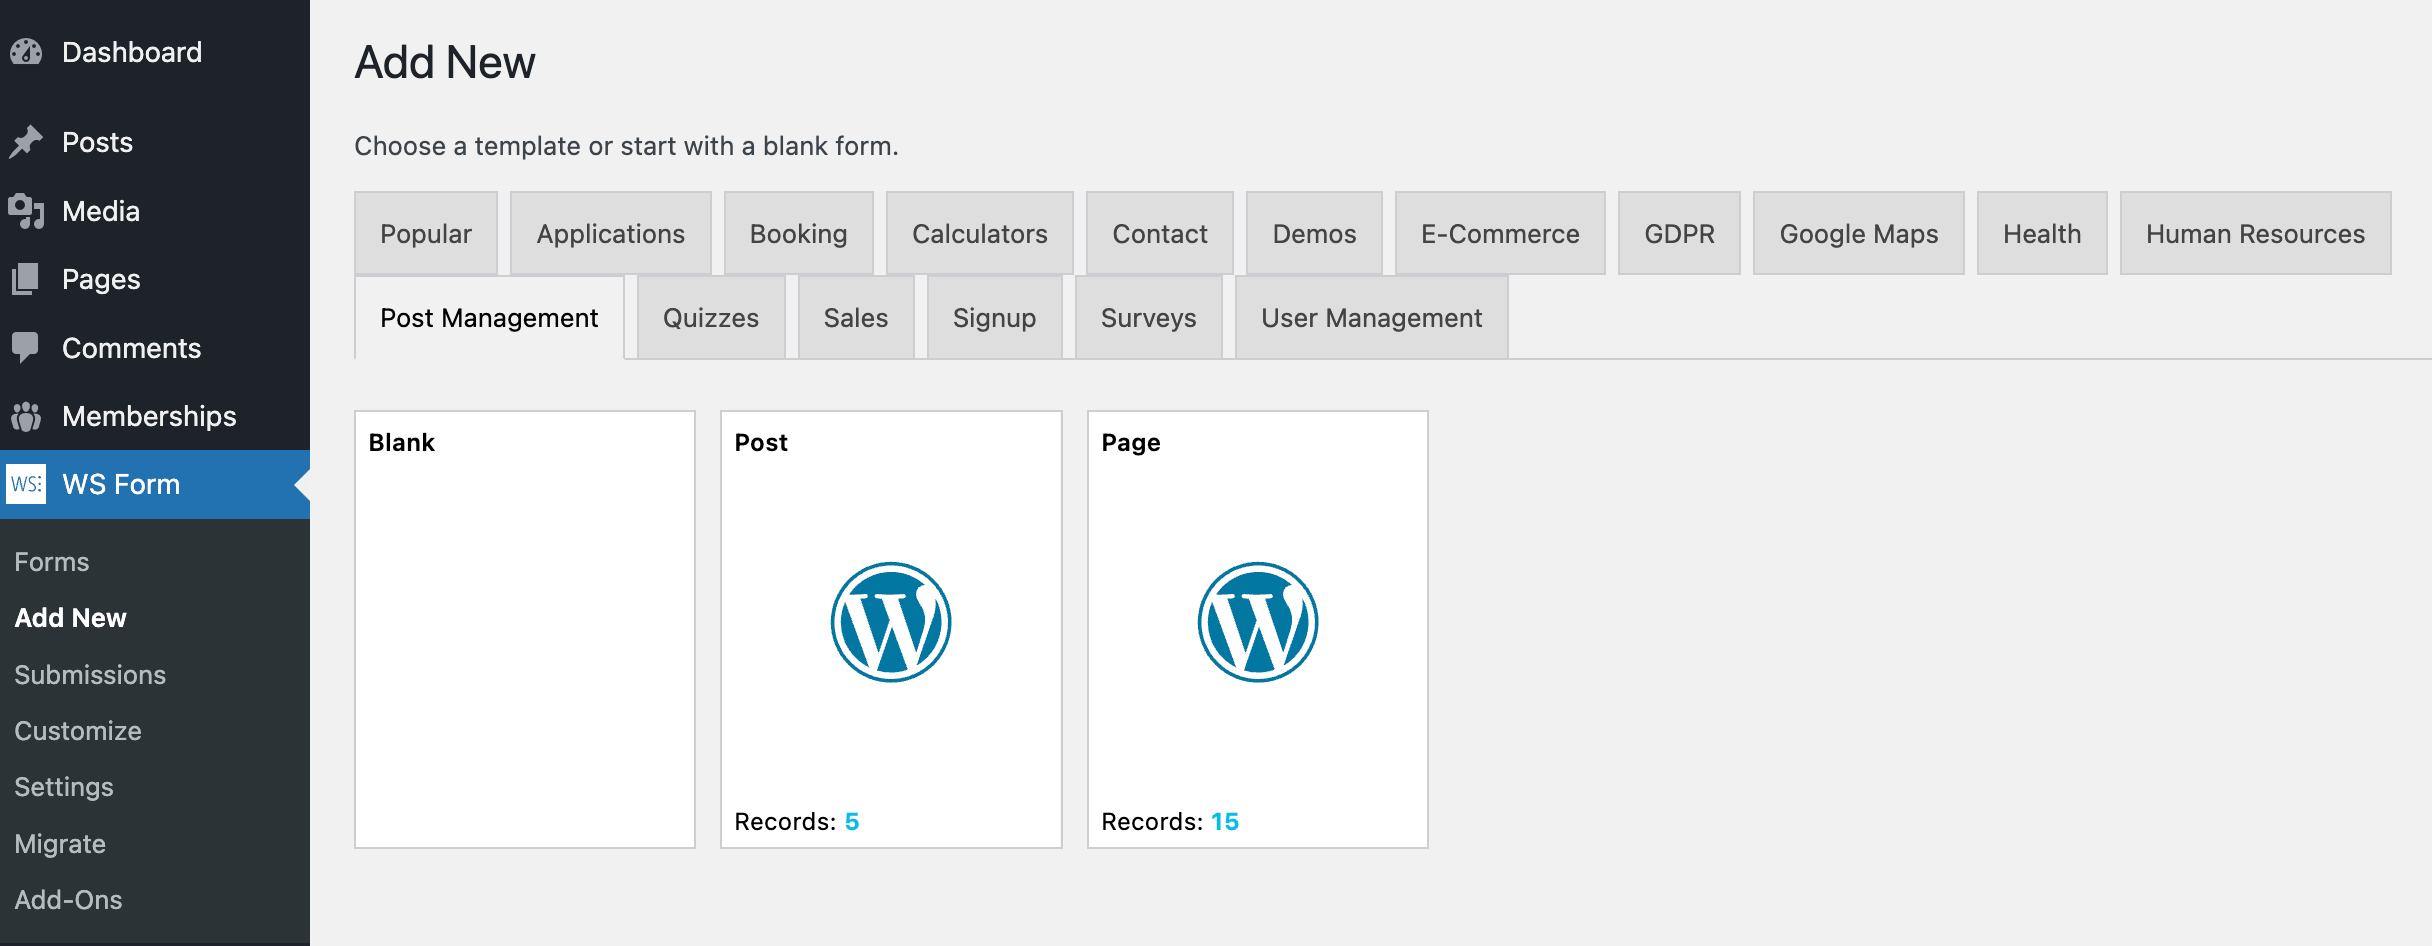
- WS Form will automatically create a form with mapped fields for the post type you selected.
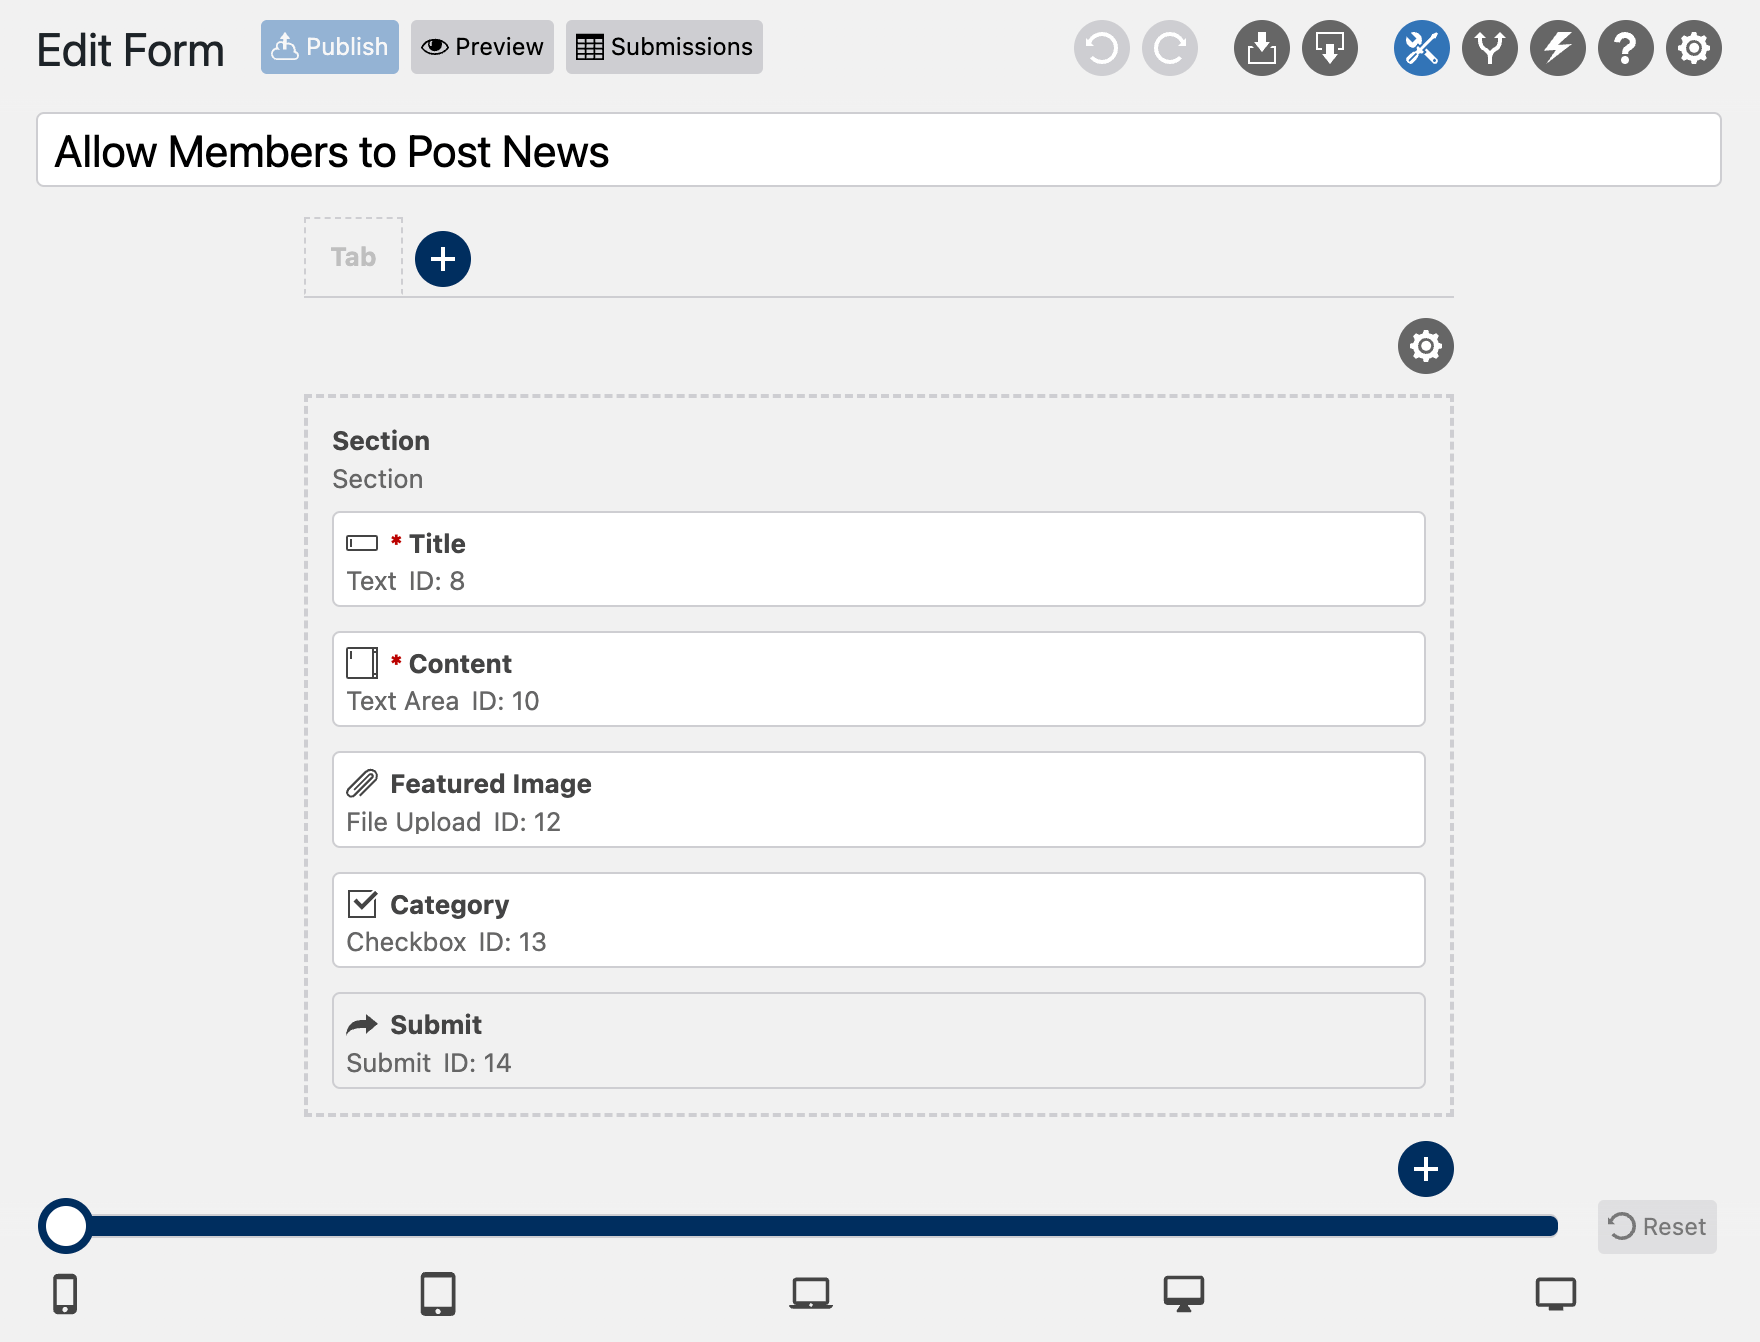
- Customize the default form fields based on the information you want members to submit. Some popular fields to collect include:
- Post Title
- Post Content
- Categories
- Tags
- Featured Image
- Save changes to the form before moving on to the next steps of this process.
Note: WS Form can map custom fields added by plugins like Advanced Custom Fields (ACF) or other fields plugins. This tutorial does not go into the process of mapping form fields to custom fields. Read more about using ACF with WS Form here.
2. Protect Your Form for Members-Only With Paid Memberships Pro
While you could make your form totally public and allow anyone to submit content, most membership sites want to preserve the quality of their content by or gating access to premium features.
For this reason, we recommend protecting your post submission form for logged-in members only.
The steps below offer a few methods to ensure that only specific members can access the submission form using Paid Memberships Pro.
Protect the Entire Page for Members Only
- Create a new page in WordPress (e.g., “Submit Your Post”).
- Add the WS Form shortcode to this page to display the form.
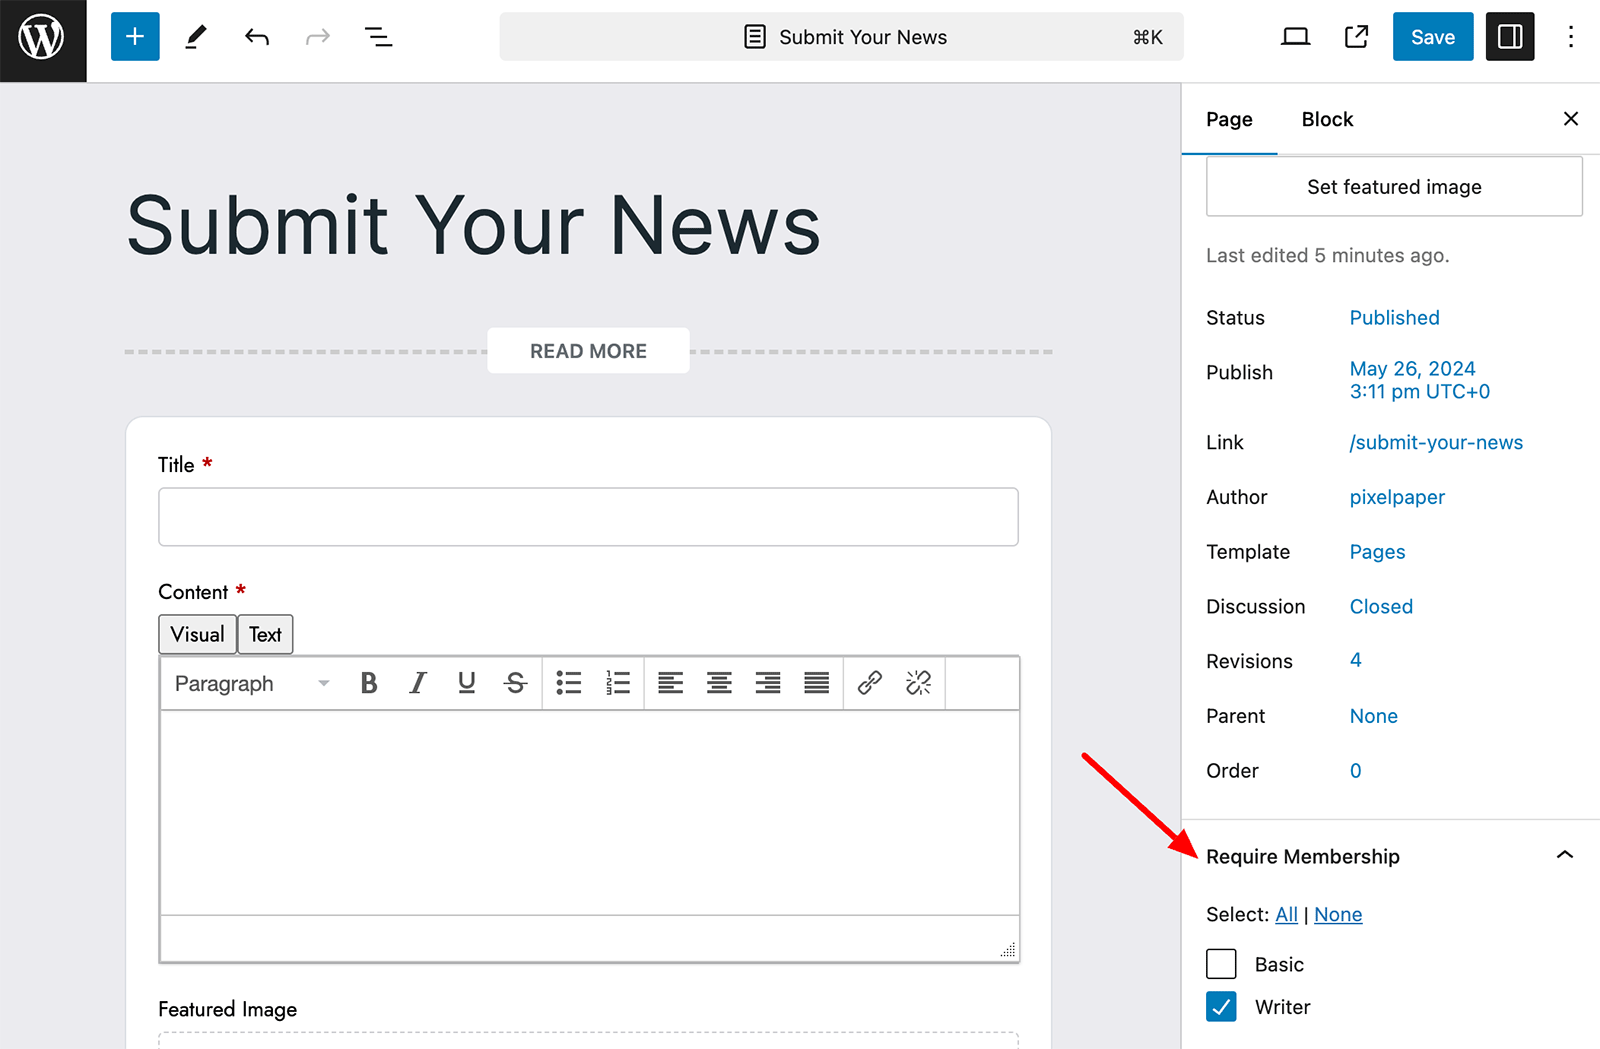
- From the page editor, use the Require Membership meta box to restrict page access to specific membership levels.
Control Form Visibility Using the Block Editor
- Add a new page or post.
- Insert the WS Form shortcode in a content block.
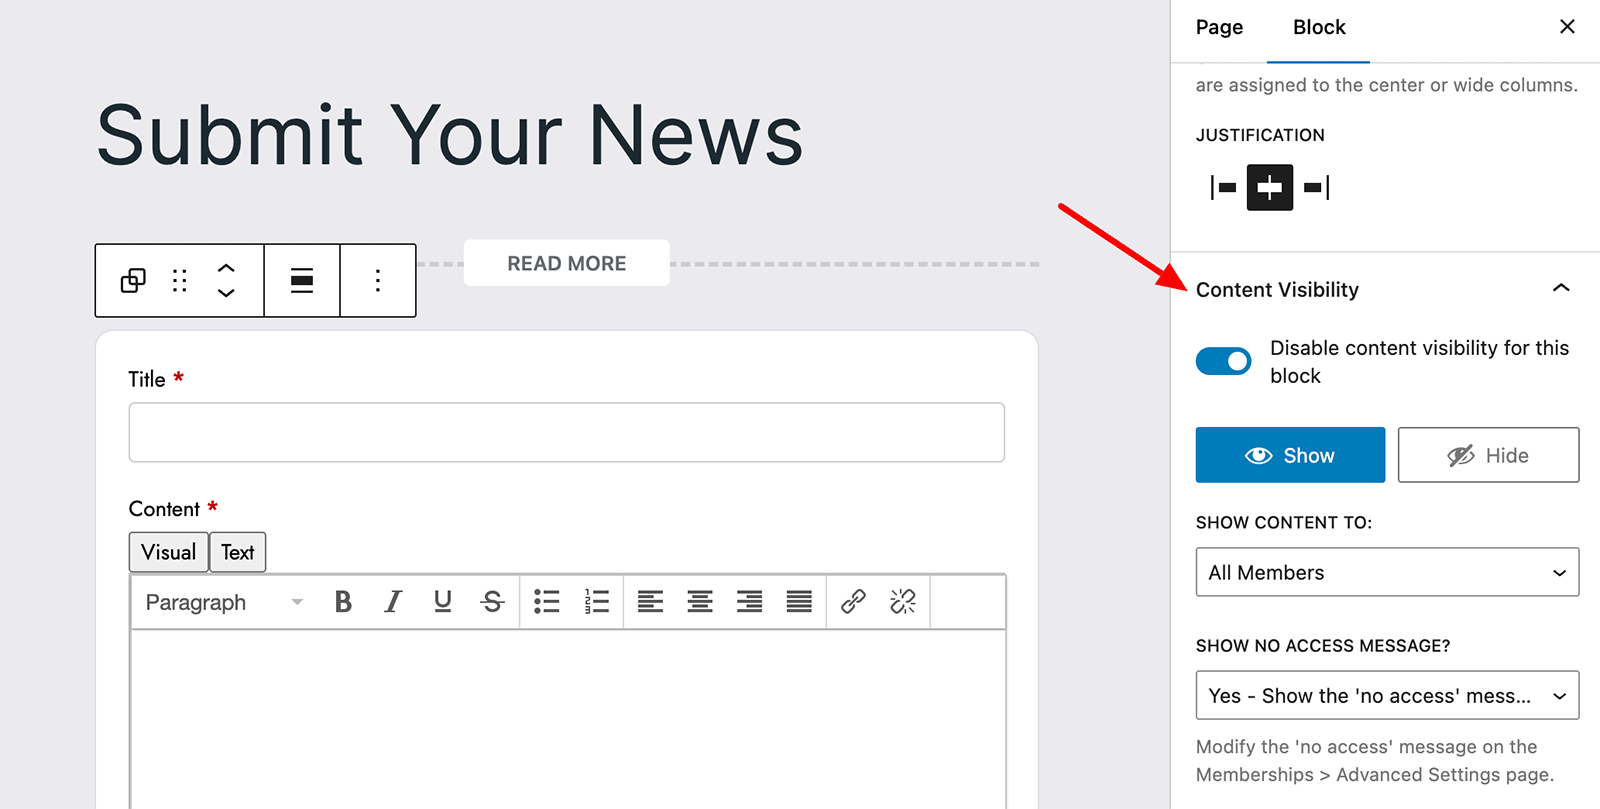
- Turn on the Content Visibility option in the block settings.
- Adjust the settings for which members can view the form.
Use Membership Shortcodes to Restrict Access
- Add a new page or post.
- Insert the WS Form shortcode in a shortcode block.
- Wrap the WS Form shortcode with the shortcode.
- Adjust the levels as needed to target specific membership tiers. For example:
[membership level="1"]
[ws_form id="123"]
[/membership]
3. Testing and Final Touches
Before going live with any new feature on your membership site, it is recommended to test the complete workflow as a non-admin user. Once your form setup is ready, here’s how to ensure everything works smoothly:
- Sign up as a new member or log in as a test user.
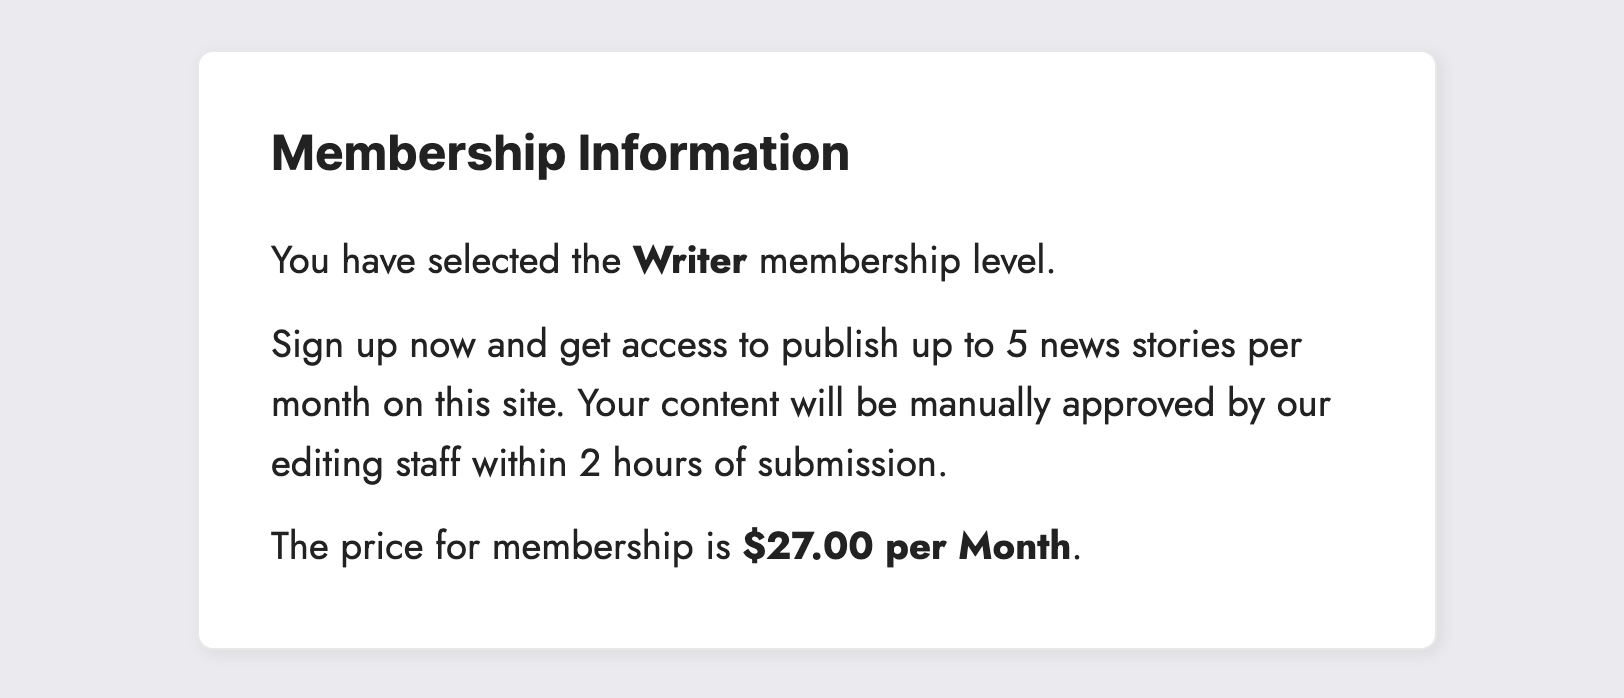
- Were the members-only benefits of being able to submit content clear to you on the pricing page? On the checkout page?
- Navigate to the content submission form.
- Was it easy to find the form to submit content to the site?
- Go through the submission process.
- Fill out the form fields.
- Test submitting the form with incomplete content.
- Do you approve of the contextual error or success messages?
- If your form is set to immediately publish submissions:
- Check that the submission appears as intended in your site.
- If your form sets submissions to draft or pending status:
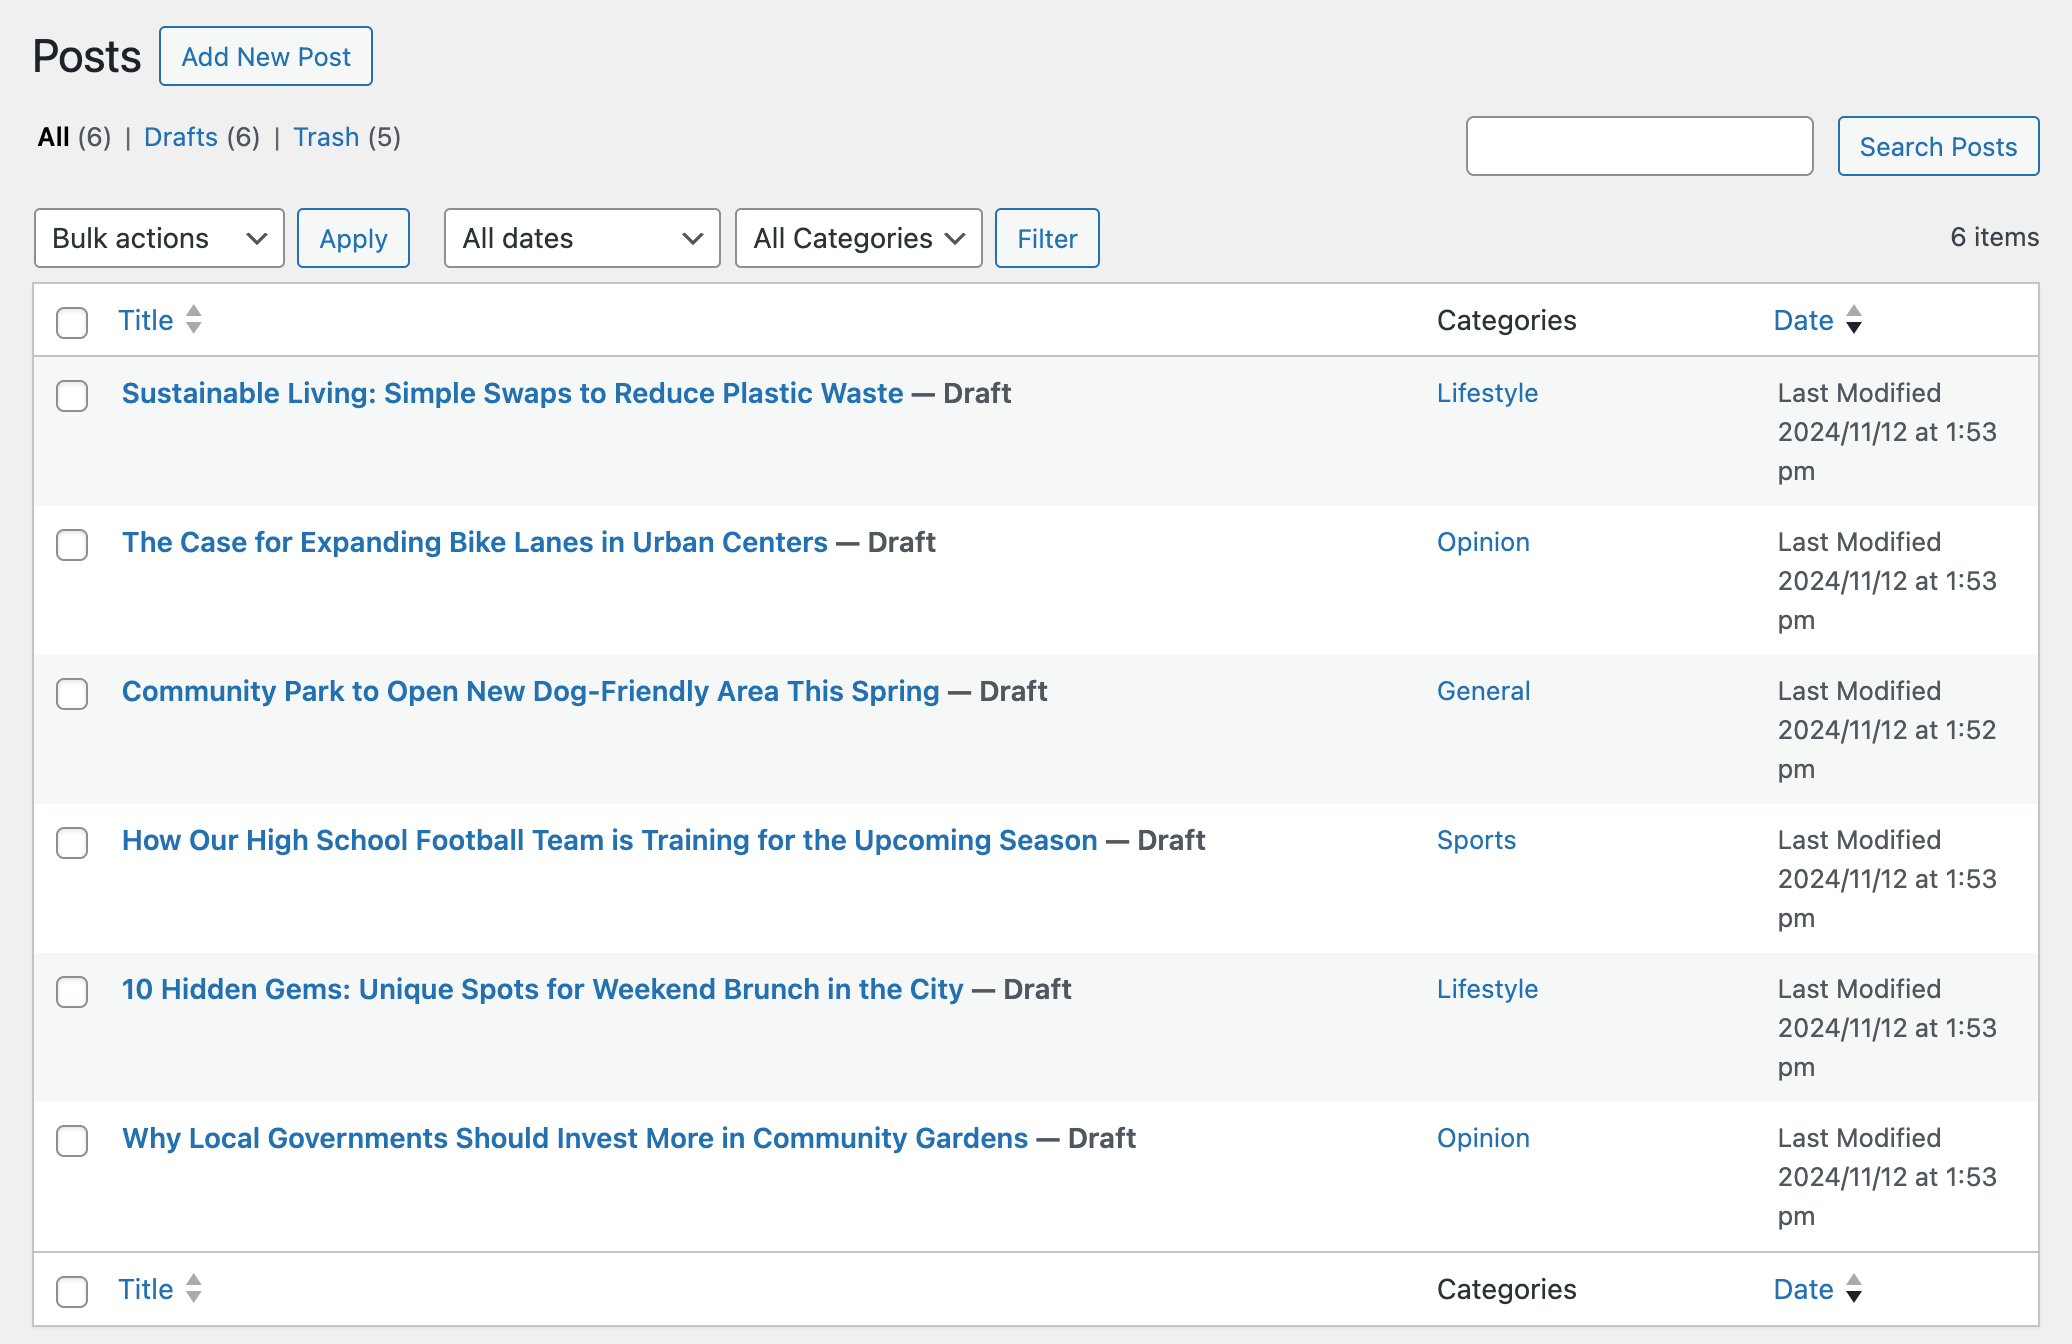
- Log back in as the site admin and check the Posts or CPT admin screens for the submitted content.
- Approve the content by changing the status to Publish.
- Check that the submission appears as intended in your site.
As an added precautionary step, you can also visit the submission form as a site visitor or as a logged-in user without the correct level of access. Make sure your second test account cannot access the form.

4. Member Post Submissions Are Live
At this stage in the setup, you have a functioning frontend WS Form form that accepts member-submitted content.
Only specific logged-in members with permission can see the form and submit posts.
You have validated the form submission process and user experience as a non-admin and are happy with how the workflow functions.


Power Your Publishing with a Platform You Can Control
Paid Memberships Pro is the best tool for online publishers: an open source WordPress plugin that transforms your blog or news site into a revenue-generating platform.
Tailor your site to engage readers, monetize content, and grow a loyal subscriber base. Give your subscribers the premium content they seek and earn a reliable income with a totally independent online business.
More Ways to Customize Member-Submitted Content With WS Form
The rest of this guide offers more ways to customize the submission process. There is a lot to think about when it comes to accepting content from your members.
Keep reading to learn about WS Form settings to set post status for new submissions, limit the number of submissions, and how to format user-generated content on the frontend of your site.
Configuring the Submitted Post Status in WS Form
The WS Form Post Management Add-on lets you change the default status for new post submissions.
This is an important feature to get right—most site owners do not want member-submitted content to immediately go live on their site.
Here’s how to set the submissions form’s default post status:
- Navigate to WS Form in the WordPress admin.
- Select the form to edit.
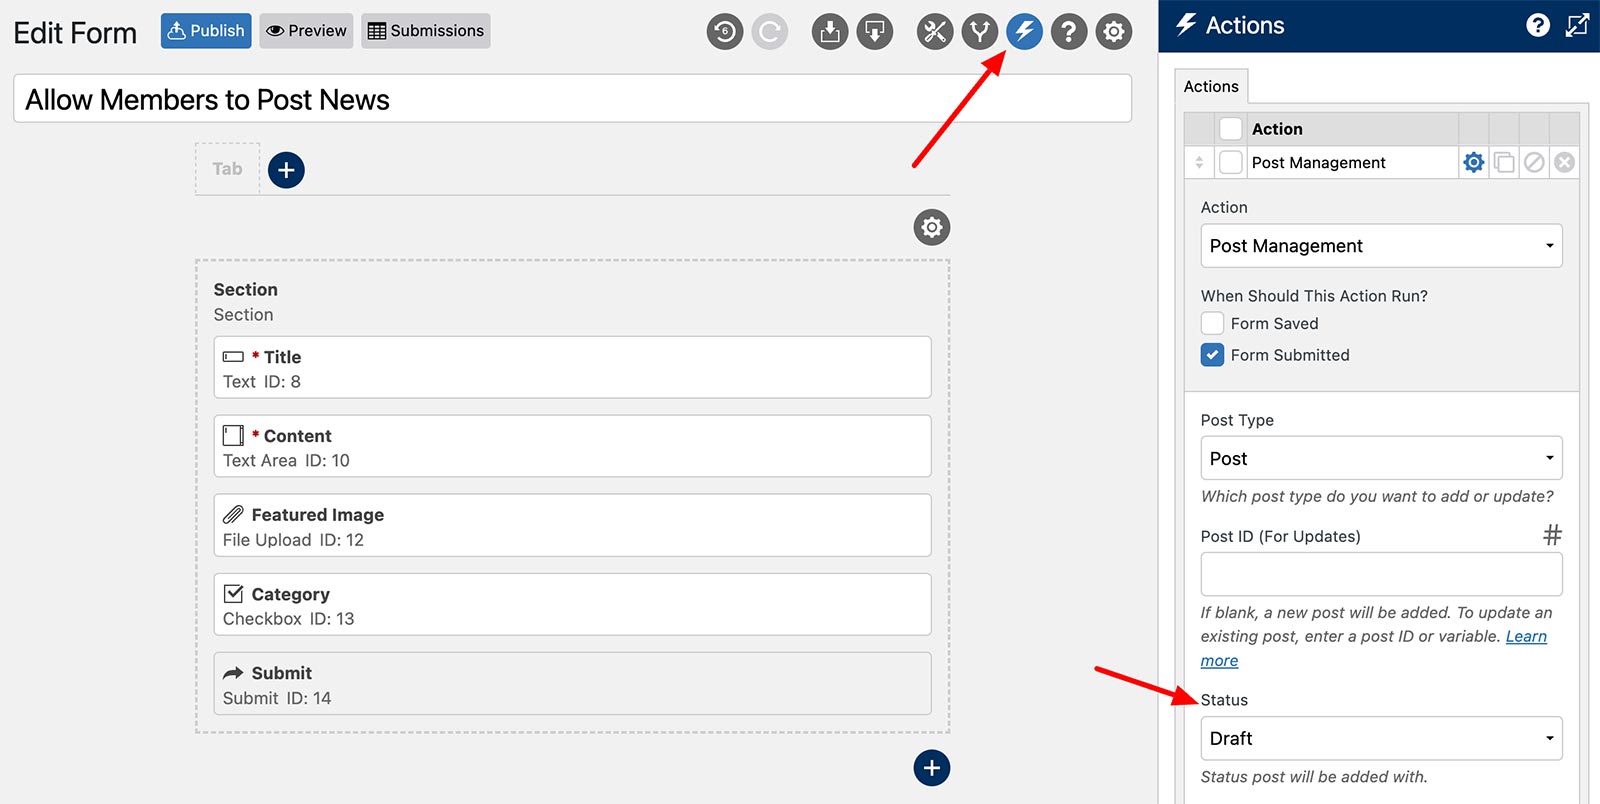
- From the form editor, select the Actions button at the top of the page (lightning bolt icon).
- Select the Post Management action and then locate the Post Status setting.
- Set the default status for new submissions. Most sites should manually review submissions, so choose “Pending” or “Draft”.
- WS Form does offer a way for users to edit their previous form submissions. This guide does not explore the steps to support this, but it is possible if you would like members to be able to edit their content after you have approved it.
- Save changes to the form.
Limit Number of Submissions for All Members or by Membership Level
WS Forms supports unlimited form submissions, but there are a few ways to limit the number of submissions a user can make.
- Navigate to WS Form in the WordPress admin.
- Select the form to edit.
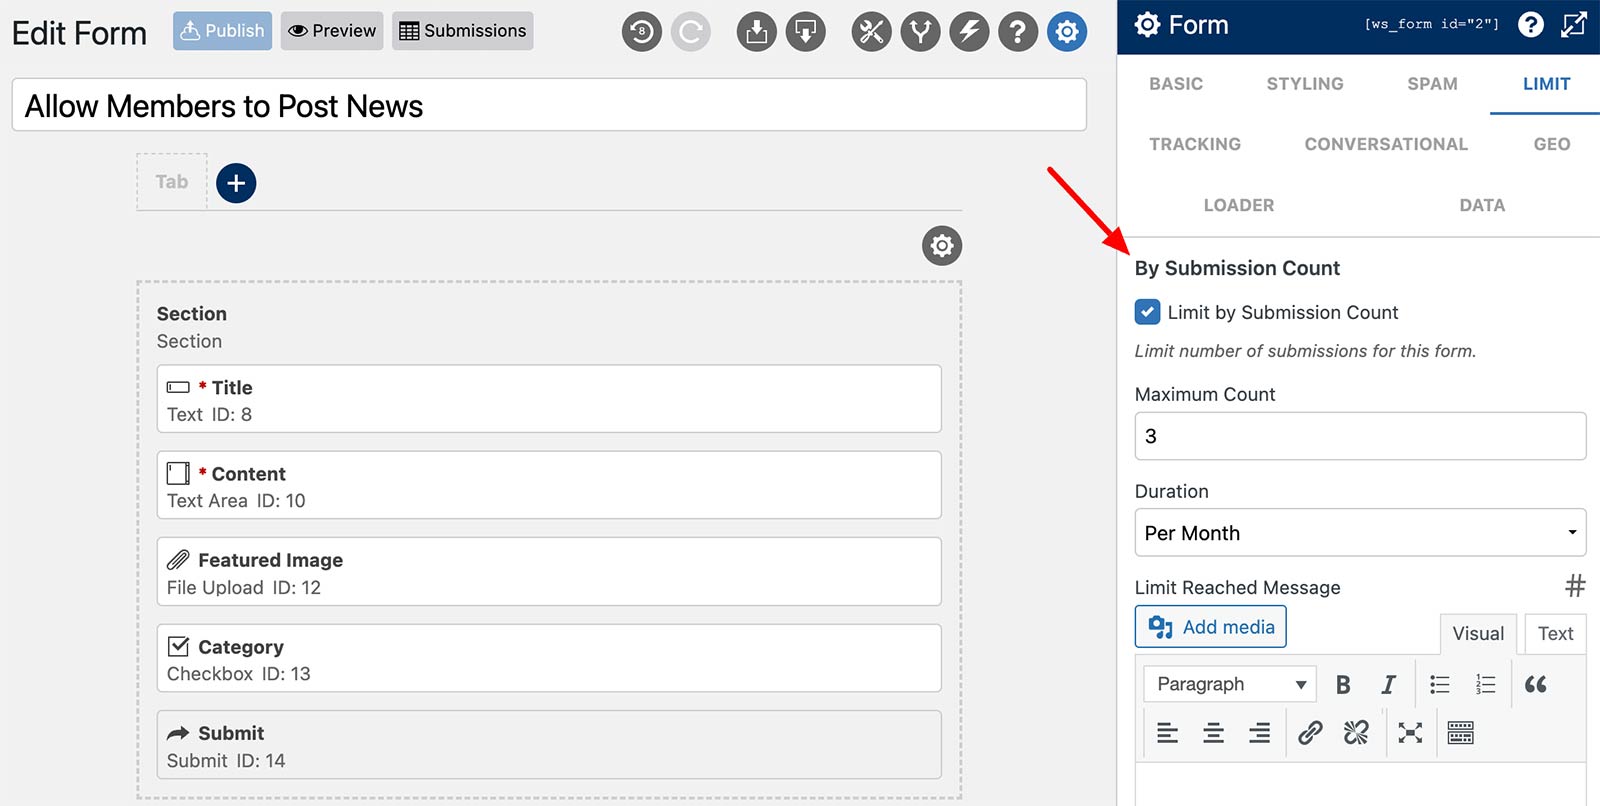
- When in the WS Form editor, open the Settings panel.
- Navigate to the Limit section and configure the following options. Note: These settings apply for all submissions to the form, not per user/member, and requires that you also set up the “Save Submission” action.
- Limit by Submission Count: Set a Maximum Count to cap submissions. You can also configure a time-based duration (e.g., daily, weekly).
- Limit Reached Message: Add a custom message to display when the limit is reached (e.g., “You have reached the maximum submissions allowed.”).
- Save changes to the form.
Submission Limits by Membership Level
If you need to limit submissions by membership level, you will need a code recipe. Here is a code snippet for setting limits based on the logged in member’s level. This snippet uses the pmpro_hasMembershipLevel function to adjust the limit for members with level ID 2. Rather than adjusting limits on the form itself, this snippet will strip the form out of the post content once a member reaches that number of submissions per month.
To customize this snippet, adjust the:
- Page ID: Adjust the page ID referenced in the `is_page` check to the ID of the page your submission form is placed on.
- Membership Level IDs: Adjust the `pmpro_hasMembershipLevel` ID and `$submission_count` values for your membership level IDs and limits.
- Limit Reached Message: Customize the `$custom_message` for your unique messaging.
Displaying User-Submitted Content on the Site
Once you start receiving submissions, you’ll want to display this content on your site in an organized and engaging way. There are loads of display options. Which option you choose depends on the submission post type, whether you’re using a Classic, Hybrid, or Block Theme, as well as your goals for these posts.
- Use a Post Type Archive:
- For standard post types, WordPress automatically creates an archive page where all posts of that type are displayed (e.g., `/blog/` or the front page of your site).
- For custom post types, you might need to set up a custom archive template in the Site Editor, a child theme, or by using a page builder to customize the display.
- Custom Page or Directory:
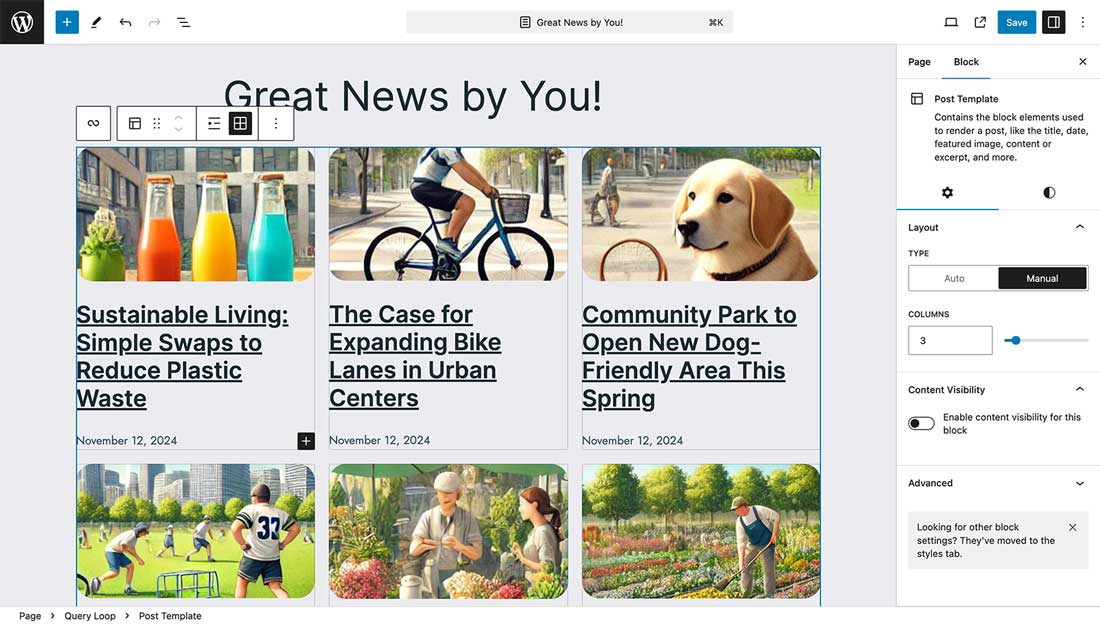
- You can create a custom page to showcase the submissions, using the WordPress Block Editor’s Query Loop block or a page builder.
- Either method will give you freedom to style the display of your member-submitted content library.
- This method is especially useful for a directory-like layout.
- Individual Post View:
- If each submission has an individual page, ensure members can navigate to these posts easily.
- However you display the archive of submitted content, make sure that each piece of content is properly linked, if desired, to the single post.
- Use the Posts Table Plugin:
- Posts Table by Barn2 gives you a no-code way to display member-submitted content.
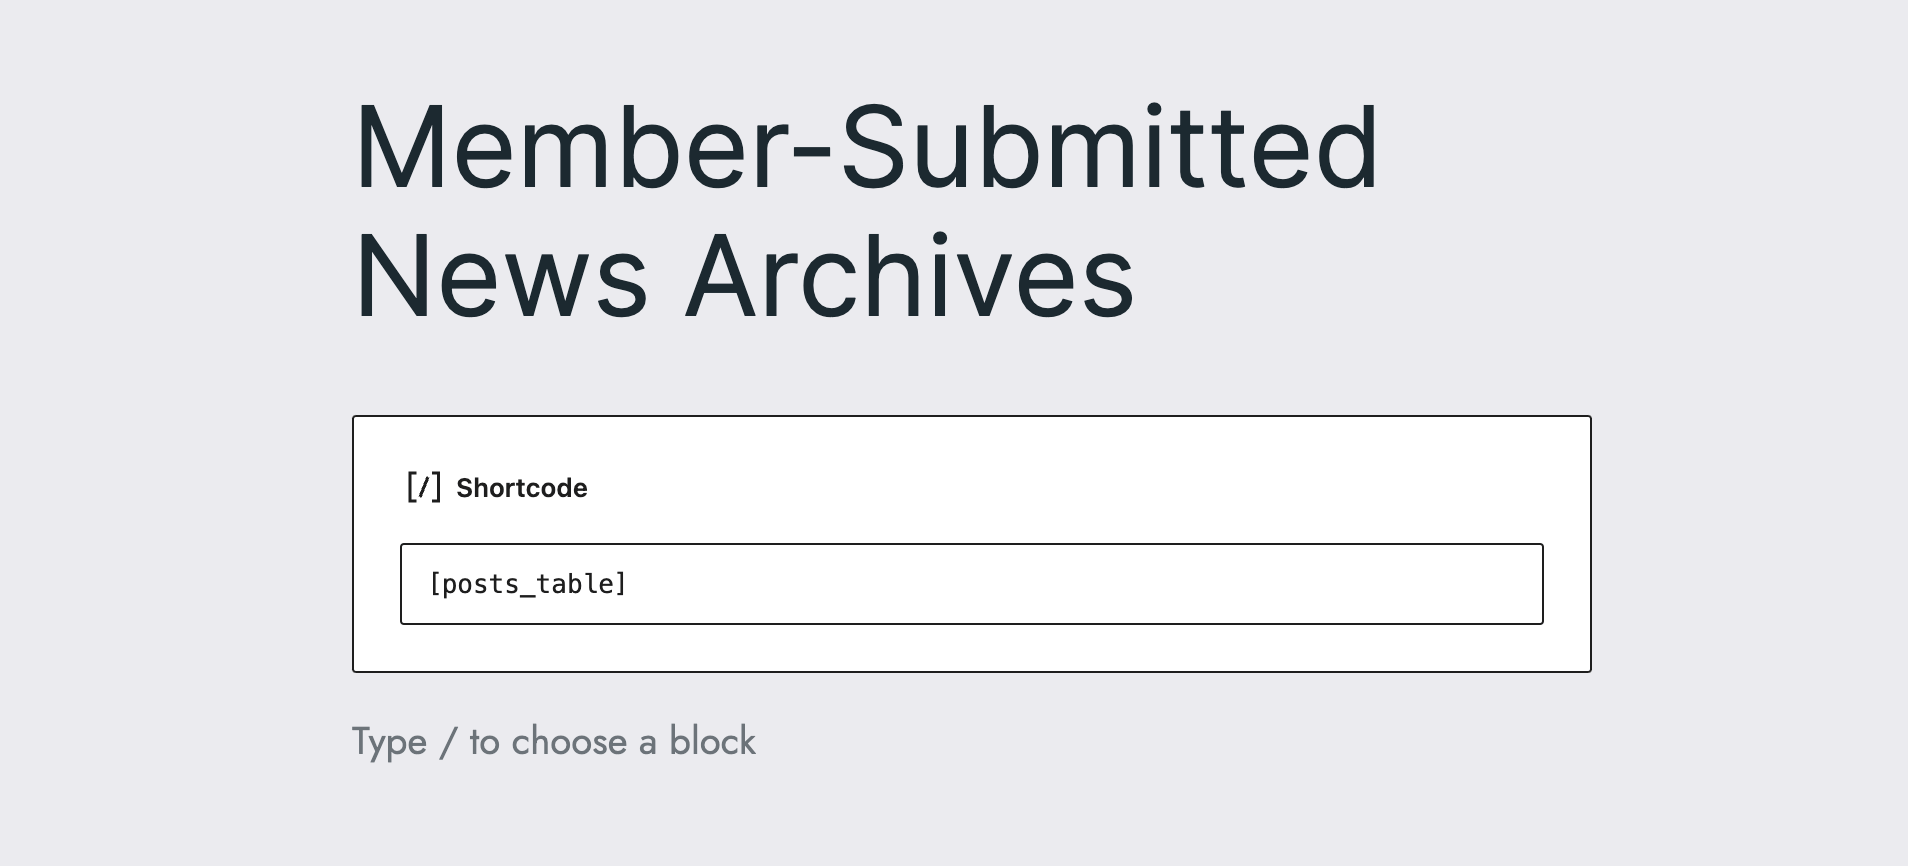
- This plugin lets you build views of posts, pages, or custom post types in customizable, sortable, and filterable tables.
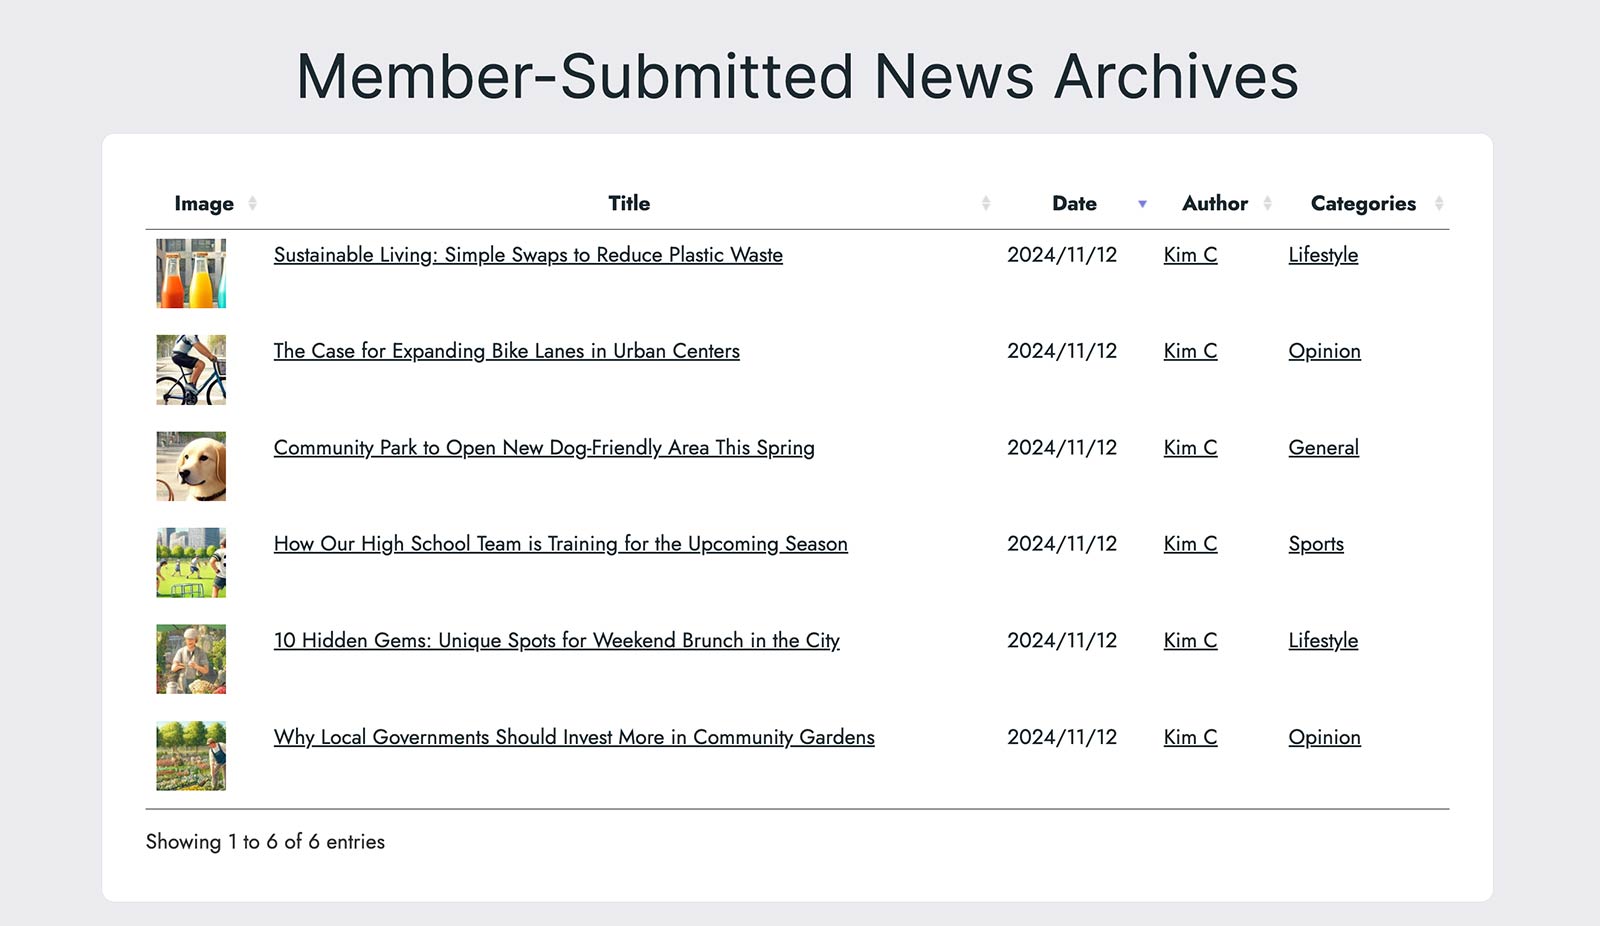
- For more control, the Posts Table Pro version supports advanced features such as custom post types, additional column options, and media embeds, making it ideal for managing and showcasing rich user-generated content on membership sites.
Boosting Your Community With Member-Submitted Content
With WS Form and Paid Memberships Pro, you have built a robust setup to enable member-submitted content on your membership site. This functionality has the power to increase member engagement, boost signups, and strengthen the voices of your community.
By following this guide, you have put in place a workflow to capture and display member submissions. There is still so much you can do to keep improving your submission process—but the tiny details should not hold you back from launching this feature to your community. Treat the initial launch with a spirit of experimentation: gather feedback from people as they submit content. Ask if they have suggestions to improve the process or whether they experienced any hiccups using the form.
I hope you enjoy the increased community interaction and the unique perspectives that member-submitted content brings to your membership site.
If you have any questions about this process, reach out to our team or our growing community of membership site creators for support.
