If you’re reading this, you’ve already experienced the power of Paid Memberships Pro and witnessed how it can transform your membership-based e-commerce venture. Now, it’s time to level up further by making a strategic move – migrating your membership sales engine from WooCommerce Subscriptions to Paid Memberships Pro.
In this blog post, we’ll explain step-by-step how to transition your existing membership subscriptions from WooCommerce to PMPro. You already know the wonders of PMPro’s features, so we’ll focus on how you streamline your operations by centralizing your memberships within the PMPro ecosystem.
Note: This guide is specifically written to support someone transitioning from selling their PMPro membership levels through WooCommerce to solely utilizing Paid Memberships Pro. If you were using WooCommerce Memberships, not PMPro, there are additional steps we’ll try to cover at the end of this guide related to migrating member data and content protections.
Overview of How Payments Work in WooCommerce Subscriptions
Before we dive into the nitty gritty, there are a couple of things we need to understand about this migration.
WooCommerce Subscriptions has its own way of managing payments. While Paid Memberships Pro creates the subscriptions at the gateway, WooCommerce Subscriptions creates and manages the subscription from within your WordPress site.
For this reason, any subscriptions created by WooCommerce Subscriptions cannot be migrated and remain active by any other e-commerce plugin, including PMPro, even if you are using the exact same payment gateway, such as Stripe.
You can still complete this migration. The caveat is that all members will need to be set up with an expiration date for the next date their payment would have been accepted. Then they will need to resubscribe and set up a new active membership with your gateway.
The final step will be to cancel recurring payments with WooCommerce Subscriptions by disabling the WooCommerce Subscriptions plugin. But before you do anything, follow our steps so you do not lose critical information about your members.
Let’s embark on this journey together and unlock the full potential of your e-commerce venture—without relying on your WordPress site to keep payments in sync.

DOWNLOAD NOW
We have a downloadable version of this setup guide with the specific steps you need to migrate members from WooCommerce Subscriptions to Paid Memberships Pro’s native checkout process.
Part 1: Set Expiration Dates and Update Users
1. Backup Your WordPress Website
In our article Backup Your WordPress Site: The Complete Guide to Site Backups, we highlight the significance of frequent backups and provide a guide on how to create one for your site. This is particularly crucial for membership sites that involve customer accounts and sensitive information.
Please make sure to create a backup of your site before proceeding with the migration process.
2. Pause Your Live Site
During this process, it’s essential to prevent any data loss or mismatch, which can occur quickly. To ensure this doesn’t happen, it’s advisable to temporarily pause your live website. This includes:
- Deactivating all new membership sign-ups
- Putting your main website in “Maintenance Mode” or “Coming Soon” mode.
You can use plugins like WP Maintenance Mode & Coming Soon to add a maintenance or coming soon page to your website.
Note: If it’s not possible to pause your active site, proceed to Export and Import Your Data. Keep in mind that some data may still need to be moved before the final import, which is normal.
3. Set Up Paid Memberships Pro
As stated above, this guide is specifically written to support someone transitioning from selling their PMPro membership levels through WooCommerce to solely utilizing Paid Memberships Pro.
With that assumption in mind, your PMPro Membership Levels should already be set up.
You should also update any WooCommerce product that was used to sell membership. Your members will now purchase membership directly through Paid Memberships Pro. Instead of adding WooCommerce products to a cart, members will visit your Membership Levels page,
- Edit the WooCommerce product.
- In the Product Data metabox, click on Membership.
- In the Membership Product dropdown, change the setting to None.
- Save and update the product.
Now, confirm that you have properly set up your Membership Levels page. Navigate to Memberships > Settings > Pages and click to view your Membership Levels page. Make sure this page is showing the levels you would like to offer with accurate pricing.
If you are using this guide to also migrate away from WooCommerce Memberships, you should do the full Initial Setup of PMPro at this step.
Our Initial Setup guide provides information on how to set up Paid Memberships Pro.
Make sure to save the membership level IDs for future reference, and hold off on connecting your payment gateway until later.
4. Set Up User Fields (If Applicable)
Were you collecting any data via custom fields during the WooCommerce checkout? Do you wish to add new user fields?
If you don’t need to collect custom fields, proceed to Export and Import Your Data.
As long as the custom fields you were capturing are stored in user meta (just like the user fields created by Paid Memberships Pro), you won’t need to migrate this data. This is the WordPress database table that stores all the custom user data that is not part of the user object itself.
Paid Memberships Pro features an intuitive settings interface to create and manage custom profile fields. To maintain these fields within your PMPro checkout process, you’ll need to exactly match the Meta Key name in your user meta table to the Field Name in PMPro.
Once this is done, PMPro will automatically recognize the existing user meta information for all your members.
- Navigate to Memberships > Settings > User Fields in the WordPress admin.
- Create a new field group or add fields to the default group.
- Add a new field for every custom field you want to maintain from your WooCommerce checkout forms.
- When you create fields, you must set the field’s name to the exact same Meta Key used in your current user meta data.
- Repeat these steps for each custom profile field you want to preserve.
- Add new fields for new data you want to capture.
- Save your fields settings.
If you are trying to create a User Field for a field type that PMPro does not support via the Use Fields Settings page, it may be possible to set the field up via custom code.
Check out the User Fields documentation for specific help configuring fields.
5. Export and Import Your Data
We stated above how we cannot migrate subscriptions due to how the subscriptions are created in WooCommerce Subscriptions. They aren’t actually recurring subscriptions in your payment gateway. Rather, they are linked to customer records within the payment gateway that your WordPress site and WooCommerce Subscriptions will communicate with to make recurring charges.
So while you cannot migrate and keep subscriptions active, you can give all members an appropriate expiration date and have them resubscribe.
Once your members have their assigned expiration date, PMPro will trigger renewal emails. This renewal reminder is sent close to when their membership is ending and prompts them to check out again.
When the user checks out, the new recurring payment will be created at your payment gateway. No more relying on your site to keep charging members. Things are going to run a whole lot more smoothly from here on out.
First, Export Active Subscriptions
In order to include the expiration date on your import, we first need to export the active subscriptions so we’ll know when the subscription is set to renew.
Exporting your WooCommerce Subscriptions information requires a third party plugin premium plugin.
But at PMPro, we always prefer to give users a free and open source way to approach any challenge with running their membership site.
The most straightforward way to export data from WooCommerce without purchasing a premium product is directly via your WordPress site database. If you are not comfortable using tools like phpMyAdmin to access your database, you can share these steps with your hosting provider and hopefully they can retrieve the exported data for you.
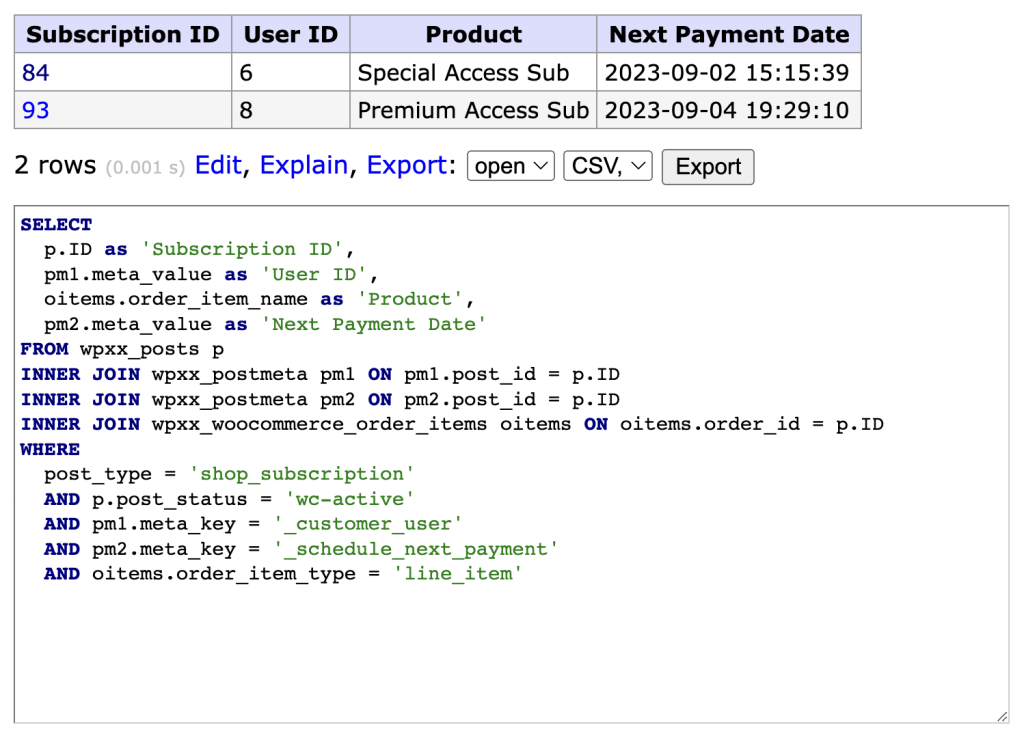
The data you need is located in the wp_posts and wp_postmeta tables. Here is a MySQL command you can use to export the exact data you need:
Note if your site uses a different prefix for database tables, adjust the table names in this snippet to match the names of your wp_posts and wp_postmeta tables.
This will run a query on your database to get the following information on your active subscriptions:
- Subscription ID
- User ID
- Product
- Next Payment Date
Depending on your hosting environment and phpMyAdmin version, this command should show results on the screen and provide an “Export” option to download as a CSV.
Now that you have this data for your members, you are ready to create a file that PMPro can use to import your membership information.
You will need the PMPro Import Members From CSV Add On.
The plugin includes a starter import template file. Navigate to Users > Import Members in your WordPress admin. You’ll see a link to download the example CSV file from this page.
Prepare Your Import File
From your WooCommerce Subscriptions export CSV file, update the following CSV headers to prepare your import file for Paid Memberships Pro.
| WooCommerce Subscription CSV | Update for PMPro | Explanation |
| User ID | user_id | The unique User ID for this member. |
| Product | membership_id | Add the numerical ID for the level in Paid Memberships Pro. The MySQL command exports the product name that you can use to match to the appropriate level ID in PMPro. |
| Next Payment Date | membership_enddate | The date the membership should expire. This will trigger renewal emails for your members to checkout. Paid Memberships Pro import requires this data to be in the format YYYY-MM-DD. |
Prep Your Import File as a CSV and Test the Import
We recommend testing the import with a subset of your data (the first 10 records) to ensure that everything works as expected.
- Export a subset of your .csv to only include the first 5 or 10 records.
- Run that import by following the directions on the Import Users from CSV Add On documentation page.
- Double check the data to be sure everything looks correct.
You can check your Members List under Memberships > Members and the Orders list under Memberships > Orders.
- The import process will create one PMPro order for each newly imported member.
- The import process will not create a history of orders for all payments that member had made previously through WooCommerce Subscriptions.
If everything looks correct, you are ready to do the full and final import. To do this, repeat the process from your test above using the full set of data (minus those test members already imported).
6. Resume Your Live Site
You’re almost done! Now it’s time to connect your payment gateway in PMPro.
First, deactivate WooCommerce Subscriptions. Once you are sure everything is working properly, you can deactivate the WooCommerce Subscriptions plugin. This will cancel all subscriptions created within the plugin.
Now, activate your payment gateway in Paid Memberships Pro. PMPro has only one settings page to configure the payment gateway for all memberships. Navigate to Memberships > Settings > Payment Settings. The process of setting up a payment gateway is also outlined in the Initial Setup guide we mentioned earlier.
Part 2: Configuring Content Protection
For this guide, we assume you were already using Paid Memberships Pro to manage your members-only content.
If you are reading this guide and also trying to migrate your membership plugin from WooCommerce Memberships, keep reading for how to configure new content protections via PMPro.
With Paid Memberships Pro, you can restrict individual pages, posts, or entire categories of posts.
Browse our documentation on restricting content to learn more about the various ways you can protect your content with PMPro.
This includes:
- Pages
- Posts and Categories
- Other content types including CPTs
- Courses
- Community features like bbPress and BuddyPress
You’ll need to manually update every piece of content that was protected through the WooCommerce Memberships methods to now use the Paid Memberships Pro methods. If you have a very large membership site, there are some developer-level methods to bulk apply content restrictions. Here are two primary resources:
- Methods to Restrict Access by Membership Level in Bulk
- Developer’s Toolkit: Add On to duplicate content restrictions for newly added levels.
It’s Time to Celebrate
You did it! You’ve successfully migrated your active subscriptions and members from WooCommerce Subscriptions to Paid Memberships Pro.
If you’re still in need of additional help, be sure to check the Frequently Asked Questions section below, or contact our support team if you’re a premium member.
You have made a great choice by switching to Paid Memberships Pro, the most trusted membership platform that grows with you. We are here by your side as you take your membership business to new heights.
Thinking about switching to PMPro? Our How to Migrate to Paid Memberships Pro guide provides a general overview of the migration process.
Frequently Asked Questions
This seems really complicated!
If this is all too overwhelming or confusing for you, you should consider hiring a developer. We recommend working with one of our Codeable freelancers or agency partners to make sure your migration goes as smoothly as possible.
If you’re a premium member, you can always reach out to our support team for help as well.
What is a Staging Site?
A staging site is essentially a duplicate of your website, where you can test out new features and make changes without affecting your live website.
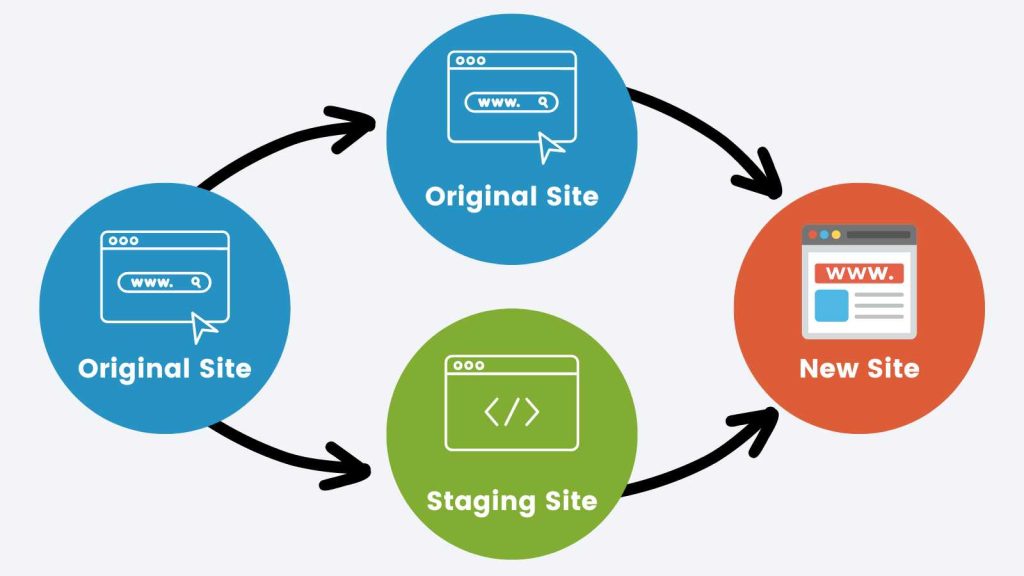
Creating a staging site allows you to get all of your membership data in place before merging it with your live site.
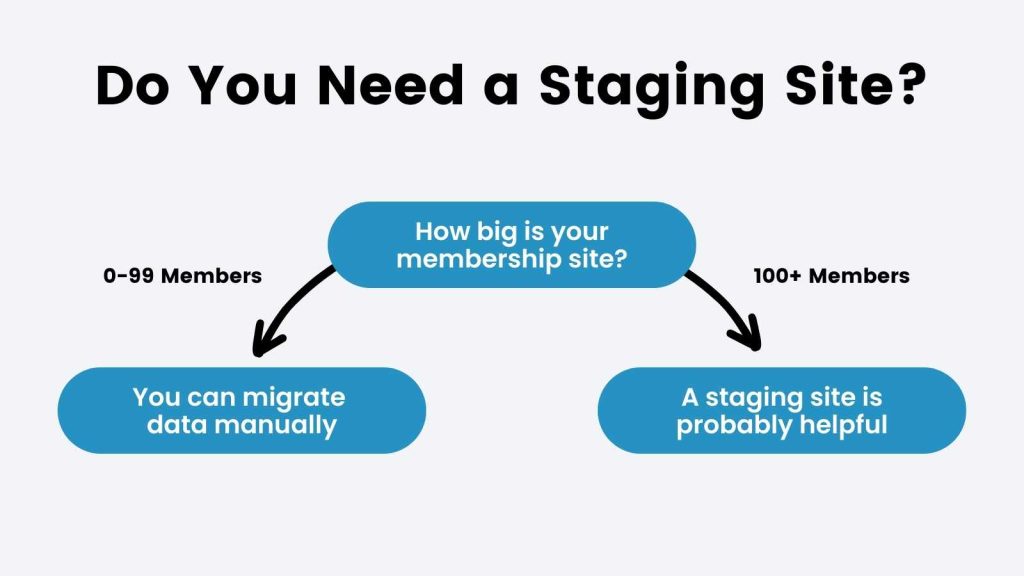
Do I Need a Staging Site?
A staging site is a non-public version of your site’s code that powers your live membership site. Your membership’s staging site, if set up properly, will allow you to add and test all kinds of things before releasing them on your live site.
With a staging site, you can test things like:
- Code recipes
- New features
- New plugins
- Plugin updates
If you have a very active membership site that receives a lot of traffic, or you don’t have a lot of development experience and you want to experiment without killing your live site, using a staging site is a wise choice.
