Our Zapier Integration Add On allows you to receive data from 1,000s of integrated apps into your Membership site. This means that external applications can send updates to your Paid Memberships Pro member data, including adding or updating members, adding or updating orders, and validating a member’s level.
Here’s a video and step-by-step instructions for adding a new member when a row is added to a Google Sheet. You can read the full Zapier Integration documentation for help with other available actions.
Watch the Video
Setting Up Your Google Sheet
If you are starting from a new spreadsheet, here’s a template you can use to set up the proper columns to match the parameters available via the add_member Action. For existing spreadsheets, note that your data will need to match the following available parameters:
- user_email (required)
- level_id (required)
- user_login
- full_name
- first_name
- last_name
Setting Up The Zap to Receive Data
- Log in to your Zapier Account or create a new account with Zapier.
- Select MAKE A ZAP which can be found near the top of the screen.
- Select “Google Sheets” under “Choose a Trigger App”
- Select the “New Spreadsheet Row” trigger.
- Follow the steps to authenticate your Google Sheets Account with Zapier. You should authenticate the Google Sheets Account that is the owner of the Spreadsheet that holds your member data.
- Once authenticated, select the Spreadsheet you will be populating with member data and the specific “Worksheet” that contains this data. (This is usually Sheet1 unless otherwise named in your spreadsheet.)
- You can test the connection, if desired, by modifying the Spreadsheet directly in your Google Sheet then return to Zapier and click “Get More Samples”. This should update with the new data added to your sheet, thereby confirming the connection is working.
- Next you must add an “Action App” to your Zap.
- Select “Webhooks”. This is listed as a “Built-In App” or can be located by the search field.
- Select “GET: Fire off a single GET request with optional querystrings.” on the “Select Webhooks by Zapier Action” step.
- Locate your Webhook URL under Memberships > PMPro Zapier > Receive Data from Zapier (Actions).
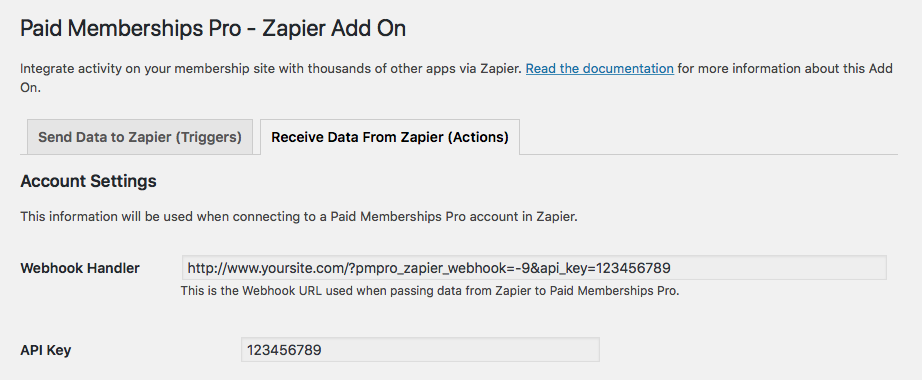
- Copy and paste the Webhook URL into the “URL” field in Zapier.
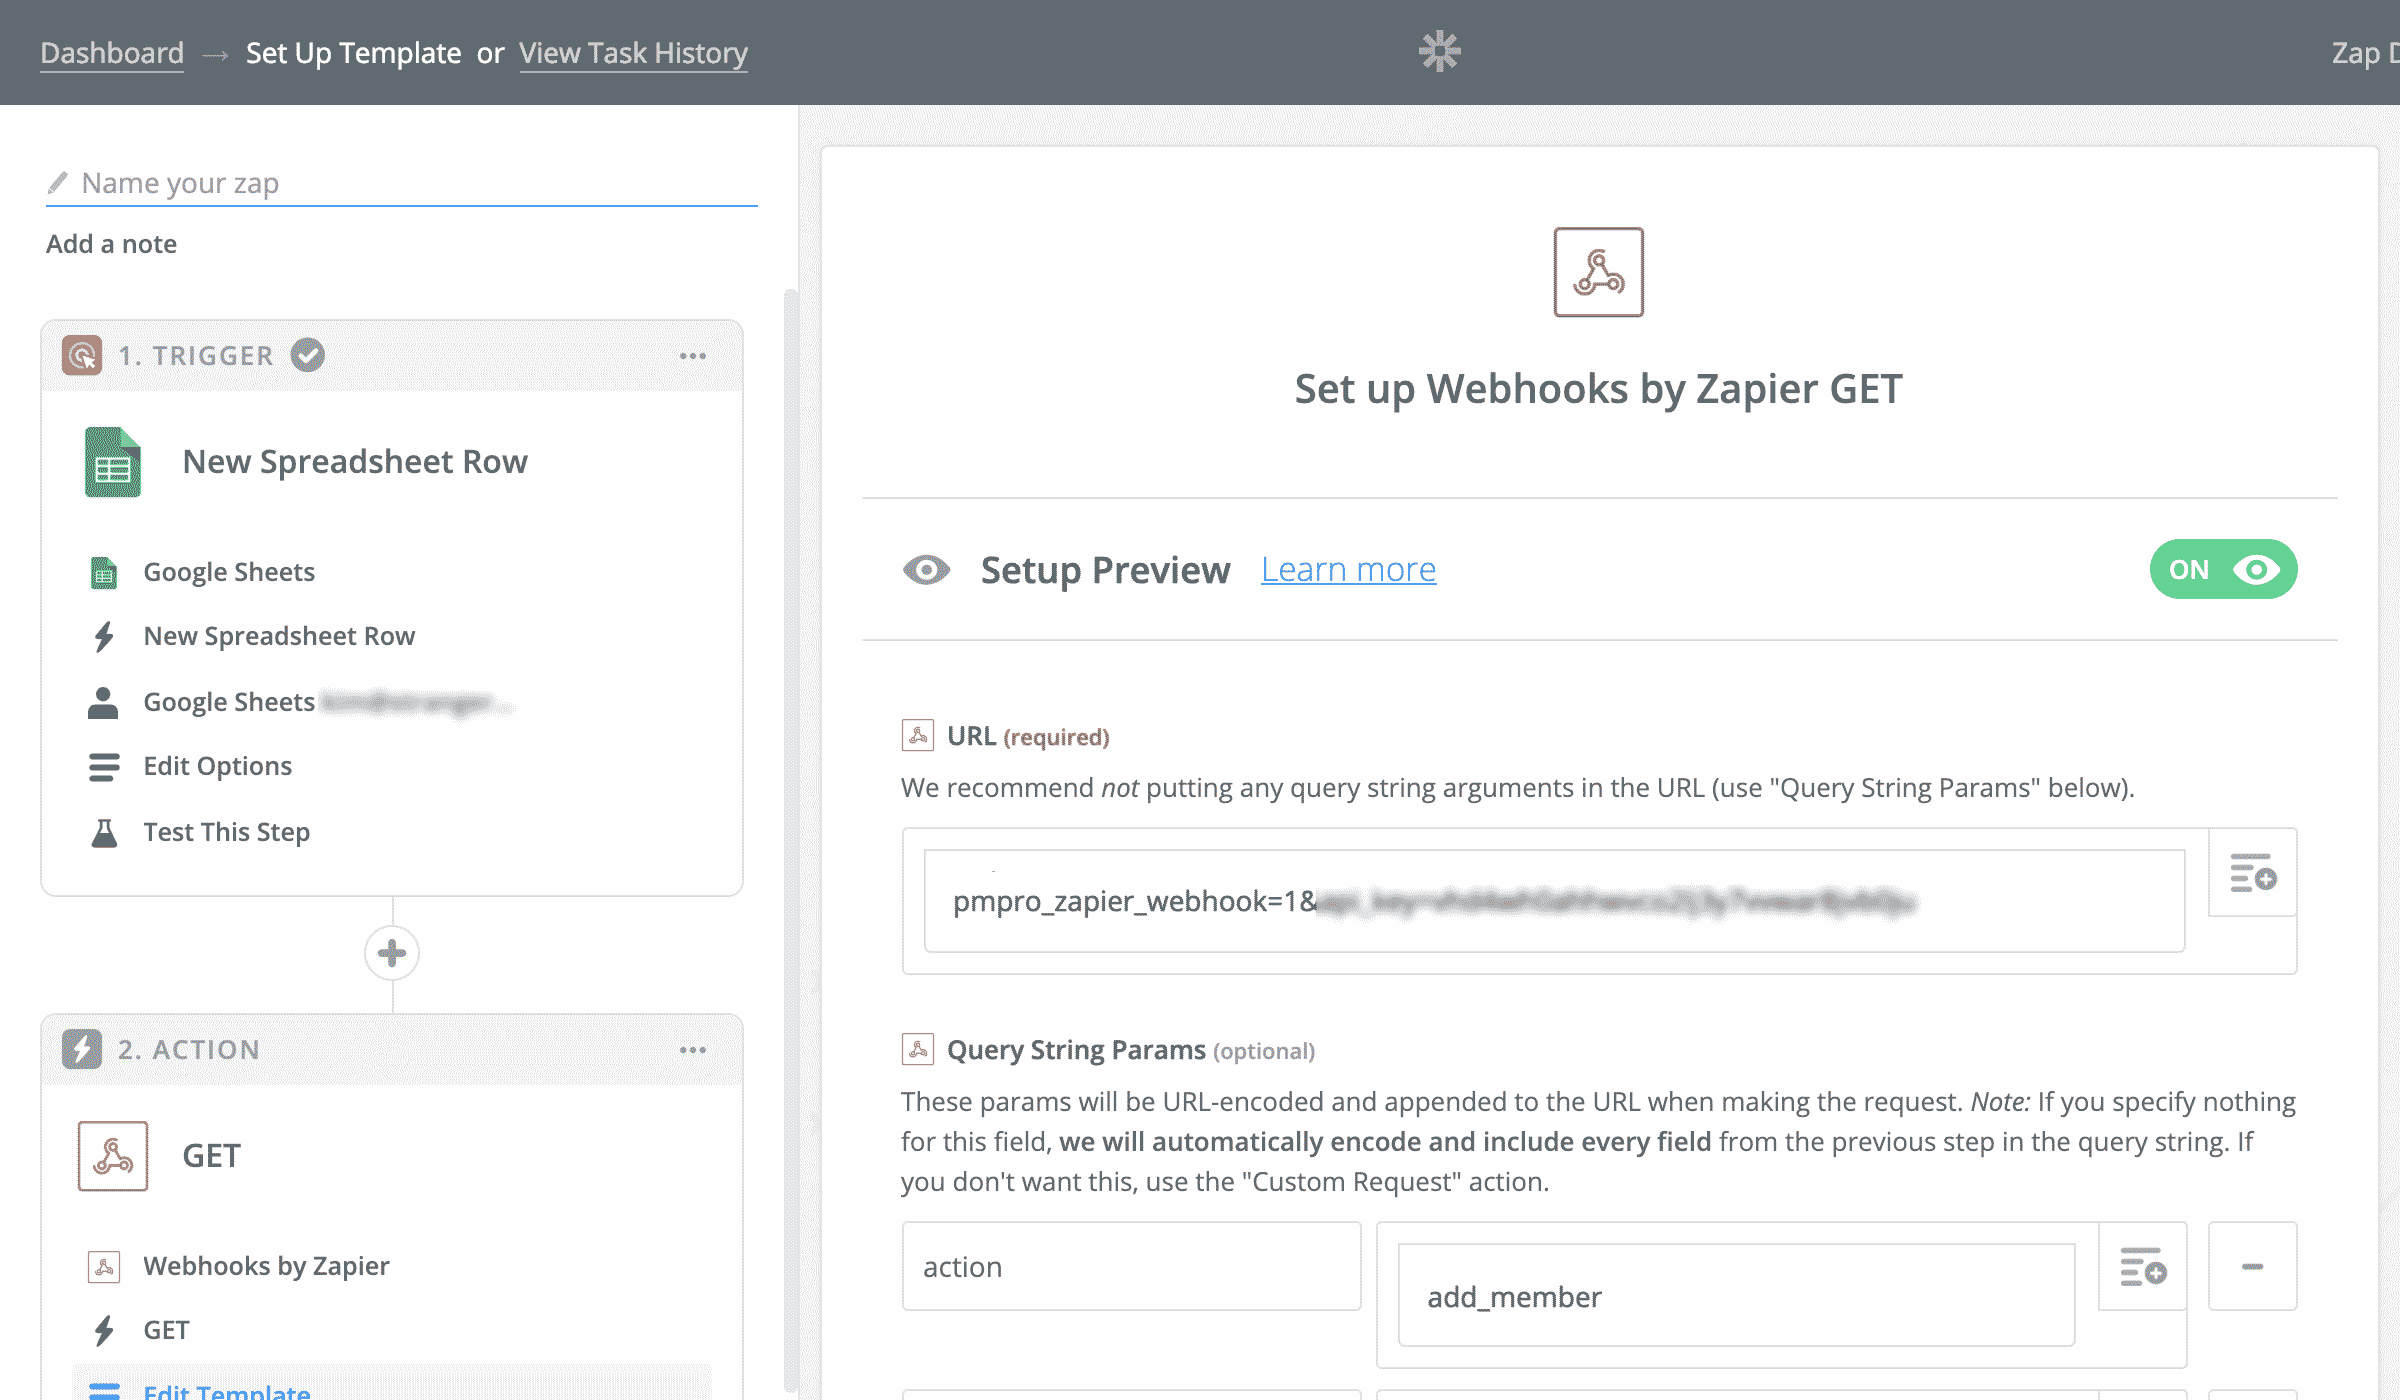
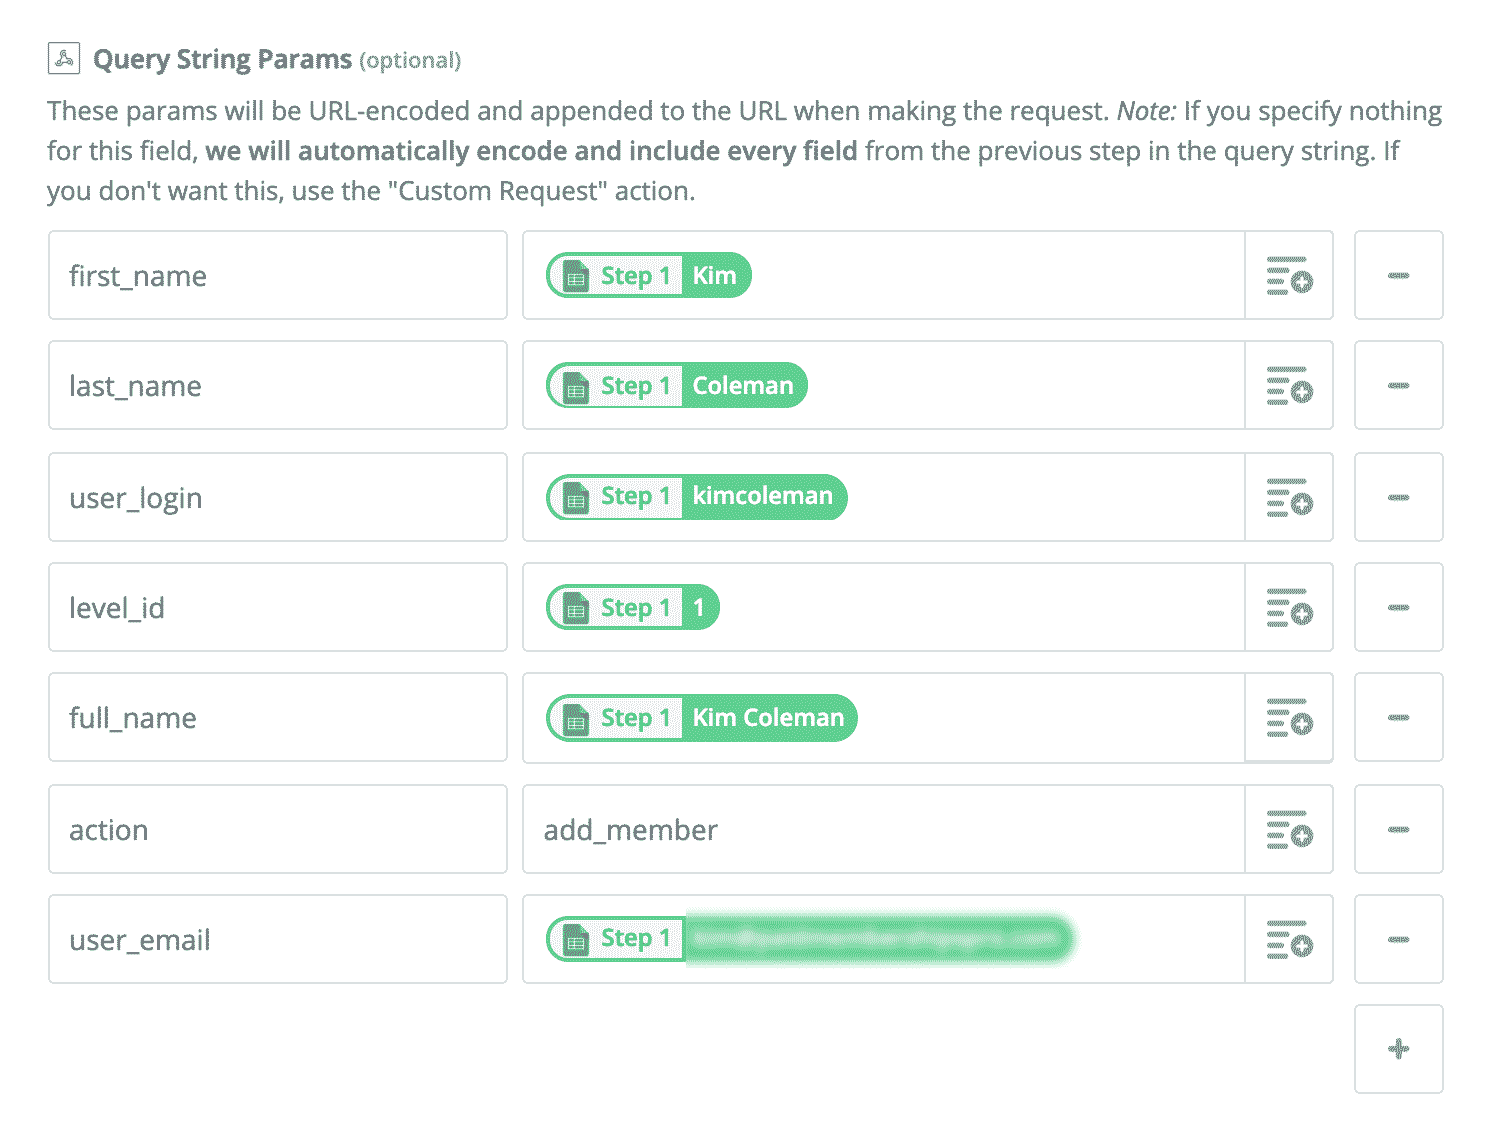
- In the “Query String Params” section, add a parameter with the name
actionand the valueadd_member. Other available Actions for this integration are listed separately in this documentation. - Continue to add additional query string parameters for the data you would like the spreadsheet to send to your membership site. Available parameters for the action must correspond to a column of data in your spreadsheet. The following parameters can be passed into the
add_memberaction:- user_email (required)
- level_id (required)
- user_login
- full_name
- first_name
- last_name
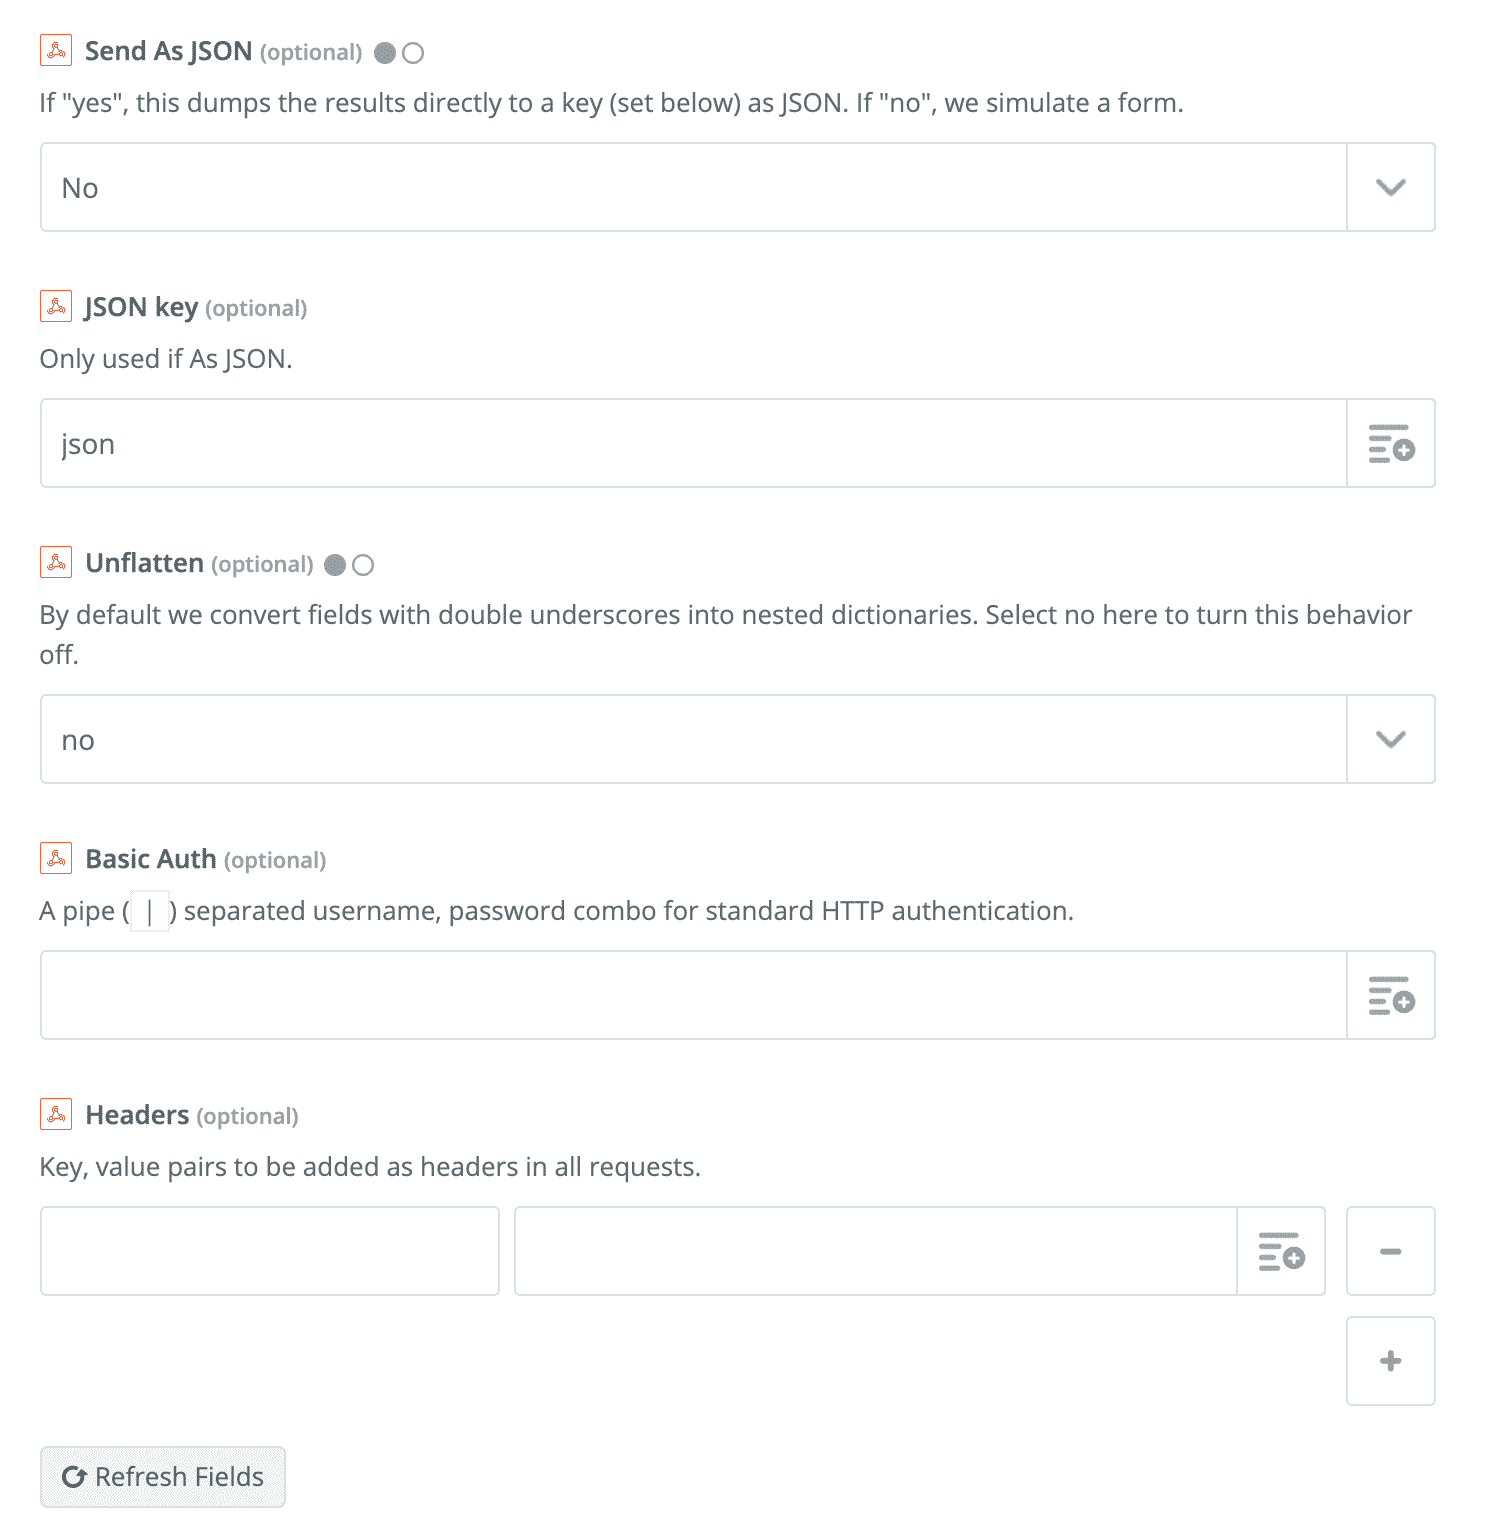
- In the “Additional Action Settings” section, you should set “Unflatten” to “No”.
- The next step will test your Zap. Click “Send Test To Webhooks by Zapier”. Note that the
add_memberaction will only work if there is no existing User in the WordPress site with that matching email address.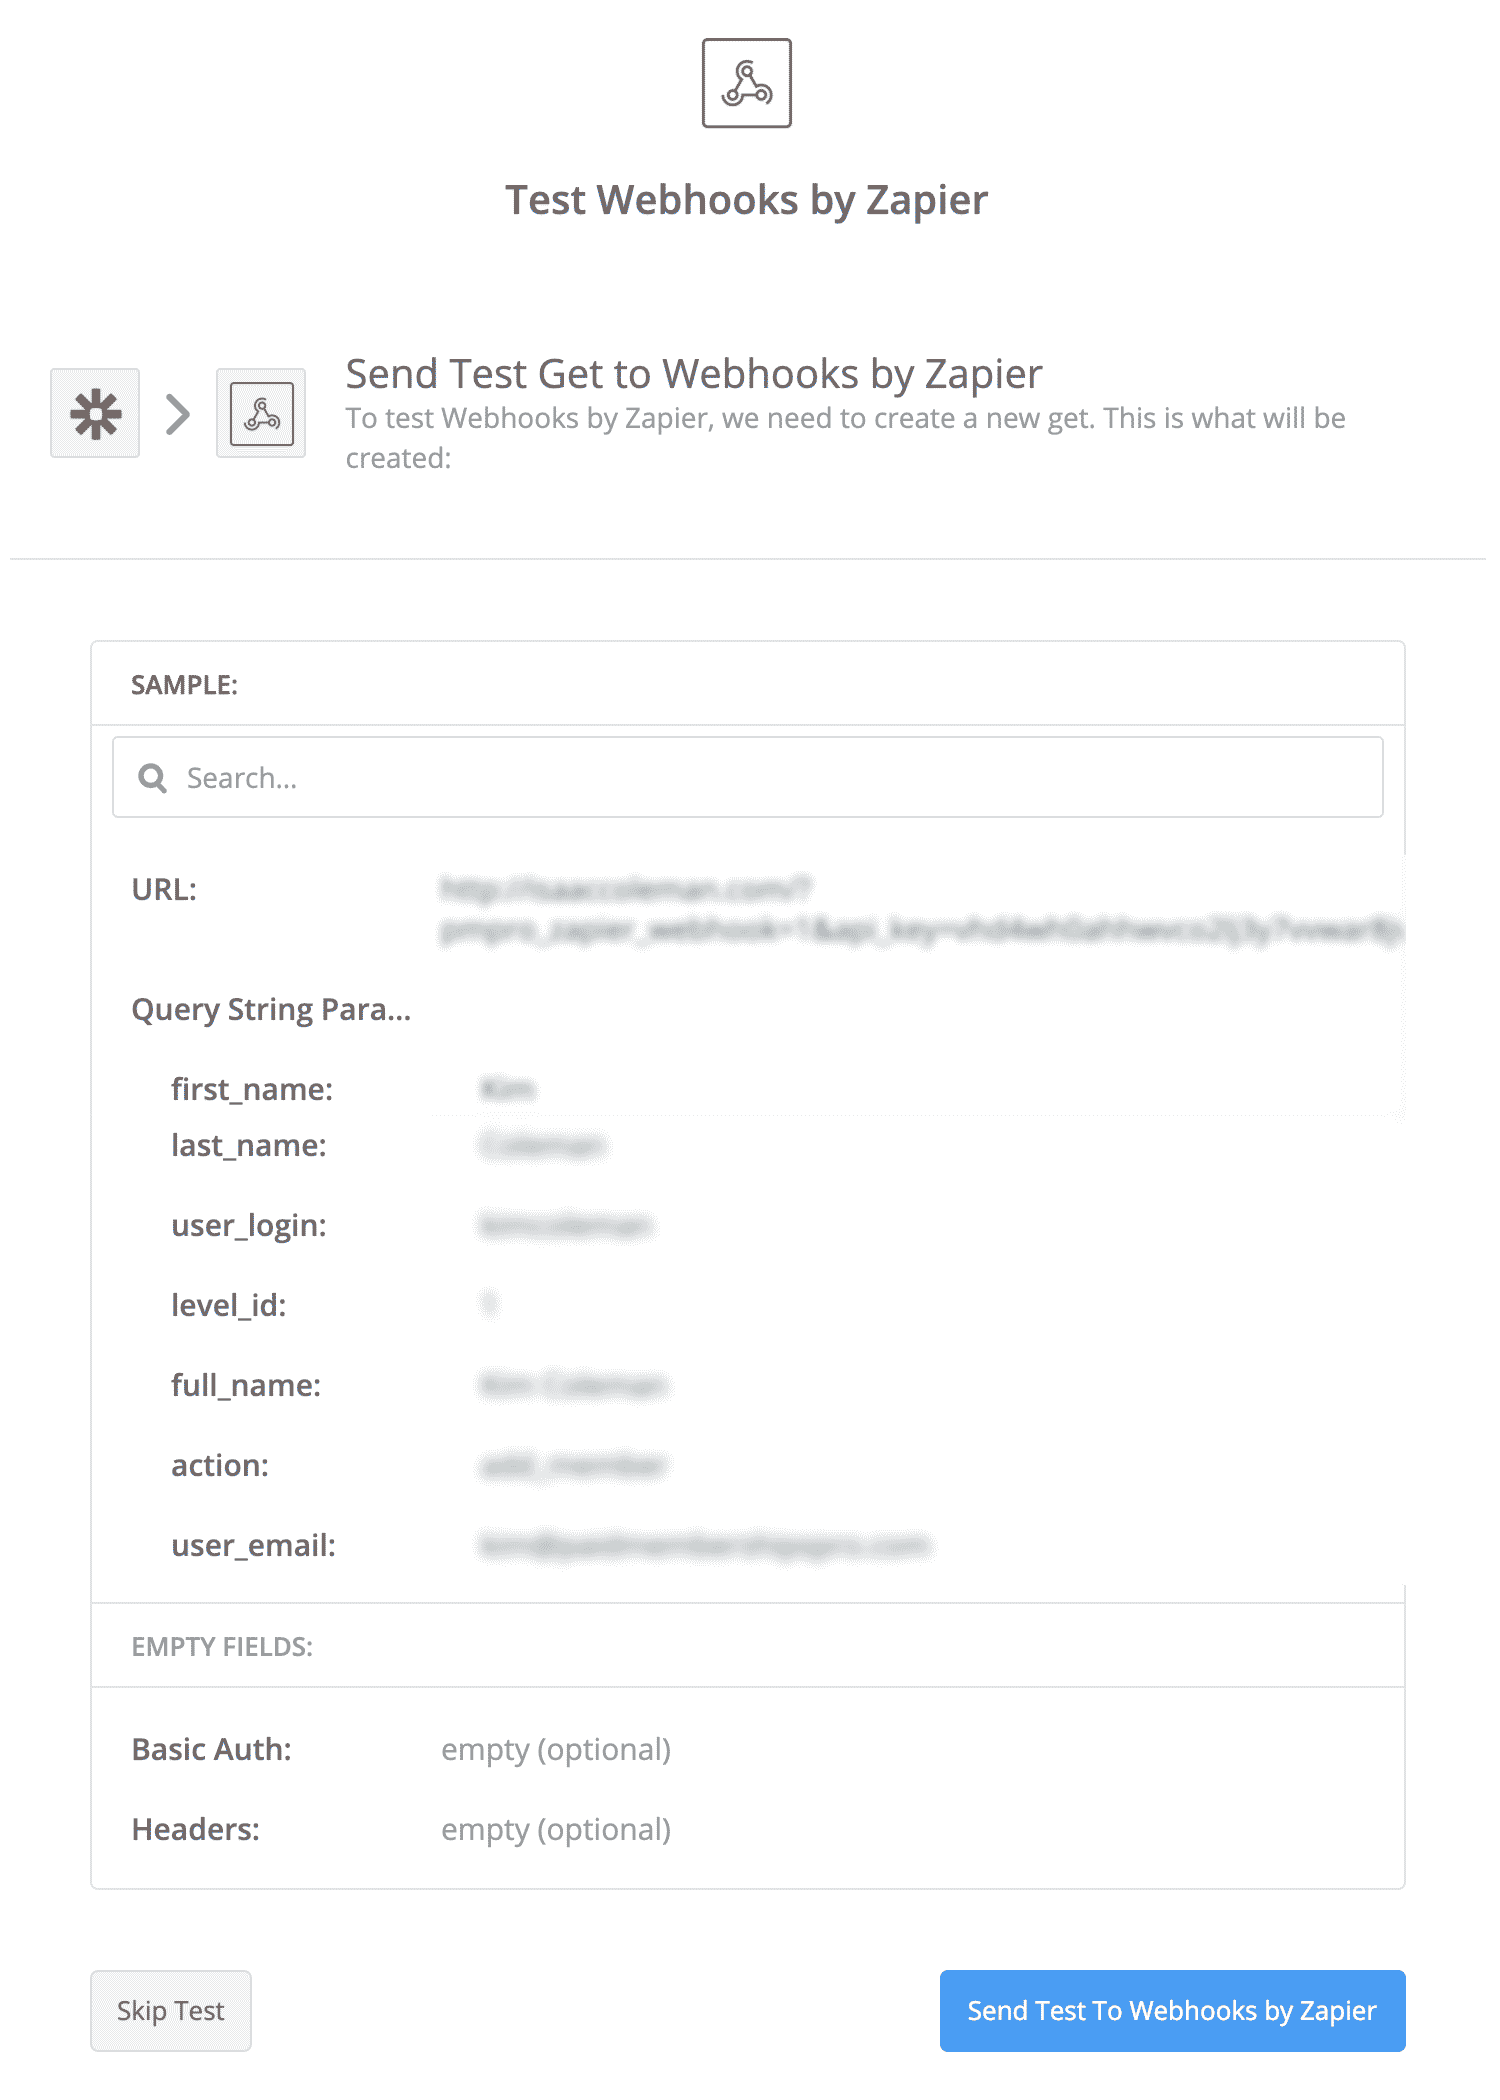
- If successful, a member will be created in the membership site. This Action can add a membership level to an existing member OR simultaneously create the user record with the membership level.
The full Zapier Integration documentation for page provides more information on other available actions.

